
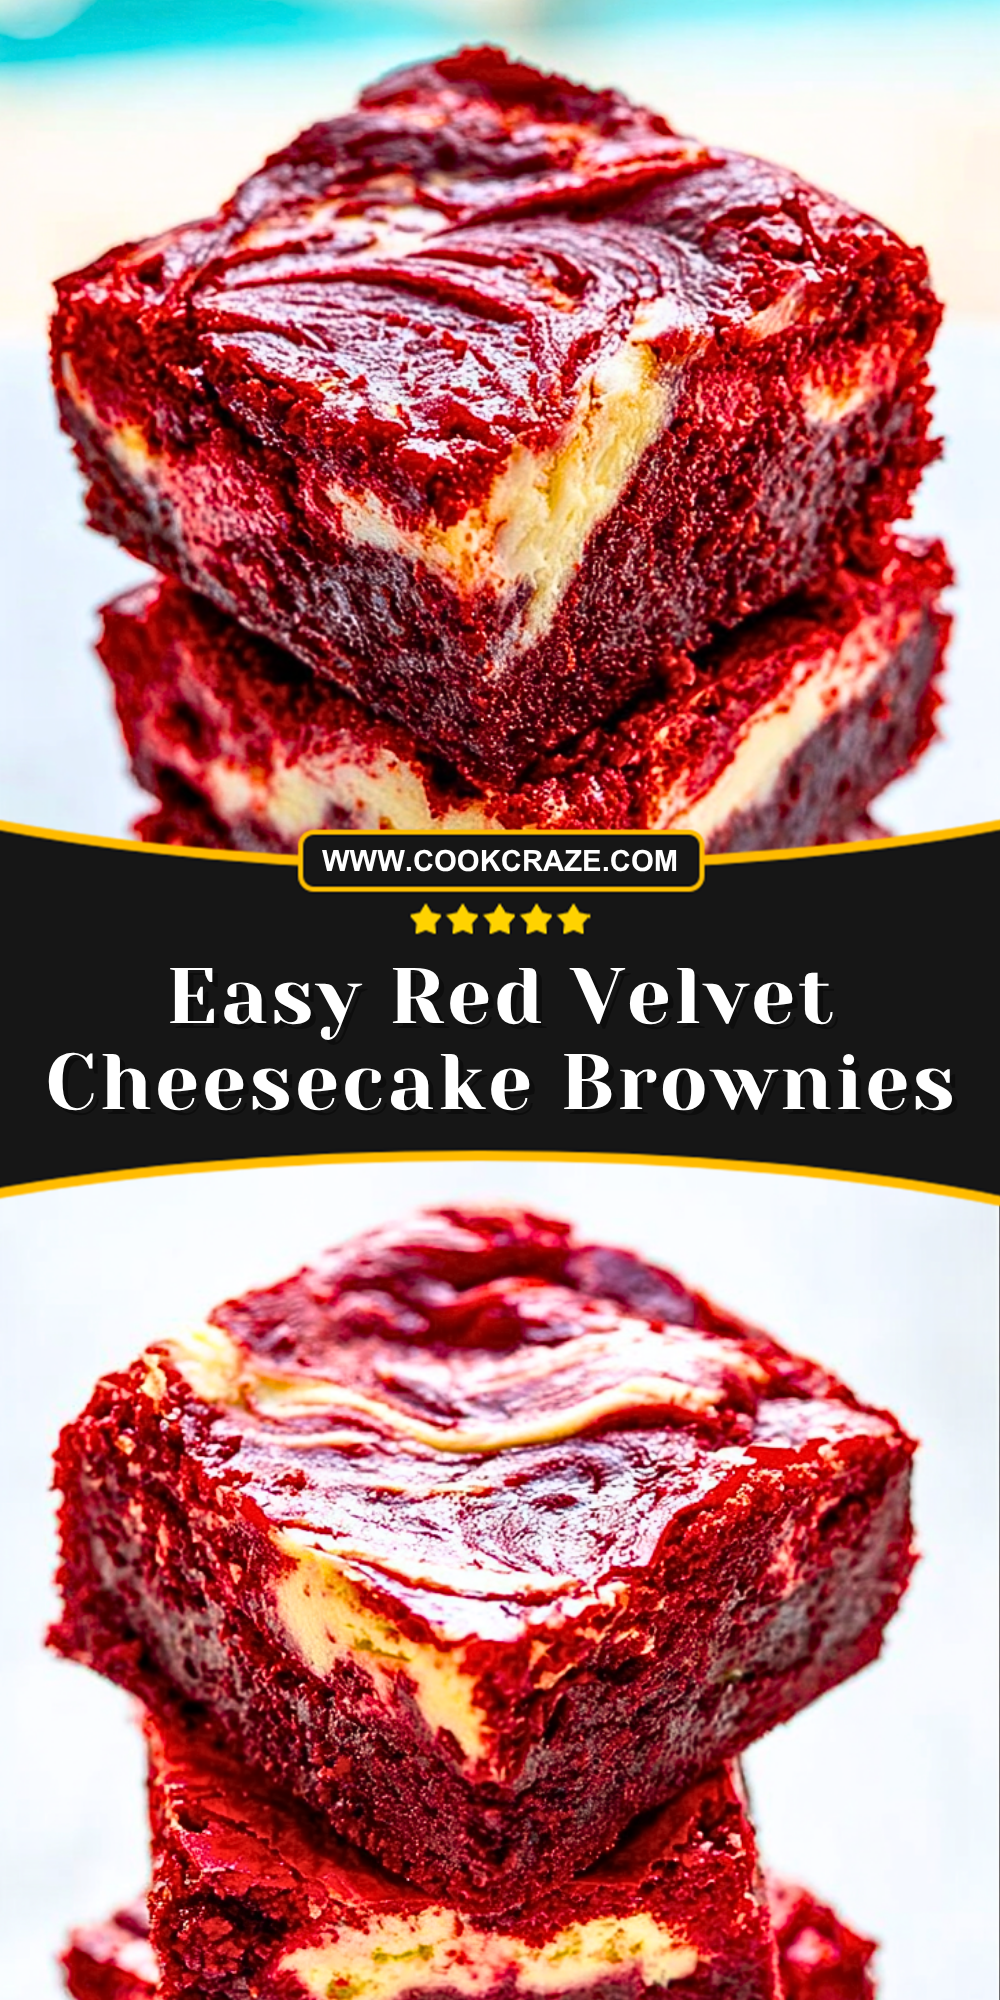
Easy Red Velvet Cheesecake Brownies bring together two irresistible desserts in one decadent bite. Rich cocoa-infused red velvet brownie layers are swirled with creamy cheesecake filling, creating a dessert that looks as stunning as it tastes. The vibrant red color paired with the velvety cream cheese marbling makes these brownies perfect for holidays, birthdays, Valentine’s Day, or whenever you want a bakery-style treat without complicated steps.
WANT TO SAVE THIS RECIPE?
Just enter your email and get it sent to your inbox!
Every bite delivers a fudgy texture balanced by the smooth tang of cheesecake. These brownies are easy enough for beginner bakers yet impressive enough to serve at gatherings. Whether you enjoy them chilled for a denser texture or slightly warm with a glass of milk, this dessert quickly becomes a favorite for anyone who loves rich chocolate desserts with a creamy twist.
Why You’ll Love This Easy Red Velvet Cheesecake Brownies Recipe
These Easy Red Velvet Cheesecake Brownies are the perfect combination of fudgy brownies and creamy cheesecake, giving you two desserts in one pan. The recipe uses simple pantry ingredients and comes together with minimal prep time, making it ideal for busy bakers. The striking red and white swirl pattern creates a visually stunning dessert that looks professionally made, even if it’s your first time baking brownies from scratch. They also store beautifully, making them a great make-ahead dessert for parties, celebrations, or meal prep treats throughout the week.
Preparation Phase & Tools to Use
Having the right tools ready before starting makes the baking process smooth and stress-free. A mixing bowl is essential for preparing both the brownie batter and cheesecake filling evenly. An electric hand mixer helps create a smooth, lump-free cheesecake swirl and ensures the batter is well combined without overmixing. Measuring cups and spoons are important for accurate ingredient portions, which directly affects the brownies’ texture and consistency. A whisk helps blend dry ingredients evenly, while a rubber spatula is perfect for folding ingredients together and scraping every bit of batter from the bowl. You’ll also need an 8×8-inch baking pan lined with parchment paper to prevent sticking and make removing the brownies easy after baking. Finally, a butter knife or skewer is useful for creating the signature cheesecake swirl pattern on top.
Preparation Tips
For the best texture, make sure the cream cheese is softened to room temperature before mixing so the cheesecake layer becomes silky smooth without lumps. Avoid overmixing the brownie batter once the flour is added, as this can make the brownies less fudgy and more cakey. Line the baking pan with parchment paper and leave a little overhang on the sides for easy lifting after baking. When swirling the cheesecake mixture into the brownie batter, use gentle motions to create defined patterns without blending the layers completely together. Allow the brownies to cool fully before slicing, as this helps the cheesecake layer set properly and gives you clean, bakery-style squares.
Easy Red Velvet Cheesecake Brownies
Ingredients for Easy Red Velvet Cheesecake Brownies
For the Red Velvet Brownie Batter
- 1 cup unsalted butter, melted
- 2 cups granulated sugar
- 4 large eggs
- 1 tablespoon vanilla extract
- 2 tablespoons red food coloring
- 1 tablespoon white vinegar
- 1/4 cup unsweetened cocoa powder
- 1 1/2 cups all-purpose flour
- 1/2 teaspoon salt
For the Cheesecake Swirl
- 8 ounces cream cheese, softened
- 1/3 cup granulated sugar
- 1 large egg yolk
- 1 teaspoon vanilla extract
Optional Add-Ins and Garnishes
- White chocolate chips for extra sweetness
- Mini chocolate chips for richer flavor
- Crushed freeze-dried raspberries for a fruity twist
- Powdered sugar for dusting
- Fresh strawberries for serving
- Whipped cream for presentation
Step 1: Prepare the Baking Pan and Oven
Preheat your oven to 350°F (175°C). Line an 8×8-inch baking pan with parchment paper, leaving extra paper hanging over the edges to make lifting the brownies easier after baking. Lightly grease the parchment paper with nonstick spray or butter to prevent sticking.
Preparing the pan properly ensures the brownies bake evenly and release cleanly without breaking apart. Using parchment paper also helps maintain the beautiful swirl design when slicing.
Step 2: Make the Cheesecake Filling
In a medium mixing bowl, combine the softened cream cheese and sugar using an electric hand mixer until completely smooth and creamy. Add the egg yolk and vanilla extract, then continue mixing until fully combined.
The cheesecake mixture should have a silky texture with no visible lumps. Set the bowl aside while preparing the brownie batter.
Step 3: Mix the Wet Ingredients for the Brownie Batter
In a large mixing bowl, whisk together the melted butter and granulated sugar until glossy and smooth. Add the eggs one at a time, whisking well after each addition to create a rich, cohesive batter.
Stir in the vanilla extract, red food coloring, and white vinegar. The batter should develop a vibrant deep red color at this stage.
The vinegar not only enhances the classic red velvet flavor but also reacts with the cocoa powder to deepen the color and create a tender texture.
Step 4: Add the Dry Ingredients
Sift the cocoa powder, all-purpose flour, and salt into the wet ingredients. Using a rubber spatula or wooden spoon, gently fold the dry ingredients into the batter until just combined.
Avoid overmixing once the flour is added, as this can develop too much gluten and make the brownies more cakey instead of fudgy. The batter should remain thick, smooth, and glossy.
If using white chocolate chips or mini chocolate chips, gently fold them into the batter at this stage.
Step 5: Layer the Batter and Cheesecake Mixture
Pour about three-quarters of the brownie batter into the prepared baking pan and spread it evenly using a spatula. Spoon the cheesecake filling over the brownie layer in dollops across the pan.
Add the remaining brownie batter on top in smaller spoonfuls. This layering technique helps create the signature marbled effect when swirled.
Step 6: Create the Swirl Pattern
Using a butter knife, skewer, or toothpick, gently swirl the brownie batter and cheesecake filling together. Move the knife in figure-eight motions and curved lines across the surface.
Do not over-swirl the layers, as keeping some separation between the red velvet batter and cheesecake filling creates the most visually appealing marbled pattern.
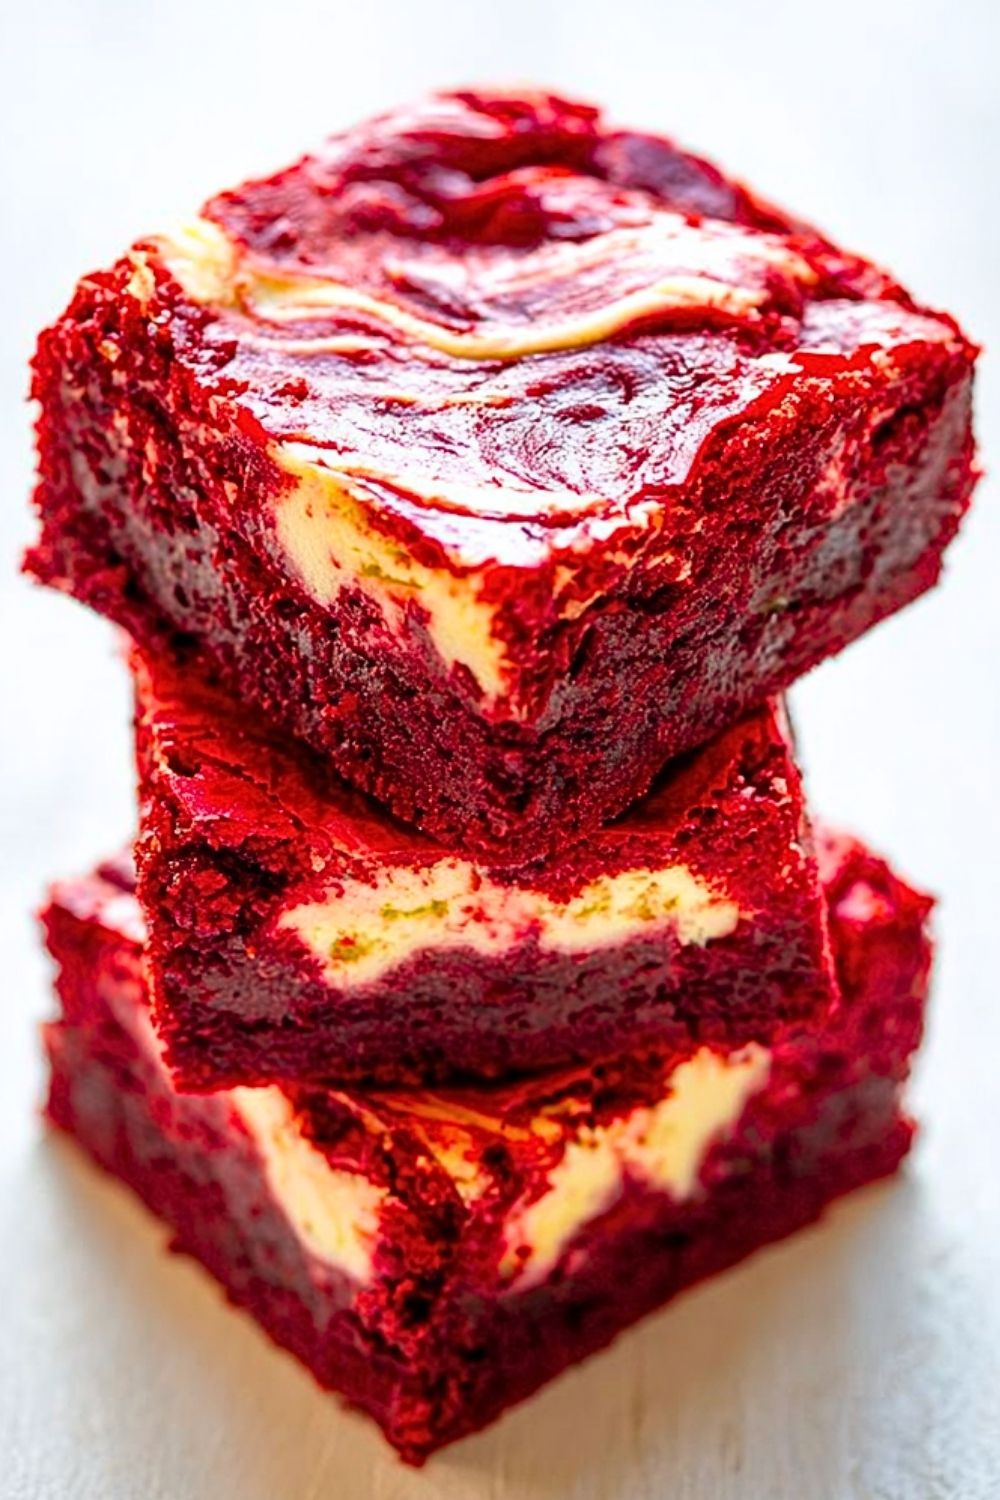
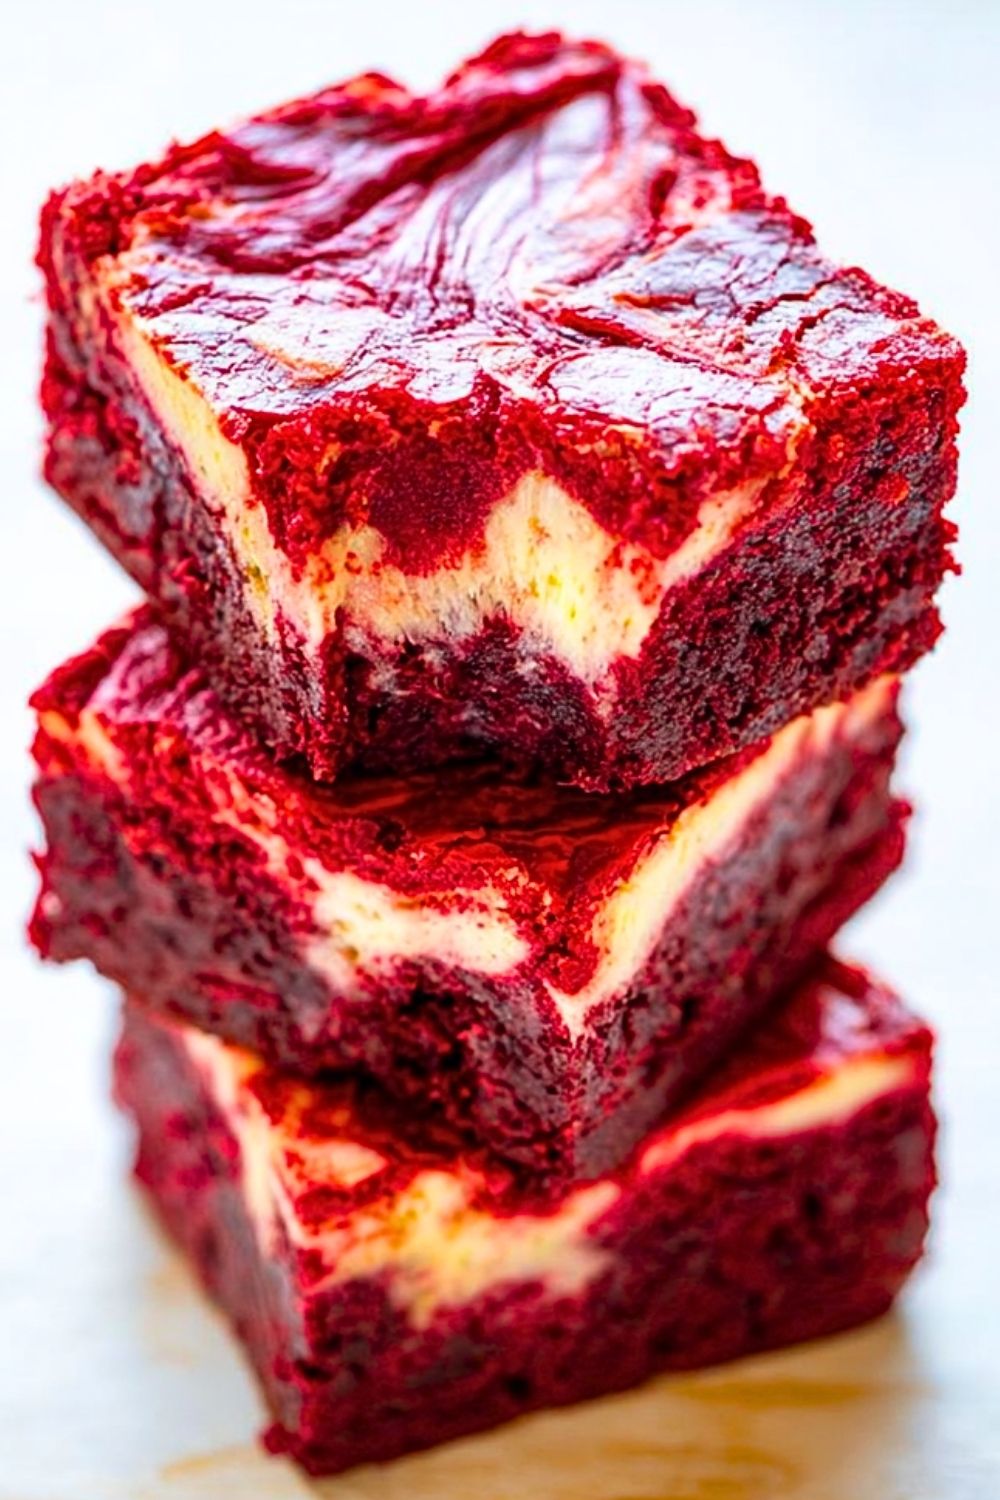
The top should have dramatic red and white swirls with visible contrast.
Step 7: Bake the Brownies
Place the pan in the preheated oven and bake for 32 to 38 minutes. The edges should appear set while the center remains slightly soft. Insert a toothpick into the brownie portion rather than the cheesecake swirl; it should come out with a few moist crumbs attached.
Avoid overbaking, as the brownies will continue to firm up while cooling. Overbaked brownies can become dry and lose their signature fudgy texture.
Step 8: Cool Completely Before Slicing
Remove the brownies from the oven and place the pan on a cooling rack. Allow them to cool completely at room temperature before transferring to the refrigerator for at least 1 hour.
Chilling the brownies helps the cheesecake layer set properly and makes slicing much cleaner. Use a sharp knife wiped clean between cuts for professional-looking squares.
Step 9: Slice and Serve
Lift the brownies from the pan using the parchment paper overhang. Slice into squares or rectangles depending on your preferred serving size.
Serve chilled for a dense cheesecake texture or slightly warmed for extra fudgy brownies. Pair them with coffee, milk, hot chocolate, or vanilla ice cream for an indulgent dessert experience.
These brownies are ideal for holiday dessert tables, Valentine’s Day treats, bake sales, birthdays, potlucks, or weekend baking sessions.
Step 10: Creative Serving Variations
For a bakery-style presentation, drizzle melted white chocolate across the cooled brownies before serving. You can also top each brownie square with whipped cream and fresh berries for a more elegant dessert.
For seasonal variations, add peppermint extract during the holidays, orange zest for a citrus twist, or crushed cookies for added crunch. These brownies are highly customizable while still keeping their signature red velvet cheesecake flavor.
Notes
Easy Red Velvet Cheesecake Brownies are best enjoyed after they have fully chilled because the cheesecake layer becomes firmer and the flavors meld together beautifully. The brownies naturally become even fudgier the next day, making them an excellent make-ahead dessert for parties and gatherings. Using high-quality cocoa powder and pure vanilla extract significantly improves the flavor profile, giving the brownies a richer and more balanced taste.
If you prefer a deeper chocolate flavor, you can add a handful of dark chocolate chips to the batter without affecting the texture. For a more vibrant red velvet appearance, gel food coloring works especially well because it produces a stronger color without thinning the batter. Bakers who enjoy slightly tangy desserts can also add a teaspoon of lemon juice to the cheesecake filling for extra brightness.
These brownies are versatile enough for every occasion, from holiday dessert platters to casual weekend baking. Their striking red-and-white marbled appearance makes them especially popular during Valentine’s Day, Christmas, birthdays, anniversaries, and bake sales.
Watch Out for These Mistakes While Cooking
Using Cold Cream Cheese
Cold cream cheese can leave lumps in the cheesecake filling, preventing the swirl from becoming smooth and creamy. Always let the cream cheese soften at room temperature before mixing.
Overmixing the Brownie Batter
Once the flour is added, excessive mixing develops gluten and creates a cakey texture instead of soft, fudgy brownies. Stir only until the ingredients are combined.
Overbaking the Brownies
One of the most common mistakes is baking until the center looks fully firm. The brownies continue cooking slightly as they cool, so removing them when the center still appears slightly soft ensures a moist texture.
Swirling Too Aggressively
Over-swirling blends the cheesecake and brownie layers together completely, removing the beautiful marbled effect. Use gentle figure-eight motions for distinct swirls.
Skipping the Cooling Time
Cutting into warm brownies causes messy slices and prevents the cheesecake layer from setting properly. Allow enough cooling and chilling time before slicing.
Incorrect Measuring Techniques
Packing too much flour into the measuring cup can make the brownies dense and dry. Spoon flour into the cup and level it off rather than scooping directly from the bag.
Using a Pan That’s Too Large
A larger pan creates thinner brownies that bake too quickly and lose their rich fudgy texture. An 8×8-inch pan gives the ideal thickness.
Forgetting to Line the Pan
Without parchment paper, the brownies may stick and break apart when removed. Parchment paper also makes cleanup much easier.
Storage Instructions
Store Easy Red Velvet Cheesecake Brownies in an airtight container in the refrigerator for up to 5 days. Because of the cheesecake layer, refrigeration is necessary to maintain freshness and food safety. For the best texture, allow the brownies to sit at room temperature for about 10 minutes before serving.
To freeze, wrap individual brownie squares tightly in plastic wrap and place them in a freezer-safe container or zip-top bag. They can be frozen for up to 3 months without losing flavor or texture. Thaw overnight in the refrigerator before serving.
If stacking brownies in a container, place parchment paper between layers to prevent sticking and preserve the swirl design. Avoid storing them uncovered, as refrigeration can dry out the brownie edges.
Estimated Nutrition
Per Serving (Based on 12 Brownies)
- Calories: 340
- Carbohydrates: 38g
- Protein: 5g
- Fat: 19g
- Saturated Fat: 11g
- Cholesterol: 92mg
- Sodium: 180mg
- Sugar: 28g
- Fiber: 1g
Nutritional values may vary depending on ingredient brands, optional add-ins, and portion sizes.
Frequently Asked Questions
Can I use boxed red velvet brownie mix instead of homemade batter?
Yes, boxed mix can be used for convenience. Prepare the brownie batter according to the package directions, then continue with the cheesecake swirl portion of the recipe.
How do I know when the brownies are fully baked?
The edges should look set while the center remains slightly soft. A toothpick inserted into the brownie section should come out with a few moist crumbs.
Can I make these brownies ahead of time?
Absolutely. These brownies actually taste better after chilling for several hours, making them ideal for preparing a day in advance.
Why did my cheesecake swirl sink into the batter?
This can happen if the brownie batter is too thin or if the cheesecake mixture is too heavy in one area. Spread the layers evenly and avoid large dollops concentrated in one spot.
Can I freeze Red Velvet Cheesecake Brownies?
Yes, they freeze very well. Wrap them individually and store them in an airtight container for up to three months.
What type of cocoa powder works best?
Unsweetened natural cocoa powder is commonly used for traditional red velvet flavor, though Dutch-process cocoa can provide a richer chocolate taste.
Can I make these brownies without food coloring?
Yes, but they will not have the classic red velvet appearance. The flavor will still be delicious with a subtle cocoa taste.
How can I get perfectly clean brownie slices?
Chill the brownies thoroughly and use a sharp knife cleaned between each cut. This prevents smearing and keeps the cheesecake swirls crisp.
Conclusion
Easy Red Velvet Cheesecake Brownies combine the rich decadence of fudgy brownies with the creamy smoothness of cheesecake in one unforgettable dessert. Their bold red velvet color, beautiful marbled swirl, and indulgent texture make them perfect for holidays, celebrations, or satisfying a chocolate craving any day of the week.
The recipe is simple enough for beginner bakers while still delivering bakery-quality results. With the right preparation techniques, careful baking, and proper chilling time, you can create perfectly moist and visually stunning brownies every single time. Whether served chilled, slightly warm, or paired with ice cream, these brownies are guaranteed to become a crowd favorite.
Easy Red Velvet Cheesecake Brownies
- Total Time: 55 minutes
- Yield: 12 brownies
- Diet: Vegetarian
Description
These Easy Red Velvet Cheesecake Brownies are the ultimate dessert for chocolate lovers who want something rich, creamy, and visually stunning. With fudgy red velvet brownie layers swirled together with smooth cheesecake filling, every bite delivers the perfect balance of chocolate flavor and tangy cream cheese goodness. This easy recipe is perfect for holidays, Valentine’s Day desserts, quick dessert ideas, party treats, bake sales, or whenever you need an indulgent homemade dessert. The vibrant red color and creamy cheesecake swirls make these brownies look bakery-quality while still being simple enough for beginner bakers. Whether you need easy dessert ideas, crowd-pleasing food ideas, or a decadent make-ahead treat, these brownies are guaranteed to impress.
Ingredients
1 cup unsalted butter, melted
2 cups granulated sugar
4 large eggs
1 tablespoon vanilla extract
2 tablespoons red food coloring
1 tablespoon white vinegar
1/4 cup unsweetened cocoa powder
1 1/2 cups all-purpose flour
1/2 teaspoon salt
8 ounces cream cheese, softened
1/3 cup granulated sugar
1 large egg yolk
1 teaspoon vanilla extract
Instructions
1. Preheat the oven to 350°F (175°C). Line an 8×8-inch baking pan with parchment paper and lightly grease it.
2. In a medium bowl, beat the softened cream cheese and sugar until smooth. Add the egg yolk and vanilla extract, then mix until creamy. Set aside.
3. In a large bowl, whisk together the melted butter and sugar until glossy.
4. Add the eggs one at a time, mixing well after each addition.
5. Stir in the vanilla extract, red food coloring, and white vinegar.
6. Sift in the cocoa powder, flour, and salt. Fold gently until just combined.
7. Pour about three-quarters of the brownie batter into the prepared baking pan.
8. Spoon the cheesecake filling evenly over the brownie batter.
9. Add the remaining brownie batter in dollops over the cheesecake layer.
10. Use a knife or skewer to gently swirl the cheesecake and brownie layers together.
11. Bake for 32 to 38 minutes, or until the edges are set and a toothpick inserted into the brownie portion comes out with moist crumbs.
12. Allow the brownies to cool completely, then refrigerate for at least 1 hour before slicing.
13. Slice into squares and serve chilled or slightly warm.
Notes
Use room temperature cream cheese for the smoothest cheesecake swirl and the best texture.
Do not overmix the brownie batter after adding the flour to keep the brownies soft and fudgy.
Chill the brownies before slicing for cleaner cuts and a perfectly set cheesecake layer.
- Prep Time: 20 minutes
- Cook Time: 35 minutes
- Category: Dessert
- Method: Baking
- Cuisine: American
Nutrition
- Serving Size: 1 brownie
- Calories: 340
- Sugar: 28g
- Sodium: 180mg
- Fat: 19g
- Saturated Fat: 11g
- Unsaturated Fat: 6g
- Trans Fat: 0g
- Carbohydrates: 38g
- Fiber: 1g
- Protein: 5g
- Cholesterol: 92mg
Keywords: easy red velvet cheesecake brownies, red velvet brownies, cheesecake brownies, easy dessert recipe, fudgy brownies, homemade brownies, holiday desserts, party desserts, valentine desserts