

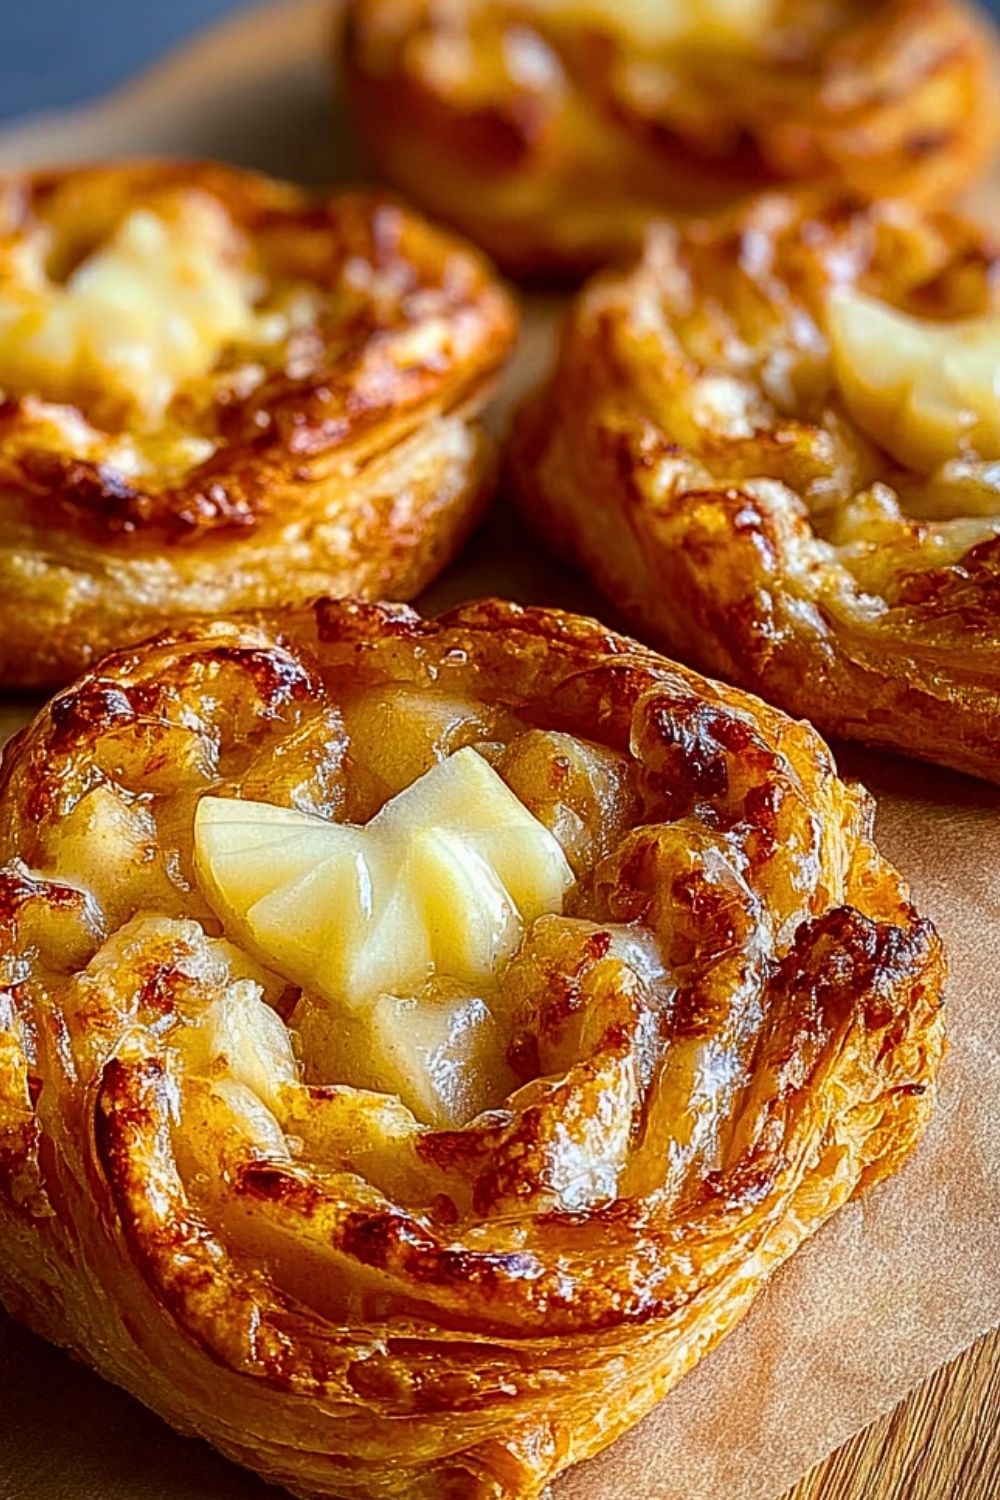
I always find myself coming back to recipes that feel both cozy and bakery-worthy, and these Delicious Apple & Cheese Danishes check every box. The flaky pastry, creamy cheese filling, and soft cinnamon apples create the kind of treat that makes the whole kitchen smell incredible while they bake. They look impressive, but the process is surprisingly simple, which makes them perfect for both weekend baking and special brunch tables.
WANT TO SAVE THIS RECIPE?
Just enter your email and get it sent to your inbox!
What I love most about these danishes is how balanced they are. The sweetness from the apples pairs beautifully with the slightly tangy cream cheese filling, while the buttery pastry adds that irresistible crisp texture. Whether I serve them warm with coffee in the morning or as an afternoon dessert, they disappear almost instantly every time.
Why You’ll Love These Delicious Apple & Cheese Danishes
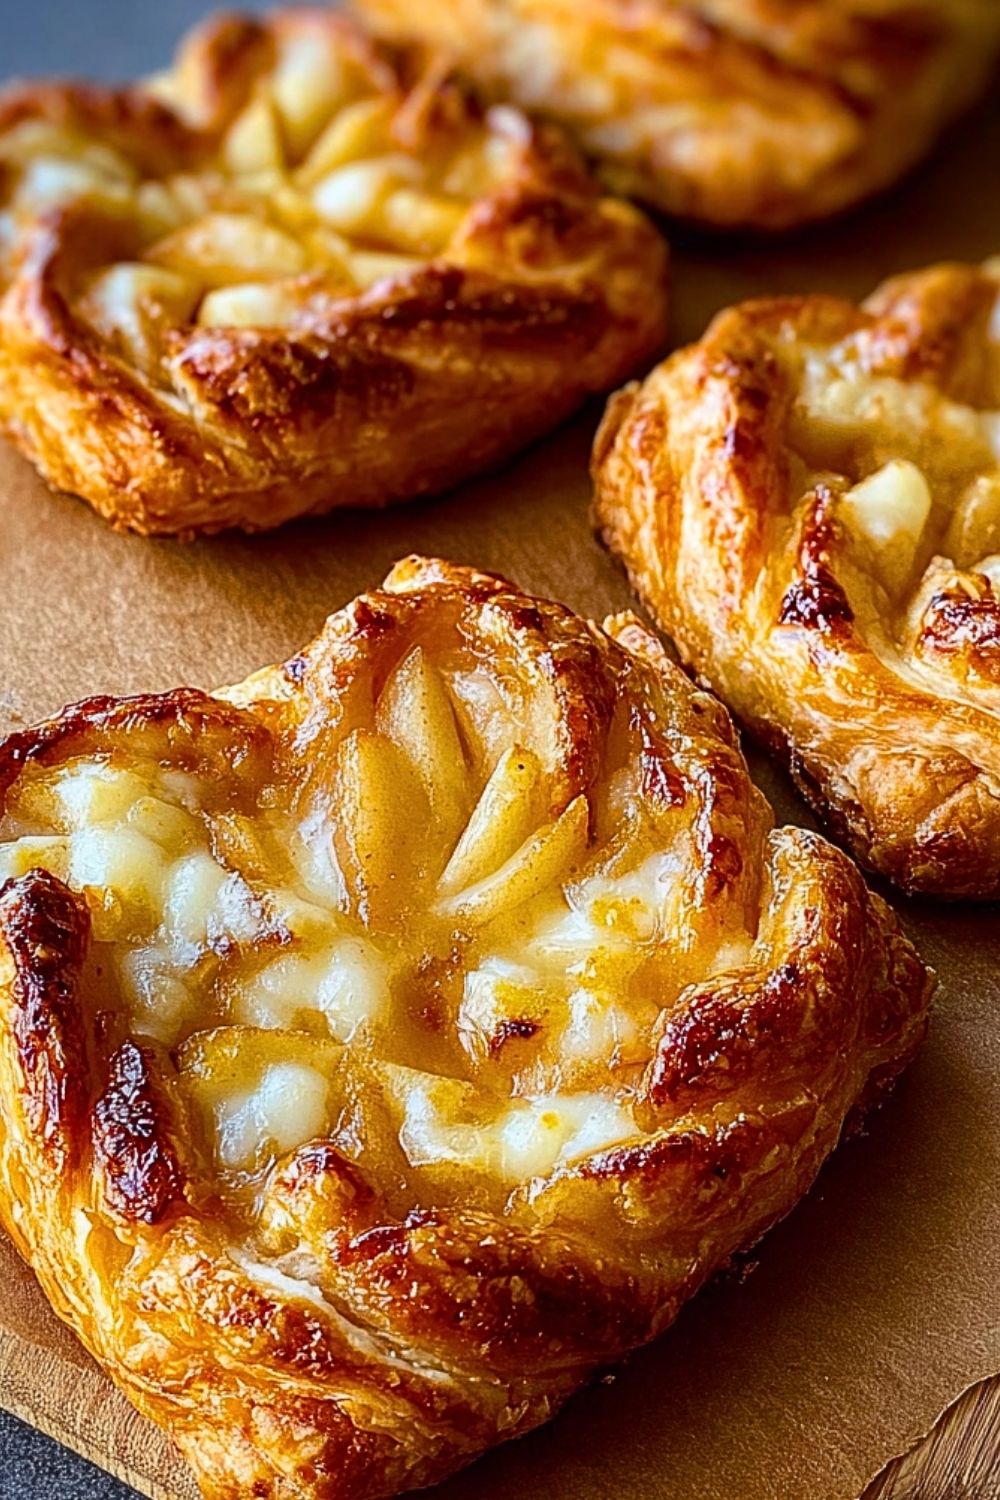
These pastries bring together everything people love about bakery-style treats without requiring complicated techniques. The puff pastry bakes into golden, flaky layers while the filling stays rich and creamy inside. Every bite has a mix of textures that feels indulgent and comforting at the same time.
Another reason these danishes stand out is their versatility. They work beautifully for breakfast, brunch gatherings, holiday mornings, dessert platters, or even quick sweet snacks during the week. Since they can be made ahead and reheated, they fit easily into busy schedules without sacrificing flavor.
They also look elegant with very little effort. The rustic folded pastry edges give each danish a homemade charm, and the caramelized apples create a glossy finish that makes them bakery-display worthy.
What Kind of Puff Pastry Should I Use for Delicious Apple & Cheese Danishes?
Store-bought puff pastry is the easiest and most reliable option for this recipe. I usually prefer all-butter puff pastry because it creates richer flavor and flakier layers, but standard frozen puff pastry works wonderfully too. The key is allowing it to thaw just enough so it becomes flexible without turning too soft.
If the pastry becomes overly warm before baking, the layers may not puff properly in the oven. I like to keep it chilled while assembling the danishes so the butter inside the dough stays cold. That’s what helps create those beautiful crisp layers once baked.
Homemade puff pastry can absolutely be used if you enjoy baking from scratch, though it requires more preparation time. For most occasions, frozen puff pastry delivers excellent results with far less work.
Options for Substitutions
One of the best things about these Delicious Apple & Cheese Danishes is how adaptable they are. A few ingredient swaps can completely customize the flavor while still keeping the same flaky, creamy texture everyone loves.
Cream cheese can be replaced with mascarpone for a richer and slightly sweeter filling. Ricotta also works if you prefer a lighter texture. For the fruit filling, pears make an excellent substitute for apples and pair beautifully with cinnamon and pastry.
If you want extra warmth and sweetness, brown sugar can replace white sugar in the apple mixture. Maple syrup or honey also add deeper flavor notes that complement the fruit perfectly.
For those avoiding dairy, dairy-free cream cheese alternatives and plant-based puff pastry can be used successfully. The final pastries still bake up golden and delicious while keeping the recipe more accessible for different dietary needs.
Adding chopped pecans or walnuts gives the danishes a little crunch, while raisins or dried cranberries can bring extra sweetness and texture to the filling. Even a drizzle of caramel sauce after baking can turn these pastries into an even more decadent dessert.
Ingredients for this Delicious Apple & Cheese Danishes
Puff Pastry
Puff pastry forms the buttery, flaky base of these danishes. As it bakes, the layers puff beautifully and create the crisp texture that makes every bite feel bakery-quality. Using chilled pastry is essential for achieving those golden layers.
Apples
Fresh apples provide the sweet and slightly tart filling that balances the richness of the cheese mixture. Firmer apples hold their shape during baking and create soft caramelized bites inside the pastry.
Cream Cheese
Cream cheese gives the danishes their creamy, smooth center. Its slight tanginess complements the sweet apples perfectly while creating a rich texture that melts into the pastry as it bakes.
Granulated Sugar
Sugar sweetens both the apple filling and the cheese layer. It also helps the apples caramelize slightly in the oven, creating deeper flavor and a glossy finish.
Brown Sugar
Brown sugar adds warmth and a subtle caramel flavor to the apple mixture. The molasses notes pair beautifully with cinnamon and buttery pastry.
Ground Cinnamon
Cinnamon brings warmth and classic bakery-style flavor to the danishes. It enhances the sweetness of the apples while adding a comforting aroma during baking.
Vanilla Extract
Vanilla rounds out the flavor of the cheese filling and adds sweetness without overpowering the fruit. Even a small amount makes the filling taste richer and more balanced.
Lemon Juice
A little lemon juice brightens the apple filling and prevents the apples from browning too quickly. It also balances the sweetness with a slight fresh acidity.
Egg
Egg is used for the egg wash that gives the pastries their shiny golden finish. It also helps seal some of the pastry folds during baking.
Butter
Butter helps cook the apples into a soft, flavorful filling before baking. It also adds richness and helps the sugar and cinnamon coat the fruit evenly.
Cornstarch
Cornstarch slightly thickens the apple filling so the juices do not make the pastry soggy while baking.
Powdered Sugar
Powdered sugar is perfect for finishing touches like glaze or dusting. It adds bakery-style presentation and a little extra sweetness.
Milk
Milk helps create a smooth glaze and can also soften the cheese filling slightly for easier spreading.
Salt
A small amount of salt enhances all the sweet flavors and balances the richness of the pastry and cheese.
Step 1: Prepare the Puff Pastry
Start by thawing the puff pastry according to the package instructions. The pastry should be cold but flexible enough to unfold without cracking. If it becomes too warm, place it back into the refrigerator for a few minutes before working with it.
Lightly flour your surface and gently roll the pastry to smooth out the folds and slightly enlarge the sheet. Cut the pastry into evenly sized squares or circles depending on the shape you want for the danishes.
Place the pastry pieces onto a parchment-lined baking tray, leaving enough space between each one so they can puff properly in the oven.
Step 2: Prepare the Apple Filling
Peel and dice the apples into small, even cubes so they cook consistently. Smaller pieces fit better into the pastries and create a softer filling texture.
In a skillet over medium heat, melt the butter and add the diced apples. Stir in the brown sugar, granulated sugar, cinnamon, lemon juice, and a pinch of salt. Cook until the apples soften slightly and begin to caramelize.
Sprinkle in the cornstarch and stir thoroughly so the filling thickens slightly. This prevents excess liquid from leaking into the pastry during baking. Remove the apples from the heat and allow the mixture to cool before assembling the danishes.
Step 3: Make the Cream Cheese Filling
In a mixing bowl, combine the cream cheese, sugar, vanilla extract, and a small splash of milk. Beat until the mixture becomes smooth, creamy, and spreadable.
The filling should have a soft texture without lumps. If needed, let the cream cheese sit at room temperature for a few minutes before mixing so it blends more easily.
This creamy layer creates a delicious contrast to the sweet apple topping and gives the danishes their signature richness.
Step 4: Shape the Danishes
Add a spoonful of cream cheese filling to the center of each pastry piece, leaving a border around the edges. Top the cheese layer with a spoonful of cooled apple filling.
Carefully fold or pinch the edges of the pastry inward to create a rustic danish shape. Some people prefer square folds while others like round, free-form styles. Either works beautifully for this recipe.
If the pastry becomes soft while shaping, chill the tray in the refrigerator for about 10 minutes before baking. Cold pastry creates better layers and cleaner edges.
Step 5: Apply the Egg Wash
Whisk the egg with a small splash of water or milk until smooth. Using a pastry brush, lightly coat the exposed pastry edges with the egg wash.
This step helps the danishes bake into a shiny golden brown color while giving the crust a beautiful bakery-style finish.
Be careful not to brush too much egg wash onto the filling itself, as it may affect the texture while baking.
Step 6: Bake the Delicious Apple & Cheese Danishes
Preheat the oven fully before baking to ensure the puff pastry rises properly from the start. Place the tray in the center of the oven for even heat circulation.
Bake the danishes until the pastry becomes deeply golden, crisp, and puffed around the edges. The cheese filling should appear set while the apples become lightly caramelized on top.
The aroma during baking is one of the best parts of this recipe, with warm cinnamon, butter, apples, and pastry filling the kitchen.
Step 7: Cool Before Glazing
Allow the danishes to cool slightly on the baking tray before transferring them to a wire rack. This helps the pastry finish setting while keeping the bottoms crisp.
If desired, prepare a simple glaze using powdered sugar and milk. Drizzle it lightly over the warm pastries for extra sweetness and a beautiful bakery-style appearance.
The glaze melts slightly into the warm pastry and adds another delicious layer of flavor.
Step 8: Serve and Enjoy
These Delicious Apple & Cheese Danishes are best enjoyed slightly warm when the pastry is crisp and the filling is soft and creamy.
Serve them with coffee, tea, hot chocolate, or even fresh fruit for a complete breakfast or dessert spread. They also make beautiful additions to brunch tables and holiday gatherings.
Every bite combines flaky pastry, creamy filling, soft cinnamon apples, and buttery richness that makes these danishes feel truly special.
How Long to Prepare Delicious Apple & Cheese Danishes
Making these Delicious Apple & Cheese Danishes feels surprisingly manageable once everything is organized. Most of the preparation time goes into preparing the fillings and shaping the pastries, but the process itself is very straightforward and enjoyable. Since puff pastry does most of the hard work for you, these danishes come together much faster than traditional homemade pastries.
For the preparation stage, expect to spend around 20 to 30 minutes. This includes peeling and dicing the apples, cooking the filling, mixing the cream cheese layer, thawing the pastry, and assembling the danishes. Working carefully during assembly helps create cleaner shapes and evenly filled pastries.
The baking time is usually between 18 and 25 minutes depending on the size of the danishes and your oven. You’ll know they are ready when the pastry becomes deeply golden brown and puffed around the edges while the filling looks set and lightly caramelized.
Cooling takes another 10 to 15 minutes. Although it can be tempting to eat them immediately, allowing the pastries to cool slightly helps the filling set properly and improves the texture of the flaky pastry.
Overall, these danishes can easily be completed in under one hour, making them ideal for weekend breakfasts, brunches, holiday mornings, or quick bakery-style desserts at home.
Tips for Perfect Delicious Apple & Cheese Danishes
Keeping the puff pastry cold is one of the most important secrets to achieving flaky layers. Warm pastry loses its structure quickly, so chilling the assembled danishes before baking can make a huge difference in the final texture.
Using firm apples helps maintain a pleasant filling consistency. Softer apples may release too much liquid and make the pastry soggy. Varieties with a balance of sweetness and tartness usually provide the best flavor.
Avoid overfilling the pastries. While it may be tempting to add extra filling, too much moisture can leak out during baking and prevent the pastry from crisping properly.
Pre-cooking the apple mixture is another helpful step because it removes excess moisture before the apples go into the pastry. This creates richer flavor and better texture after baking.
For extra shine and color, apply the egg wash evenly around the pastry edges right before baking. This gives the danishes that beautiful bakery-style golden finish.
If you enjoy extra sweetness, adding glaze while the pastries are still slightly warm allows it to melt gently into the flaky layers for even more flavor.
Watch Out for These Mistakes While Cooking
One common mistake is using puff pastry before it has thawed correctly. If it is too frozen, it cracks while unfolding. If it becomes too soft, the butter melts too early and the pastry loses its flaky texture.
Skipping the cooling step for the apple filling can also create problems. Hot filling warms the pastry too quickly and may cause uneven baking.
Another issue is adding too much liquid to the filling. Apples naturally release moisture while cooking, so thickening the mixture slightly with cornstarch helps prevent soggy centers.
Overbaking can dry out the filling and darken the pastry too much. It is best to watch closely during the final minutes of baking and remove the danishes once they are deeply golden.
Crowding the baking tray is another mistake that affects puff pastry. Leaving enough space between each danish allows hot air to circulate properly and helps the layers puff evenly.
Finally, glazing the pastries too early can cause the icing to disappear into the heat completely. Waiting a few minutes after baking gives a better finish and presentation.
What to Serve With Delicious Apple & Cheese Danishes?
Freshly Brewed Coffee
The buttery pastry and sweet apple filling pair beautifully with hot coffee. A rich espresso or smooth cappuccino balances the sweetness while creating the perfect bakery-style breakfast experience.
Vanilla Chai Tea
Warm chai spices complement the cinnamon apples wonderfully. The creamy texture of chai tea also pairs naturally with the rich cream cheese filling.
Fresh Fruit Salad
A light fruit salad adds freshness and balance to the richness of the danishes. Berries, grapes, oranges, and kiwi work especially well together.
Whipped Cream or Vanilla Ice Cream
For dessert-style serving, a small spoonful of whipped cream or vanilla ice cream turns these pastries into a decadent treat.
Maple Yogurt Parfait
Creamy yogurt layered with granola and maple syrup creates a delicious brunch pairing that balances the flaky sweetness of the pastries.
Storage Instructions
These Delicious Apple & Cheese Danishes store surprisingly well when handled properly. If you plan to enjoy them within the same day, they can remain loosely covered at room temperature for several hours while maintaining their flaky texture.
For longer storage, place the cooled danishes in an airtight container and refrigerate them. They typically stay fresh for up to 3 to 4 days. Because of the cream cheese filling, refrigeration is the safest option after the first day.
When reheating, avoid the microwave if possible since it can soften the pastry too much. Instead, warm the danishes in the oven or air fryer for a few minutes to restore their crisp flaky layers.
These pastries can also be frozen successfully. Wrap each danish individually and store them in a freezer-safe container. Reheat directly from frozen in the oven until warmed through and crisp again.
If glazing the pastries, some people prefer adding the glaze fresh after reheating rather than before freezing for the best appearance and texture.
Estimated Nutrition
The exact nutritional values depend on ingredient brands and portion sizes, but these Delicious Apple & Cheese Danishes are generally considered an indulgent bakery-style pastry.
Each danish typically contains a balance of carbohydrates from the pastry and apples, fats from the butter and cream cheese, and moderate sugar from the filling and glaze.
They also provide small amounts of calcium from the dairy ingredients and fiber from the apples. Choosing lighter cream cheese or reducing sugar can slightly lower the calorie content while still keeping the pastries delicious.
Because these danishes are rich and satisfying, one pastry often feels like a complete breakfast treat or dessert serving.
Frequently Asked Questions
Can I make Delicious Apple & Cheese Danishes ahead of time?
Yes, the danishes can be assembled ahead and refrigerated before baking. This makes them especially convenient for brunches or holiday mornings.
What apples work best for this recipe?
Firm apples with balanced sweetness and tartness work best because they hold their shape during baking and provide richer flavor.
Can I freeze these danishes?
Absolutely. They freeze well both baked and unbaked. Reheating in the oven helps restore the flaky pastry texture.
Why did my puff pastry not rise properly?
Usually this happens when the pastry becomes too warm before baking. Keeping the pastry cold helps maintain the butter layers needed for puffing.
Can I add other flavors to the filling?
Yes, chopped nuts, caramel drizzle, raisins, pears, or even a touch of nutmeg can all be added to customize the danishes.
Conclusion
These Delicious Apple & Cheese Danishes combine flaky buttery pastry, creamy filling, and sweet cinnamon apples into a bakery-style treat that feels both elegant and comforting. They are simple enough for everyday baking yet impressive enough for special gatherings and brunch tables.
What makes this recipe especially enjoyable is its flexibility. You can customize the flavors, prepare them ahead of time, and serve them for breakfast, dessert, or afternoon snacks. The balance of crisp pastry and soft filling creates a texture that keeps every bite exciting and satisfying.
Once you make these danishes at home, it becomes easy to understand why they disappear so quickly. They bring together warmth, sweetness, and rich pastry flavor in a way that feels timeless and irresistibly homemade.
Delicious Apple & Cheese Danishes
- Total Time: 55 minutes
- Yield: 8 danishes
- Diet: Vegetarian
Description
These Delicious Apple & Cheese Danishes are flaky, buttery, creamy, and filled with warm cinnamon apples for the perfect bakery-style treat at home. They are ideal for a quick breakfast, cozy brunch, easy dessert, holiday breakfast ideas, sweet snack cravings, or elegant food ideas for gatherings. The combination of crisp puff pastry, rich cream cheese filling, and caramelized apples creates an easy recipe that feels both comforting and impressive. Whether served fresh from the oven with coffee or enjoyed as an afternoon pastry, these homemade danishes deliver incredible flavor in every bite.
Ingredients
2 sheets puff pastry, thawed
2 medium apples, peeled and diced
8 oz cream cheese, softened
1/4 cup granulated sugar
1/4 cup brown sugar
1 tsp vanilla extract
1 tsp ground cinnamon
1 tbsp lemon juice
1 tbsp butter
1 tbsp cornstarch
1 egg
1 tbsp milk
1 cup powdered sugar
2 tbsp milk for glaze
1/4 tsp salt
Instructions
1. Preheat the oven to 400°F and line a baking tray with parchment paper.
2. Roll the puff pastry lightly on a floured surface and cut into evenly sized squares or circles.
3. In a skillet over medium heat, melt the butter and cook the diced apples with brown sugar, cinnamon, lemon juice, and salt until slightly softened.
4. Stir in the cornstarch and cook for another minute until the filling thickens slightly. Remove from heat and allow to cool.
5. In a bowl, beat the cream cheese, granulated sugar, vanilla extract, and milk until smooth and creamy.
6. Spoon the cream cheese filling into the center of each pastry piece.
7. Add a spoonful of the apple mixture over the cream cheese layer.
8. Fold or shape the pastry edges inward to create danish shapes.
9. Whisk the egg and brush it over the pastry edges for a golden finish.
10. Bake for 18 to 25 minutes until the pastry becomes puffed and golden brown.
11. Mix powdered sugar with milk to create a glaze and drizzle over slightly cooled danishes.
12. Serve warm and enjoy.
Notes
Keep the puff pastry cold while assembling to ensure flaky layers after baking.
Allow the apple filling to cool before placing it onto the pastry to prevent soggy dough.
For extra flavor, drizzle caramel sauce over the danishes before serving.
- Prep Time: 30 minutes
- Cook Time: 25 minutes
- Category: Breakfast
- Method: Baking
- Cuisine: American
Nutrition
- Serving Size: 1 danish
- Calories: 320
- Sugar: 18g
- Sodium: 260mg
- Fat: 19g
- Saturated Fat: 9g
- Unsaturated Fat: 8g
- Trans Fat: 0g
- Carbohydrates: 33g
- Fiber: 2g
- Protein: 5g
- Cholesterol: 45mg
Keywords: apple danishes, cheese danishes, puff pastry dessert, easy breakfast recipe, brunch ideas, bakery style pastries, homemade danishes, apple pastry recipe