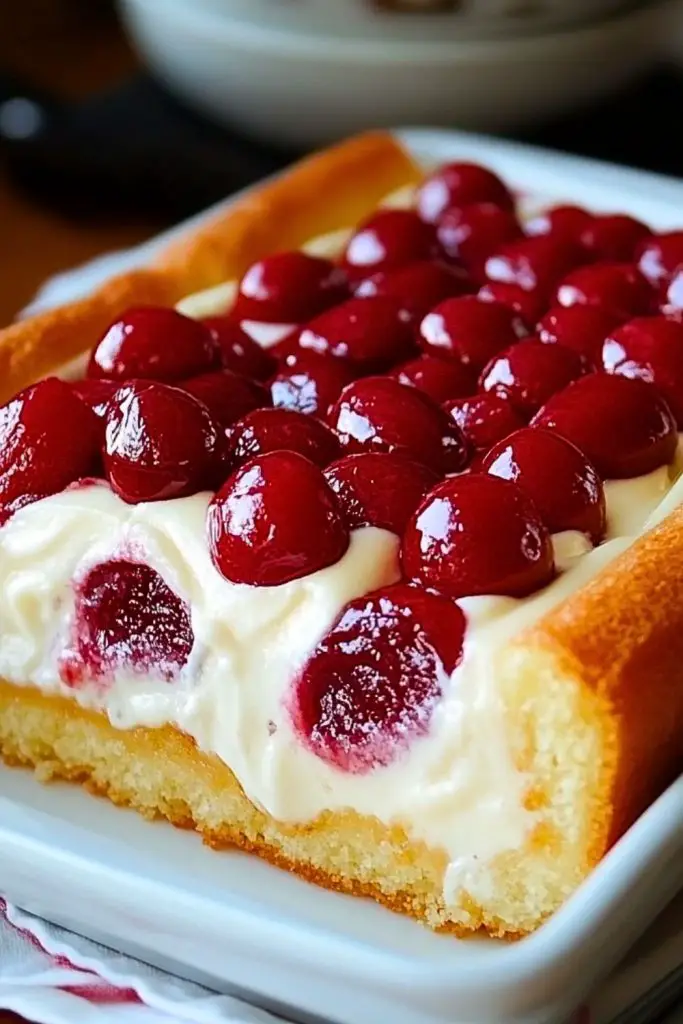
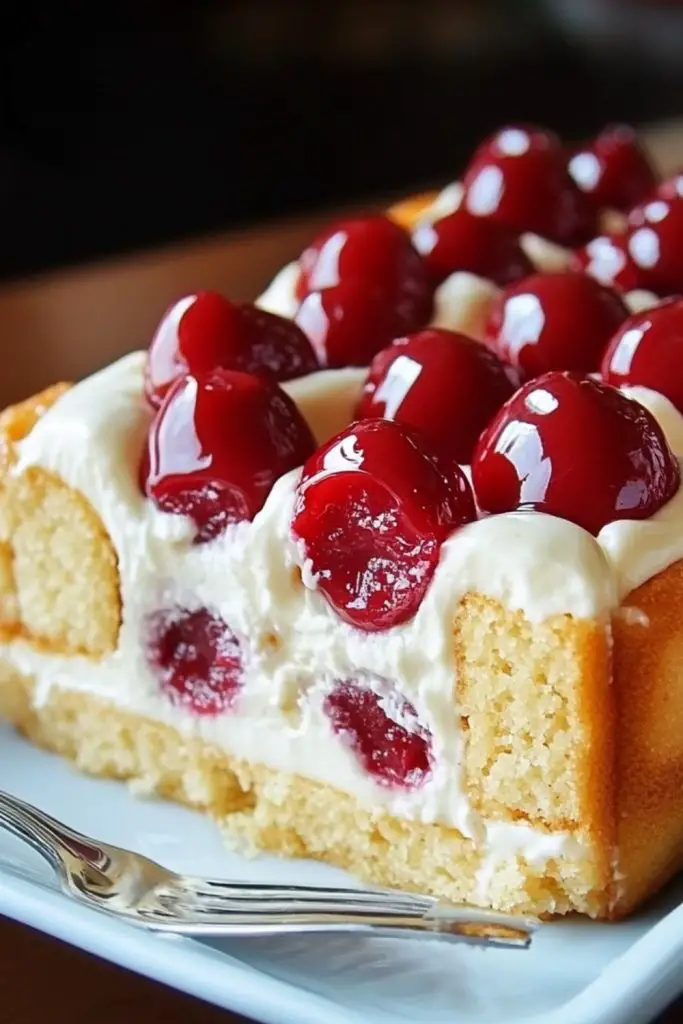
I never thought I’d fall head over heels for a dessert made with store-bought snack cakes, but this No-Bake Twinkie Pudding Cake completely changed the game for me. It’s the kind of nostalgic-meets-creamy creation that brings together layers of moist golden Twinkies, luscious vanilla pudding, tangy cherries, and a cloud-like whipped topping. It’s cold, sweet, and just the right amount of indulgent without ever turning on the oven.

What I love most about this dessert is how effortless it is. You can pull it together in under 20 minutes, and yet it tastes like something much more elaborate. It’s perfect for potlucks, summer barbecues, or a quick weeknight treat that still feels a little fancy. Plus, it always gets that wide-eyed “Wait…is that made with Twinkies?!” reaction.
Why You’ll Love This No-Bake Twinkie Pudding Cake
This dessert is a nostalgic delight wrapped in creamy goodness. The spongey Twinkies form the perfect sweet base, absorbing flavor from the pudding and fruit while holding everything together beautifully. No baking means no stress—just layer, chill, and serve. It’s kid-approved, adult-adored, and incredibly easy to customize with your favorite fruit toppings. Whether you’re a busy parent or a lazy baker, this cake is a total win.
What Kind of Twinkies Should I Use?
Classic Twinkies are definitely the go-to for this recipe—they’re soft, filled with just the right amount of cream, and have that iconic golden sponge that holds up well under pudding. That said, you can absolutely have fun with different versions! Banana-filled Twinkies bring a whole new layer of flavor, or you can try chocolate-covered ones for a richer twist. Just make sure they’re fresh and fluffy so they absorb the pudding mixture without falling apart.
Options for Substitutions
One of the best parts about this No-Bake Twinkie Pudding Cake is how flexible it is. If you can’t find Twinkies, other snack cakes like Little Debbie Cloud Cakes or even pound cake slices can step in. Want to lighten it up a little? Swap the regular pudding for sugar-free. Not into cherries? Use strawberries, blueberries, or even sliced peaches—whatever fruit you love or have on hand. And for a dairy-free version, you can use plant-based pudding mixes and whipped toppings without compromising flavor or texture.
Ingredients for This No-Bake Twinkie Pudding Cake
Twinkies
These are the heart of the cake—sweet, creamy, and spongy. They form the base layer and soak up all the delicious flavors from the pudding and fruit.
Vanilla Instant Pudding Mix
This gives the dessert its rich, creamy center. It’s quick to prepare and sets beautifully without needing heat, making it perfect for a no-bake treat.
Cold Milk
Used to prepare the pudding, milk brings everything together and creates that smooth, luscious consistency we want.
Whipped Topping (like Cool Whip)
Light and airy, this adds a fluffy finish and balances out the sweetness of the Twinkies and pudding. It also helps hold the cake together once chilled.
Canned Cherries (or Cherry Pie Filling)
These bring a burst of fruity flavor and a beautiful pop of color. Their tartness pairs perfectly with the creamy layers beneath.

Step 1: Prepare the Twinkies
Start by unwrapping the Twinkies and slicing each one in half lengthwise. Lay them, cream-side up, in a single layer at the bottom of a 9×13-inch dish to form your cake’s base. Gently press them into place so they don’t shift when you add the pudding.
Step 2: Make the Pudding
In a large mixing bowl, whisk together the vanilla instant pudding mix and cold milk until smooth and thick—this should take about 2 minutes. Let it sit for 3–5 minutes to fully set.
Step 3: Add the Creamy Layer
Once the pudding has thickened, gently fold in half of the whipped topping to create a lighter, mousse-like texture. Spread this pudding mixture evenly over the layer of Twinkies.
Step 4: Add the Cherries
Spoon the canned cherries (or cherry pie filling) evenly over the pudding layer. Try to cover the entire surface, spreading the fruit gently so the layers stay distinct.
Step 5: Finish With Whipped Topping
Top the entire cake with the remaining whipped topping. Use a spatula to smooth it out for a clean finish, or add a few swirls for texture if you’re feeling fancy.
Step 6: Chill
Cover the dish and refrigerate the cake for at least 4 hours, or overnight if you can wait. This step helps the layers firm up and the flavors meld together beautifully.
How Long to Cook the No-Bake Twinkie Pudding Cake
No cooking needed—just chill time! Once you’ve layered everything together, the cake needs to rest in the refrigerator for at least 4 hours to fully set. For best results, I like to let it sit overnight. This gives the Twinkies time to soak up the pudding and makes slicing much easier.
Tips for Perfect No-Bake Twinkie Pudding Cake
- Use cold milk when mixing the pudding so it sets properly and quickly.
- Don’t skip the chill time—rushing it can make the layers slide or look messy when sliced.
- Layer with care. Gently smooth out each layer so the pudding and whipped topping don’t mix with the fruit layer too much.
- Use a glass dish if you want to show off the pretty layers—plus, it chills evenly.
- Slice the Twinkies evenly for a uniform base; uneven layers can cause the cake to look lopsided.
- Chill your mixing bowl for a few minutes before folding in the whipped topping—it helps keep everything light and fluffy.
- Add garnishes like chocolate shavings or crushed nuts if you want to dress it up for a party.
- Wipe your knife between cuts for clean slices, especially when serving to guests.
Watch Out for These Mistakes While Cooking
Even though this dessert is super simple, a few small missteps can affect the final result. Here’s what to avoid:
- Using warm milk for the pudding – It won’t set properly and will make the cake runny.
- Not letting it chill long enough – The cake won’t hold its shape, and the layers will slide when you try to slice it.
- Skipping the whipped topping layer – It adds structure and keeps everything together.
- Overloading with fruit – Too much can make the top layer too wet, so balance is key.
- Stacking Twinkies haphazardly – Uneven layers make it harder to serve neat slices.
- Folding whipped topping too aggressively – It can deflate the mixture, so be gentle to keep it airy.
- Using frozen fruit without thawing – This adds extra water and can mess with the texture.
- Forgetting to cover while chilling – The cake might dry out or absorb fridge odors.
What to Serve With No-Bake Twinkie Pudding Cake?
A Hot Cup of Coffee
The rich, slightly bitter notes of coffee balance beautifully with the sweetness of the cake.
Cold Glass of Milk
Classic and refreshing, milk tones down the richness and keeps it light.
Sparkling Water with Citrus
Add a fizzy, refreshing contrast—especially helpful after a big meal.
A Scoop of Vanilla Ice Cream
If you really want to go indulgent, the cold creaminess of ice cream pairs like a dream.
Fresh Mint Garnish
A few mint leaves on the plate or sprinkled on top adds a pop of color and a burst of freshness.
Toasted Almonds or Pecans
Sprinkle these on the side for a little crunch if you want to contrast the soft texture.
A Berry Salad
A mix of fresh berries like blueberries, raspberries, and strawberries makes a vibrant, tangy side.
Sweet Dessert Wine or Moscato
For adults, a small glass of something sweet and bubbly enhances the whole experience.
Storage Instructions
Once assembled, the No-Bake Twinkie Pudding Cake should be stored in the refrigerator. Cover the dish tightly with plastic wrap or a fitted lid to keep it fresh and prevent it from absorbing other fridge odors. It will stay delicious for up to 3 days, though the texture is best within the first 48 hours.
If you want to make it ahead of time, you can prepare it the night before and let it chill overnight. Freezing isn’t recommended since the whipped topping and pudding may separate and change texture after thawing.
Estimated Nutrition
Here’s a general idea of the nutrition breakdown for one serving (based on 12 servings total):
- Calories: ~290
- Fat: ~12g
- Saturated Fat: ~6g
- Carbohydrates: ~40g
- Sugar: ~27g
- Protein: ~3g
- Fiber: <1g
- Sodium: ~260mg
Note: Values may vary slightly depending on the brand of Twinkies, pudding mix, and whipped topping used.
Frequently Asked Questions
Can I make this a day ahead?
Absolutely! In fact, making it the night before is ideal. It gives the layers time to set and the flavors to meld, resulting in a perfectly sliceable dessert.
Can I use homemade whipped cream instead of Cool Whip?
Yes, you can! Just make sure it’s whipped to stiff peaks and stabilized with a bit of powdered sugar or gelatin to keep it from deflating.
What other fruits can I use?
Strawberries, blueberries, raspberries, or even a tropical mix of pineapple and mango work great. Just be sure to drain any canned fruits well to avoid excess moisture.
Is this dessert kid-friendly?
Definitely! Kids love the soft texture, fun layers, and of course—the Twinkies. It’s a hit at birthday parties or weekend treats.
Can I make it in smaller portions?
Yes, you can layer the ingredients in individual cups or jars for a cute, mess-free single-serving option. Great for parties or picnics!
How long does it take to fully set?
The pudding layer sets quickly, but the whole cake benefits from chilling for at least 4 hours. Overnight is even better for the best texture.
What can I use if I don’t have Twinkies?
Try sponge cake, ladyfingers, pound cake slices, or any other soft snack cake with a neutral or vanilla flavor.
Can I make this gluten-free?
Yes! Simply use gluten-free snack cakes and check that your pudding mix and whipped topping are gluten-free certified.
Conclusion
This No-Bake Twinkie Pudding Cake is proof that simple ingredients can create something magical. It’s comforting, nostalgic, and just the right kind of indulgent without being over the top. Whether you’re serving a crowd or just looking for a no-fuss dessert that delivers, this cake checks all the boxes. Layer it, chill it, slice it—and prepare for compliments. It’s the kind of dessert people ask you to make again and again.

No-Bake Twinkie Pudding Cake
- Total Time: 4 hours 20 minutes
- Yield: 12 servings
Description
Looking for the ultimate easy dessert that feels both nostalgic and indulgent? This No-Bake Twinkie Pudding Cake is your answer. With its fluffy layers of golden Twinkies, creamy vanilla pudding, sweet cherries, and whipped topping, it’s the perfect combination of soft, smooth, and fruity. Ideal for quick breakfast treats, easy dinner desserts, or fun weekend food ideas, this cake takes less than 20 minutes to prep and delivers crowd-pleasing results every time. No oven, no stress—just chilled, creamy, delicious comfort. Whether you’re into classic snack cakes or want a fresh spin on dessert, this is your go-to easy recipe.
Ingredients
- 10 Twinkies, sliced lengthwise
- 1 (5.1 oz) package vanilla instant pudding mix
- 3 cups cold milk
- 1 (8 oz) container whipped topping (Cool Whip), divided
- 1 (21 oz) can cherry pie filling
Instructions
- Slice each Twinkie in half lengthwise and arrange them cream-side up in a 9×13-inch dish.
- In a large bowl, whisk together vanilla pudding mix and cold milk for about 2 minutes until thickened.
- Let the pudding sit for 3–5 minutes to fully set.
- Fold half of the whipped topping into the pudding until light and fluffy.
- Spread the pudding mixture evenly over the Twinkies.
- Spoon cherry pie filling on top of the pudding layer, spreading evenly.
- Top with remaining whipped topping, smoothing it out with a spatula.
- Cover and refrigerate for at least 4 hours or overnight.
- Slice, serve chilled, and enjoy!
- Prep Time: 20 minutes
- Chill Time: 4 hours

