

Smooth, creamy, and utterly indulgent—this No Bake Cheesecake is a dream come true for dessert lovers who want elegance without the effort. With its silky texture nestled in a buttery graham cracker crust, this cheesecake skips the oven entirely, making it ideal for warm days or busy schedules. Whether you’re planning a family gathering, brunch with friends, or simply craving something sweet and creamy, this dessert never disappoints.
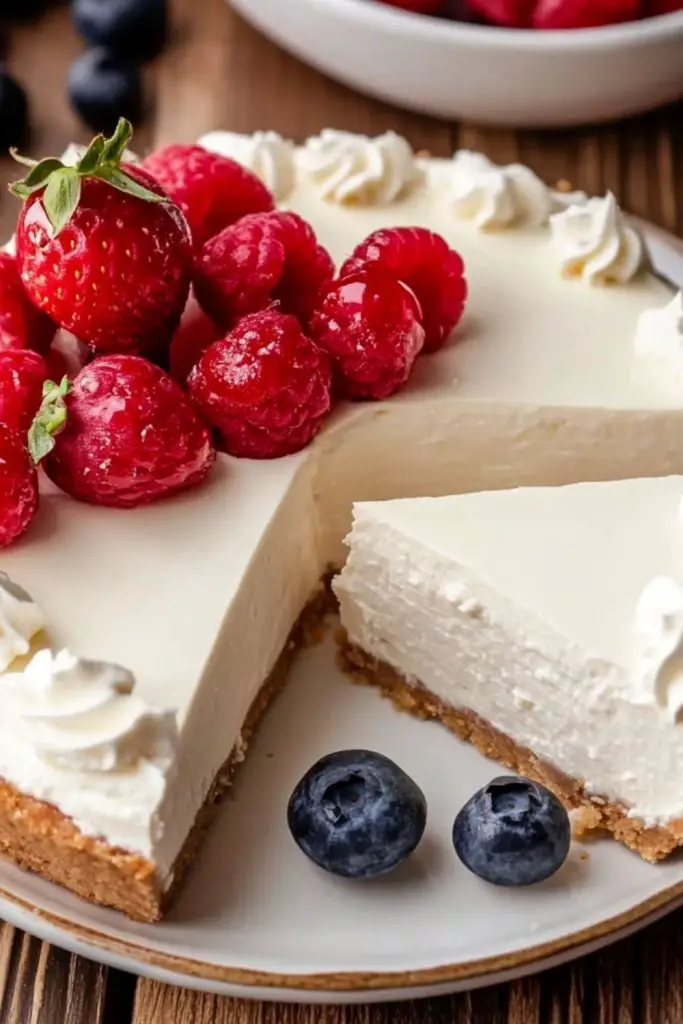
Topped with fresh berries and pillowy swirls of whipped cream, this cheesecake feels both luxurious and light. It’s the perfect canvas for seasonal fruits or your favorite toppings. Every bite offers a delightful contrast of crumbly crust and luscious filling, satisfying your sweet tooth without being overly rich.
Why You’ll Love This No Bake Cheesecake
- Quick & Convenient: No need to preheat the oven or monitor baking times. The fridge does all the work!
- Make-Ahead Friendly: Great for prepping a day in advance—just chill and serve.
- Versatile: Dress it up with berries, chocolate drizzle, caramel sauce, or keep it classic.
- Crowd-Pleaser: Its velvety texture and refreshing flavor win over even the pickiest dessert skeptics.
- Perfect for Summer: Keep the kitchen cool while still serving up something irresistibly creamy and delicious.
Preparation Phase & Tools to Use
Essential Tools and Equipment (and Why They Matter)
Making a perfect no bake cheesecake is all about the right tools and thoughtful preparation. Here’s what you’ll need:
- Springform Pan: This is the hero of cheesecake making. The removable sides make it easy to lift and serve your cheesecake without damaging its shape.
- Mixing Bowls (Various Sizes): Necessary for prepping the crust and mixing the cheesecake filling separately.
- Electric Hand Mixer or Stand Mixer: Crucial for achieving that smooth, fluffy cheesecake texture. It helps to fully incorporate air into the filling and prevents lumps.
- Rubber Spatula: Helps you fold ingredients gently and scrape down the sides of the bowl effectively without deflating the mixture.
- Measuring Cups and Spoons: Accuracy matters in dessert-making. Too much or too little of any ingredient can impact texture.
- Food Processor (Optional): Speeds up the graham cracker crust process. You can also use a ziplock bag and rolling pin if needed.
- Offset Spatula or Butter Knife: For smoothing the top of the cheesecake to give it that professional finish.
Each tool plays a key role in making the process efficient and achieving that signature silky consistency and clean presentation.
Preparation Tips
- Room Temperature Ingredients: Always bring your cream cheese to room temperature before mixing. This prevents lumps and makes blending easier.
- Chill the Crust First: Before adding the filling, chill the crust for at least 20 minutes so it sets firmly and doesn’t mix into the cheesecake layer.
- Use Full-Fat Dairy: For the richest, creamiest texture, stick with full-fat cream cheese and whipping cream.
- Do Not Rush the Chill Time: The cheesecake needs a good 6–8 hours (or overnight) in the fridge to set properly. Patience pays off.
- Avoid Overmixing: Once the whipped cream is folded into the cream cheese mixture, stop mixing. Overworking can deflate the airiness.
- Smooth with Confidence: When pouring the filling into the crust, use an offset spatula to gently smooth it out in even strokes for a clean look.
Ingredients for This No Bake Cheesecake
Here’s everything you’ll need to create a rich, velvety No Bake Cheesecake with a golden graham cracker crust and luscious creamy filling. Make sure all ingredients—especially the dairy—are at room temperature before starting for the best consistency.
For the Crust:
- 2 cups graham cracker crumbs (about 14 full crackers)
- ½ cup unsalted butter, melted
- 2 tablespoons granulated sugar (optional, for a sweeter base)
- Pinch of salt (to balance the sweetness)
For the Cheesecake Filling:
- 16 oz (450g) full-fat cream cheese, softened
- ¾ cup powdered sugar, sifted
- 1 teaspoon pure vanilla extract
- 1 tablespoon lemon juice (brightens the flavor)
- 1 ½ cups heavy whipping cream, cold
Optional Toppings:
- Fresh strawberries, halved
- Fresh blueberries
- Whipped cream, piped or dolloped
- Fruit preserves, lemon curd, or chocolate shavings (for alternative toppings)
This ingredient list yields one standard 9-inch cheesecake, ideal for 8–10 servings.
Step-by-Step Instructions for No Bake Cheesecake
Step 1: Prepare the Crust
- In a medium mixing bowl, combine graham cracker crumbs, melted butter, sugar, and a pinch of salt.
- Mix until the crumbs are evenly moistened and resemble wet sand.
- Press the mixture firmly into the bottom of a 9-inch springform pan, using the bottom of a glass or measuring cup to smooth and compact the crust.
- Chill the crust in the refrigerator for at least 20 minutes to firm up while you prepare the filling.
Step 2: Make the Cheesecake Filling
- In a large bowl, beat the softened cream cheese using an electric mixer until completely smooth and fluffy—about 2–3 minutes.
- Add in the powdered sugar, vanilla extract, and lemon juice. Beat again until well incorporated and no lumps remain.
- In a separate cold bowl, whip the heavy cream until stiff peaks form (about 3–5 minutes).
- Gently fold the whipped cream into the cream cheese mixture using a rubber spatula. Do this slowly and gently to preserve the airy texture.
Step 3: Assemble the Cheesecake
- Remove the crust from the fridge.
- Spoon the cheesecake filling over the crust and spread it out evenly using an offset spatula or the back of a spoon.
- Smooth the top, ensuring the filling is level and reaches the edges cleanly.
Step 4: Chill to Set
- Cover the pan with plastic wrap or foil and place it in the refrigerator.
- Let the cheesecake chill for at least 6–8 hours, or ideally overnight, for the best texture and flavor.
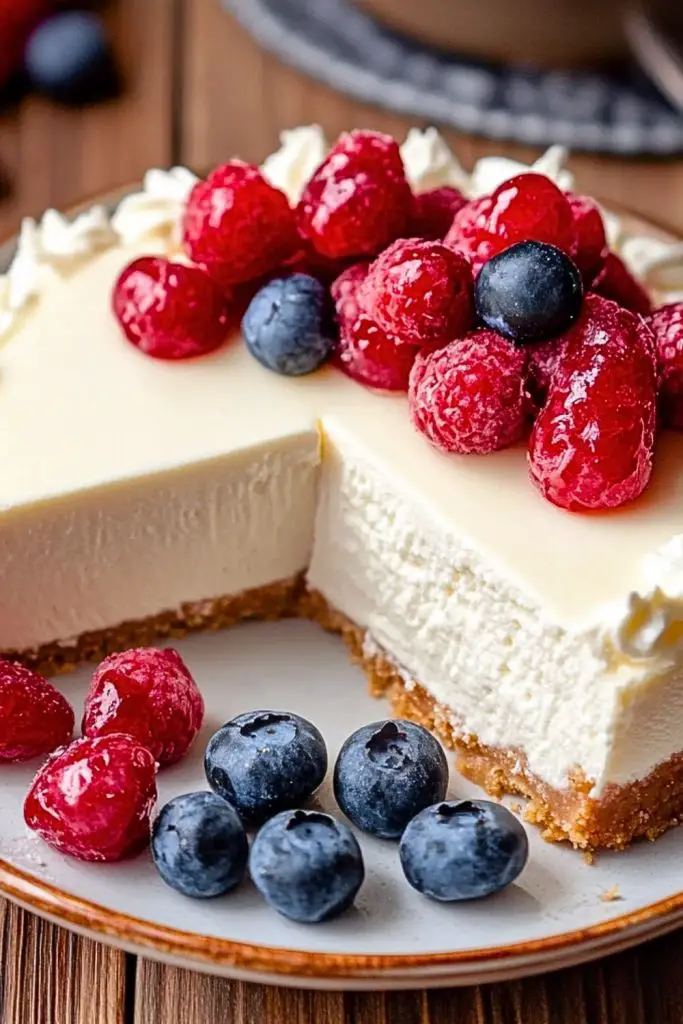
Step 5: Add Toppings and Serve
- Before serving, carefully remove the sides of the springform pan.
- Top the cheesecake with fresh strawberries, blueberries, and whipped cream swirls.
- Slice with a sharp, clean knife (wiping between cuts for neat slices) and serve chilled.
Notes
- Customize the Crust: While graham crackers are the classic choice, you can use digestive biscuits, chocolate cookies, or vanilla wafers for a twist.
- Flavor Enhancements: For a subtle flavor boost, add zest from a lemon or orange into the filling.
- Make It Mini: You can divide the mixture into muffin tins with liners to create mini cheesecakes—perfect for parties or single servings.
- Sweetness Adjustment: Taste your filling before folding in the whipped cream—feel free to adjust the sugar to match your preference.
- Chill Time Matters: If you’re short on time, chill the cheesecake in the freezer for 2 hours, but let it sit at room temperature for 10–15 minutes before serving to soften slightly.
Watch Out for These Mistakes While Cooking
- Using Cold Cream Cheese: This is the most common pitfall. Cold cream cheese doesn’t blend well and results in a lumpy filling. Always soften it first.
- Overmixing the Whipped Cream: Once your cream reaches stiff peaks, stop mixing. Overwhipping can turn it grainy or butter-like.
- Skipping the Chill Time: Cutting into the cheesecake too early will leave you with a soupy mess. Be patient—chilling is essential to set the structure.
- Not Pressing the Crust Firmly: If the crust isn’t compacted well, it will crumble when sliced. Use a flat-bottomed cup to pack it tightly.
- Folding Too Roughly: Stirring the whipped cream too aggressively into the cream cheese mixture can deflate it, leading to a dense rather than airy cheesecake.
- Using Low-Fat Ingredients: These tend to be too watery and won’t set properly. Stick to full-fat dairy for stability and flavor.
- Forgetting to Grease or Line the Pan: Though a springform pan is helpful, lightly greasing or lining the bottom makes removal even easier.
- Poor Topping Timing: Add toppings like fresh fruit just before serving to keep them vibrant and prevent sogginess.
What to Serve With No Bake Cheesecake?
While this no bake cheesecake is a showstopper on its own, pairing it with the right side flavors, drinks, or accompaniments can elevate the experience and round out your dessert table beautifully.
8 Recommendations:
- Fresh Berry Medley
A bowl of mixed strawberries, blueberries, and raspberries adds a fresh, juicy contrast to the creamy richness of the cheesecake. - Lemon Curd or Raspberry Sauce
A drizzle of tart citrus curd or berry sauce over each slice brings bright acidity that balances the sweetness. - Espresso or Strong Coffee
The slight bitterness of coffee pairs wonderfully with the smooth, sweet filling—perfect for dessert hour. - Sparkling Wine or Prosecco
A light bubbly drink complements the airy texture and adds a touch of celebration. - Mint Leaves and Dark Chocolate Shavings
Garnish your slices with these to add elegance, depth, and a refreshing twist. - Roasted Nuts or Candied Pecans
Sprinkle crushed nuts on top for a subtle crunch and nutty flavor to contrast the soft texture. - Vanilla Ice Cream
For an indulgent dessert plate, serve a scoop of ice cream alongside your cheesecake slice—especially fun for kids! - Fruit Kabobs or Skewers
Light and colorful, these add a playful, healthful side option that complements the richness of the dessert.
Storage Instructions
To keep your No Bake Cheesecake fresh and delicious, proper storage is key—especially since it contains dairy.
Refrigerator Storage
- Best for short-term (up to 5 days).
- Keep the cheesecake covered tightly with plastic wrap or stored in an airtight container to prevent it from absorbing fridge odors or drying out.
- If pre-sliced, place parchment paper between slices to keep them neat and prevent sticking.
Freezer Storage
- Ideal for making ahead or saving leftovers longer.
- Place the whole cheesecake or individual slices on a baking sheet and freeze until firm (about 1–2 hours).
- Then wrap in plastic wrap and foil, and transfer to a freezer-safe bag or container.
- Freeze for up to 1 month.
- To serve, thaw in the fridge overnight. Avoid thawing at room temperature to preserve the texture and prevent weeping.
Pro Tip: Hold off on adding fresh fruit toppings if you plan to freeze the cheesecake—they tend to become mushy when thawed. Add them fresh just before serving.
Estimated Nutrition
Here’s a general estimate for one slice (based on a 9-inch cheesecake cut into 10 servings):
- Calories: 410
- Total Fat: 32g
- Saturated Fat: 19g
- Cholesterol: 105mg
- Sodium: 230mg
- Carbohydrates: 28g
- Sugar: 20g
- Protein: 5g
- Fiber: <1g
Note: Nutritional values can vary based on brands and optional toppings used.
Frequently Asked Questions
1. Can I make this no bake cheesecake ahead of time?
Absolutely. In fact, it’s recommended! Making it a day ahead allows it to set completely and enhances the flavor. Just store it covered in the fridge until serving.
2. Can I use low-fat cream cheese or whipped topping instead of heavy cream?
You can, but be aware: using low-fat alternatives may result in a softer, less stable cheesecake. Full-fat ingredients provide the best texture and flavor.
3. Why isn’t my cheesecake setting properly?
This usually happens if the filling wasn’t whipped enough, or if it didn’t chill long enough. Make sure to beat the cream to stiff peaks and let the cake refrigerate for at least 6–8 hours.
4. Can I make this cheesecake gluten-free?
Yes! Just swap out the graham crackers for a gluten-free variety. Double-check all other ingredient labels for hidden gluten sources.
5. How do I prevent the crust from crumbling when slicing?
Use a flat-bottomed glass to firmly press the crust into the pan, and ensure it chills properly before adding the filling. For slicing, use a sharp knife dipped in hot water and wiped clean between cuts.
6. What can I use if I don’t have a springform pan?
You can use a deep pie dish or a square pan lined with parchment paper. However, a springform pan provides the cleanest release and classic look.
7. Can I add flavors like chocolate or peanut butter to the filling?
Definitely! Add melted and cooled chocolate or a few tablespoons of peanut butter to the cream cheese mixture before folding in the whipped cream. Just balance the sweetness as needed.
8. How long does it last in the fridge after serving?
If stored properly in an airtight container, it should stay fresh in the refrigerator for up to 5 days.
Conclusion
This No Bake Cheesecake proves that elegance and ease can coexist beautifully in the kitchen. With its rich creaminess, crisp buttery crust, and flexibility in flavors and toppings, it’s a must-have recipe in your dessert collection. Whether you’re preparing it for a celebration, holiday, or simply to satisfy a craving, it always hits the sweet spot. Plus, it’s no bake—so it’s just as easy as it is indulgent.
No Bake Cheesecake Recipe
- Total Time: 1 x 9-inch cheesecake (8–10 slices)
Description
Craving something creamy, cool, and irresistibly indulgent without ever touching the oven? This No Bake Cheesecake is your go-to dessert! It’s an easy recipe ideal for everything from quick breakfasts, sweet snack cravings, to impressive dinner ideas. Made with a buttery graham cracker crust and a silky smooth cream cheese filling, it sets beautifully in the fridge and is endlessly customizable with fruits, chocolate, or whipped cream. Whether you’re planning summer party food, holiday treats, or just browsing simple food ideas, this cheesecake hits the mark—every time. Light, luscious, and effortless, it’s the dessert that delights without the stress.
Ingredients
For the Crust:
- 2 cups graham cracker crumbs
- ½ cup unsalted butter, melted
- 2 tablespoons granulated sugar (optional)
- Pinch of salt
For the Filling:
- 16 oz (450g) full-fat cream cheese, softened
- ¾ cup powdered sugar, sifted
- 1 teaspoon pure vanilla extract
- 1 tablespoon lemon juice
- 1½ cups heavy whipping cream, cold
Optional Toppings:
- Fresh strawberries and blueberries
- Whipped cream
- Fruit preserves or chocolate shavings
Instructions
- Make the Crust:
Mix graham cracker crumbs, melted butter, sugar, and salt in a bowl. Press firmly into a springform pan. Chill for 20 minutes. - Prepare the Filling:
Beat cream cheese until smooth. Add powdered sugar, vanilla, and lemon juice; mix until creamy. In another bowl, whip heavy cream until stiff peaks form. Gently fold it into the cream cheese mixture. - Assemble:
Spread the filling evenly over the chilled crust. Smooth the top with an offset spatula. - Chill:
Refrigerate for 6–8 hours (or overnight) until set. - Top & Serve:
Decorate with berries and whipped cream before serving. Slice with a clean, sharp knife and enjoy cold.
- Prep Time: 20 minutes
- Chill Time: 6 hours