

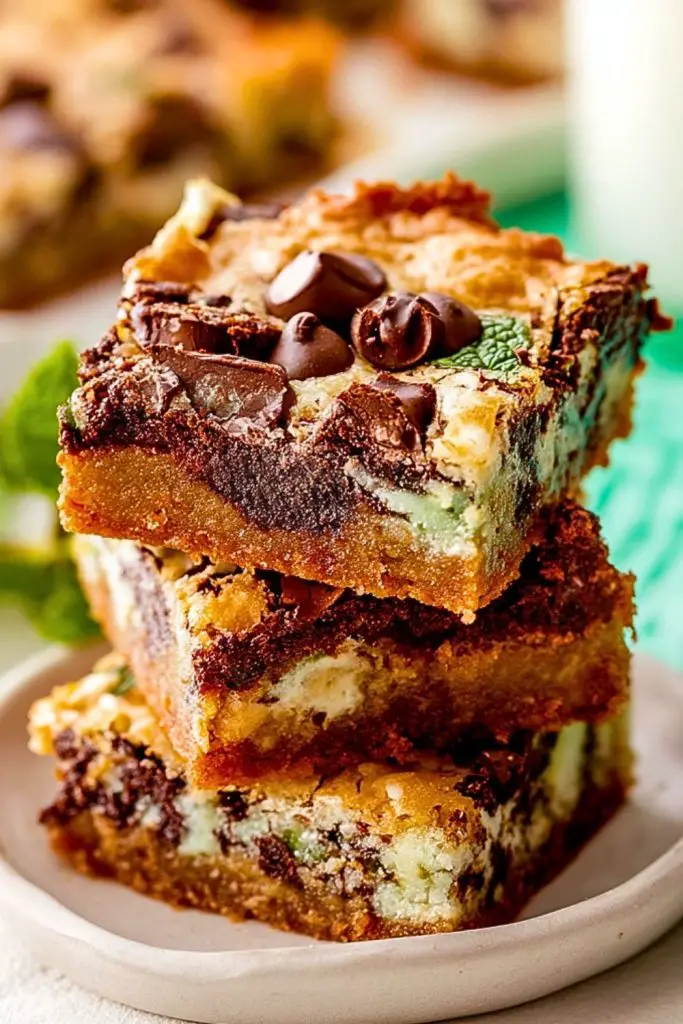
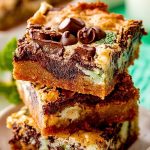
Imagine biting into a dessert bar that’s decadently chewy, perfectly gooey in the center, and bursting with the refreshing zing of mint and the richness of chocolate. Mint Magic Bars are a festive, colorful treat layered with chocolate chips, white chocolate morsels, and mint cream cookies, all held together by a buttery, golden graham cracker crust. These dessert bars look as magical as they taste, making them a showstopper at holiday parties, bake sales, or cozy family nights.
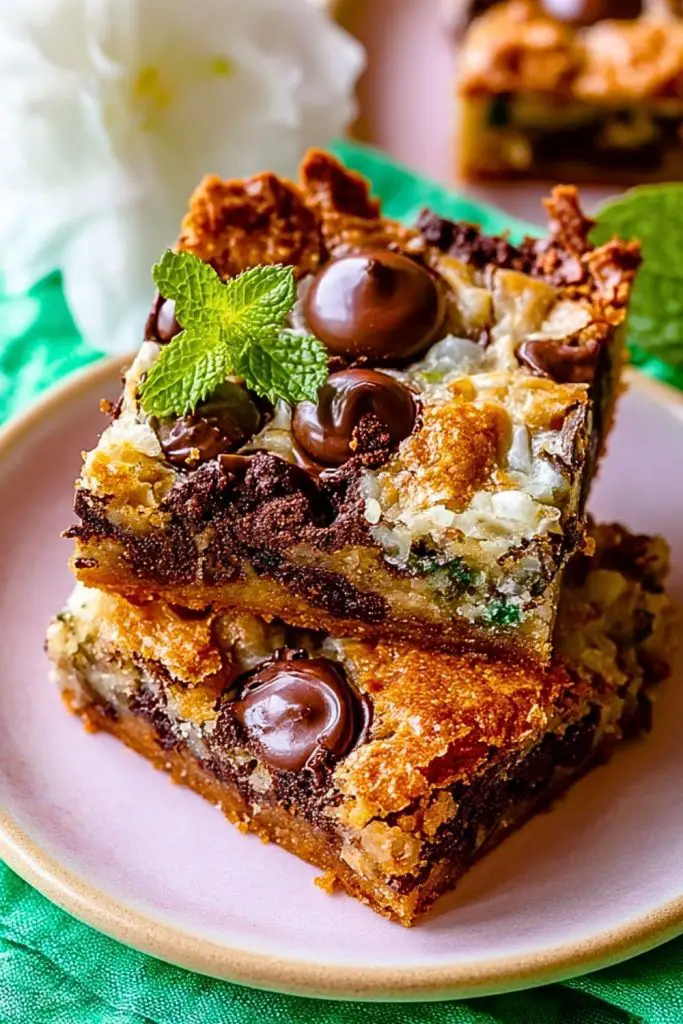
What makes Mint Magic Bars extra special is their balance of texture and flavor. The crust delivers a satisfying crunch, the condensed milk creates a sweet, fudgy glue that binds the toppings, and the mix of chocolate and mint is both nostalgic and invigorating. Whether you’re a seasoned baker or just getting started, this recipe is practically foolproof and guaranteed to impress.
Why You’ll Love This Mint Magic Bars Recipe
- Layered Perfection: Every bite includes a little bit of everything—crunchy cookie, melted chocolate, minty coolness, and buttery crust.
- No Mixer Needed: Simple ingredients layered and baked—no need for creaming or blending.
- Crowd-Pleaser: The vibrant green from mint cookies and the rich, chocolatey top make these bars both eye-catching and mouth-watering.
- Versatile: Easily adaptable with different cookie flavors or chip varieties.
Preparation Phase & Tools to Use for Mint Magic Bars
Creating Mint Magic Bars is surprisingly simple, but having the right tools can make the process smoother and more enjoyable. Here’s what you’ll need and why each tool matters:
- 9×13 Baking Pan: This size is perfect for achieving the ideal thickness in each bar. A glass or metal pan works, but if you prefer crispier edges, go with metal.
- Parchment Paper: Lining your pan ensures the bars lift out cleanly and don’t stick to the bottom, making cleanup a breeze.
- Mixing Bowls: You’ll need a couple of bowls—one for the crust mixture and another for layering ingredients. Glass or stainless steel are best for easy cleanup.
- Measuring Cups and Spoons: Precision is key in baking, especially when dealing with sweetened condensed milk or crushed cookies.
- Spatula or Spoon: A rubber spatula helps press the crust evenly and spread layers without tearing the base.
- Food Processor or Rolling Pin (optional): If you’re starting with whole graham crackers or cookies, these help crush them to the perfect texture quickly.
Each tool plays a vital role in either prepping, layering, or baking your Mint Magic Bars to perfection, ensuring the end result is both beautiful and delicious.
Preparation Tips
- Line and Lightly Grease: Even with parchment paper, lightly greasing the sides of the pan helps prevent any gooey edges from sticking.
- Use Fresh Ingredients: Especially when it comes to mint cookies and chocolate chips—fresh, high-quality ingredients elevate the flavor.
- Press Crust Firmly: Use the back of a spoon or a flat-bottomed glass to pack the crust tightly. A well-packed crust holds the bars together.
- Layer Strategically: Start with heavier items like cookies and chips before pouring over the sweetened condensed milk. This prevents toppings from sinking.
- Cool Completely: Let the bars cool entirely before cutting. This helps them firm up and makes slicing cleaner and easier.
Ingredients for Mint Magic Bars
Here’s everything you’ll need to create these irresistibly gooey, mint-chocolate layered bars. Each ingredient plays a key role in building flavor, texture, and visual appeal.
For the Crust:
- 2 cups graham cracker crumbs – This is the base of your bars, offering a buttery crunch and mild sweetness.
- ½ cup unsalted butter, melted – Helps bind the crumbs into a firm, flavorful crust.
For the Magic Layer:
- 1 can (14 oz) sweetened condensed milk – The “magic” that holds everything together, adding moisture and rich sweetness.
- 1 cup semi-sweet chocolate chips – Melts into fudgy ribbons throughout the bars.
- ¾ cup white chocolate chips – Offers creamy contrast and visual variety.
- 1 ½ cups mint crème-filled sandwich cookies, roughly chopped – Adds a pop of mint and crunch in every bite.
- ½ cup chopped Andes mints or mint chocolate pieces – For that intense mint-chocolate flavor.
- ¼ teaspoon kosher salt – Enhances the sweetness and balances the flavor.
Optional Toppings: Additional chocolate or white chips sprinkled on top for an extra indulgent finish.
Step 1: Prepare the Pan and Preheat the Oven
Start by preheating your oven to 350°F (175°C). Line a 9×13-inch baking pan with parchment paper, leaving some overhang on the sides to easily lift the bars out later. Lightly grease the paper to prevent sticking.
Step 2: Make the Crust
In a mixing bowl, combine 2 cups graham cracker crumbs with ½ cup melted butter. Stir until the mixture resembles wet sand. Pour the mixture into your prepared pan and press it firmly and evenly into the bottom using a spatula or the bottom of a flat glass.
Step 3: Layer the Goodness
Evenly sprinkle the chopped mint crème cookies, semi-sweet chocolate chips, white chocolate chips, and mint chocolate pieces over the crust. Distribute everything so you get a bit of each in every bite.
Step 4: Pour the Sweetened Condensed Milk
Slowly drizzle the sweetened condensed milk over the entire pan. Try to coat as evenly as possible to ensure every layer gets that gooey, cohesive texture once baked.
Step 5: Bake to Perfection
Place the pan in the oven and bake for 25–30 minutes, or until the top is golden and the edges are bubbly. Watch closely in the final minutes to avoid overbaking, which can dry out the bars.
Step 6: Cool and Slice
Remove from the oven and let the bars cool completely in the pan. Once cooled, lift them out using the parchment overhang and cut into squares. For cleaner cuts, chill them in the fridge for 30 minutes before slicing.
Notes
- Customization is easy: While mint is the star here, you can easily swap the mint cookies for other sandwich cookie flavors like peanut butter or golden vanilla if you’re looking to mix things up.
- Make ahead: Mint Magic Bars can be made up to 2 days in advance and stored covered at room temperature or in the fridge. The flavors deepen and the bars become even fudgier with time.
- Chill for best results: These bars slice much cleaner when chilled. If you’re serving at a party, refrigerate first for the prettiest presentation.
- Double the chocolate: For extra richness, drizzle melted chocolate over the top once cooled—or add a handful of dark chocolate chunks in with your chips.
Watch Out for These Mistakes While Cooking
- Using too much butter in the crust: It may cause the crust to bubble up or turn greasy. Stick to the measured ½ cup for a perfect base.
- Not pressing the crust enough: If it’s too loose, the bars can fall apart. Really compact the crust into the pan.
- Skipping parchment paper: Without it, you’ll have a tough time getting the bars out in one piece, especially with the gooey condensed milk layer.
- Overbaking: This is a big one. Once the top starts to brown and bubble, it’s ready. If you wait too long, the bars will be dry.
- Uneven layering: Try to spread each topping evenly so every bar has a balance of chocolate, cookie, and mint.
- Using low-fat condensed milk: It just doesn’t have the same richness. Stick to full-fat for best flavor and texture.
- Slicing too early: Give them enough time to cool completely, or you’ll end up with a gooey mess.
- Storage missteps: Don’t cover them while still warm, or they’ll get soggy from condensation.
What to Serve With Mint Magic Bars?
Mint Magic Bars are rich, sweet, and full of personality—so when pairing them with other dishes or drinks, aim to complement their bold flavor without overwhelming it. Whether you’re serving them as part of a dessert spread or enjoying a single bar with a cozy beverage, these pairings will elevate the experience.
8 Tasty Serving Recommendations
- Vanilla Bean Ice Cream
A scoop of cold, creamy vanilla balances the mint and chocolate with a touch of mellow sweetness. - Hot Chocolate or Mocha Latte
A warm, chocolatey drink brings out the richness of the bars while the coffee notes highlight the mint. - Fresh Berries
Serve with raspberries or strawberries for a fruity contrast that cuts through the sweetness. - Whipped Cream & Crushed Peppermint Garnish
Add a festive flair by topping your bars with whipped cream and a dusting of peppermint. - Espresso Shot or Cold Brew Coffee
Bold and bitter coffee tones are the perfect contrast to the sugary layers. - Chocolate Fondue Dip
For the extra indulgent, serve small pieces alongside warm chocolate fondue and let the dipping begin. - Mint Tea
Lean into the minty vibe with a warm mug of herbal mint tea—it refreshes the palate between bites. - Salted Pretzel Sticks or Crackers
A salty, crunchy snack on the side helps balance the sweetness and adds texture variety.
Storage Instructions
Proper storage keeps your Mint Magic Bars tasting fresh and delicious, whether you’re saving leftovers or prepping ahead for a gathering.
- Room Temperature: Store in an airtight container for up to 4 days. Keep the bars in a cool, dry place away from direct sunlight.
- Refrigerator: To extend freshness and make slicing easier, refrigerate them in a sealed container for up to 1 week. This also enhances the texture by making them firmer and chewier.
- Freezer: Wrap individual bars in parchment or wax paper and place them in a freezer-safe zip bag or container. They’ll keep well for up to 2 months. Thaw overnight in the fridge or let sit at room temperature for 30–60 minutes before serving.
Pro Tip: Place parchment between layers if stacking to prevent sticking.
Estimated Nutrition
Please note this is an approximate estimate and can vary based on the specific brands and quantities used.
- Serving Size: 1 bar (based on 24 bars per batch)
- Calories: ~240 kcal
- Total Fat: 13g
- Saturated Fat: 7g
- Cholesterol: 20mg
- Sodium: 110mg
- Total Carbohydrates: 29g
- Sugars: 22g
- Protein: 3g
- Fiber: 1g
These bars are indulgent, so they’re best enjoyed in moderation—or savored slowly with a good cup of coffee!
Frequently Asked Questions
1. Can I use a different type of cookie instead of mint crème cookies?
Absolutely! Chocolate sandwich cookies, peanut butter cookies, or even golden Oreos can be used. Just keep the quantity the same and enjoy experimenting with new flavors.
2. Do I need to crush the cookies before adding them?
You should roughly chop or crush the cookies to ensure they distribute well and don’t sink. Large chunks add texture while still blending into the layers.
3. Can I make Mint Magic Bars dairy-free?
Yes! Use dairy-free butter and sweetened condensed coconut milk. Swap in dairy-free chocolate chips to make the entire recipe suitable for dairy-sensitive eaters.
4. Why did my crust fall apart?
This often happens if the crust wasn’t pressed firmly enough or if there wasn’t enough butter to bind it. Be sure to compact it evenly and thoroughly before layering.
5. Should I refrigerate the bars before serving?
It’s not required, but refrigerating them for at least 30 minutes before slicing makes for cleaner, neater bars. Chilling also enhances the chewy texture.
6. Can I use foil instead of parchment paper?
Yes, but make sure to grease it well. Parchment is easier for lifting and slicing, but foil can work in a pinch.
7. How do I know when the bars are done baking?
They’re ready when the edges are golden and bubbling slightly. The center may still look soft—that’s okay! It will firm up as it cools.
8. Can I double the recipe?
You can, but it’s best to use two separate pans to ensure even baking. A single oversized pan may not bake uniformly.
Conclusion
Mint Magic Bars are the perfect marriage of nostalgic comfort and minty indulgence, offering something for everyone—whether you’re a chocolate fanatic, a mint lover, or just in need of a sweet pick-me-up. Their vibrant layers, chewy texture, and eye-catching colors make them ideal for holidays, parties, or just because. With simple steps, everyday tools, and rich flavor in every bite, these bars will easily earn a permanent place in your baking rotation.
Mint Magic Bars
- Total Time: 35 minutes
- Yield: 24 bars
Description
If you’re craving a treat that’s equal parts nostalgic, indulgent, and refreshing, Mint Magic Bars are your answer. These layered dessert bars combine a buttery graham cracker crust with gooey sweetened condensed milk, mint crème-filled cookies, and both semi-sweet and white chocolate chips. Perfect for parties, bake sales, or as a sweet surprise after dinner, these bars are rich in flavor and beautifully green-swirled for a fun presentation. Whether you’re looking for an easy recipe, quick dessert idea, or an eye-catching addition to your holiday spread, this recipe delivers on all fronts. Think chewy centers, crispy edges, and a blast of minty chocolate in every bite.
Ingredients
- 2 cups graham cracker crumbs
- 1/2 cup unsalted butter, melted
- 1 can (14 oz) sweetened condensed milk
- 1 cup semi-sweet chocolate chips
- 3/4 cup white chocolate chips
- 1 1/2 cups mint creme-filled sandwich cookies, chopped
- 1/2 cup chopped Andes mints or mint chocolate pieces
- 1/4 tsp kosher salt
Instructions
- Preheat oven to 350°F (175°C). Line a 9×13 inch pan with parchment paper and lightly grease.
- Combine graham cracker crumbs and melted butter. Press into the bottom of the pan to form a crust.
- Evenly layer chopped mint cookies, semi-sweet chocolate chips, white chocolate chips, and mint chocolate pieces.
- Drizzle the sweetened condensed milk over the top evenly.
- Bake for 25-30 minutes until the edges are golden and the center is bubbling.
- Cool completely in the pan. Refrigerate for easier slicing.
- Lift out using parchment, slice into bars, and serve.
- Prep Time: 10 minutes
- Cook Time: 25 minutes