

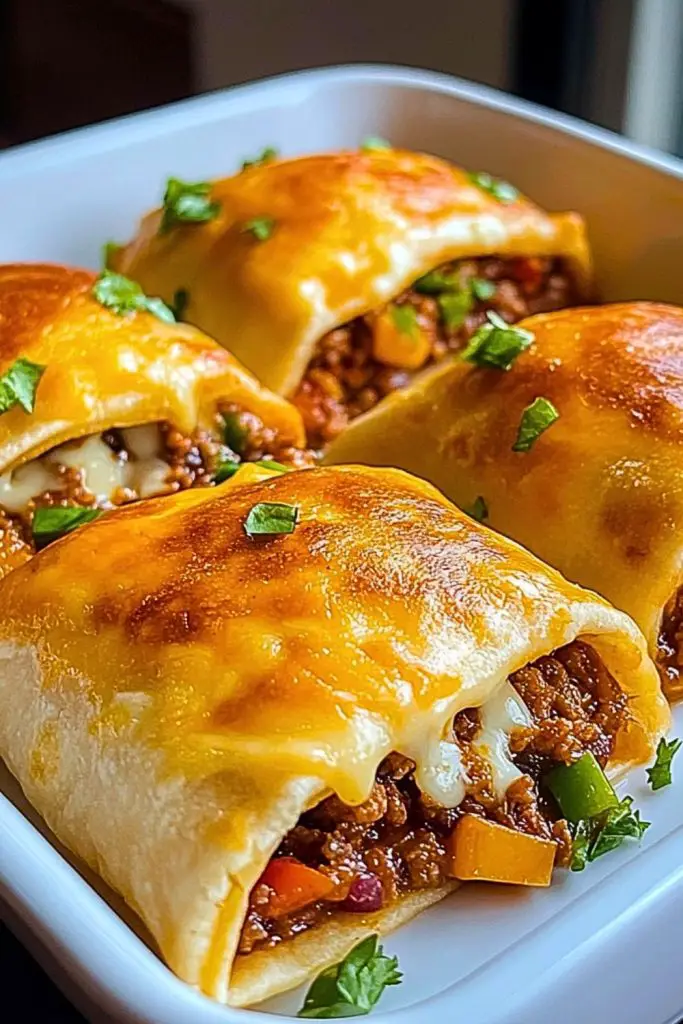
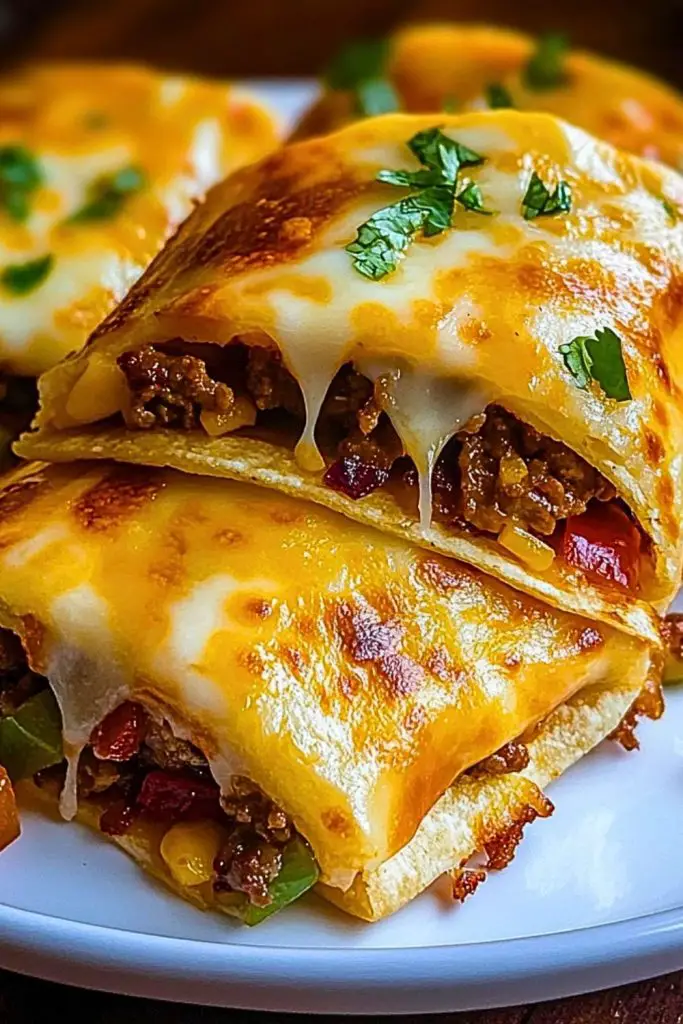
Crispy on the outside, melty and savory on the inside—Loaded Cheesy Pocket Tacos are the ultimate comfort food with a fun twist. These golden-baked tortillas are packed with seasoned ground beef, colorful mixed vegetables, tangy tomato sauce, and gooey melted cheese. With every bite, you experience a balanced fusion of textures and flavors that feel both familiar and exciting. They’re a perfect cross between tacos and enchiladas, making them ideal for family dinners, game nights, or casual get-togethers.
What makes this dish truly irresistible is how it marries convenience with indulgence. The “pocket” style presentation keeps everything neatly packed, while the topping of melted cheese and fresh herbs adds a restaurant-level flair. You don’t need any fancy ingredients or techniques—just simple steps and a bit of layering to create a stunning result. Whether you’re serving kids, impressing guests, or meal-prepping for the week, these tacos check every box.
Why You’ll Love This Loaded Cheesy Pocket Tacos Recipe
- Kid-Friendly & Crowd-Pleasing: Perfectly portioned and mess-free for little hands and party trays.
- Customizable Filling: Swap in chicken, beans, or veggies based on what you have at home.
- Make-Ahead Friendly: Assemble ahead of time and bake just before serving.
- Comfort Food with a Kick: Satisfying and flavorful, especially when served with salsa or sour cream.
- Great Use for Leftovers: A smart way to transform leftover taco meat or veggies.
Preparation Phase & Tools to Use
Before diving into making Loaded Cheesy Pocket Tacos, a bit of prep can go a long way. Having the right tools at hand will streamline the process and help your tacos come out beautifully shaped, perfectly baked, and loaded without falling apart.
Essential Tools and Equipment
- Large Skillet: Crucial for browning the ground beef evenly and sautéing the vegetables to lock in flavor. A non-stick skillet makes cleanup much easier.
- Cutting Board & Sharp Knife: You’ll need these for dicing vegetables or fresh herbs. A stable board and quality knife help you prep quickly and safely.
- Mixing Bowls: Useful for prepping fillings or holding your cheese mix and sauces separately.
- 9×13 Baking Dish: This size holds 6–8 pocket tacos snugly, which helps them maintain shape while baking.
- Measuring Cups & Spoons: Accuracy matters, especially for seasoning and cheese quantities.
- Cheese Grater: If you’re using block cheese, fresh-grated cheese melts much better than the pre-shredded kind.
- Aluminum Foil (Optional): Useful if you want to lightly cover the tacos during baking to prevent over-browning.
Preparation Tips
- Preheat First: Always preheat your oven before assembling the tacos. This ensures even baking and the cheese will melt just right.
- Drain the Beef: Once browned, drain excess fat to prevent soggy tacos or pooling oil in the baking dish.
- Warm the Tortillas: Slightly heating tortillas (microwave or skillet) makes them pliable and less likely to tear while folding.
- Layer Thoughtfully: Put cheese both inside the filling and on top for maximum gooey goodness.
- Use Parchment Paper for Clean-Up: Lining the baking dish makes cleanup a breeze and helps prevent sticking.
- Avoid Overfilling: It might be tempting to pile the filling high, but too much makes rolling tricky and may lead to bursting during baking.
Ingredients for This Loaded Cheesy Pocket Tacos Recipe
Creating these golden, cheesy pocket tacos is all about the right mix of hearty, flavorful ingredients. Here’s everything you’ll need to bring this delicious dish to life:
For the Filling:
- 1 lb ground beef – Choose lean (85/15) for a rich, balanced flavor without excess grease.
- ½ cup onion, finely chopped – Adds a sweet, aromatic base to the meat.
- 1 tsp garlic powder – For a hint of garlicky depth without needing fresh cloves.
- 1 tsp smoked paprika – Adds a subtle smokiness that elevates the filling.
- ½ tsp cumin – Essential for that signature taco taste.
- Salt and pepper, to taste – Adjust to your preference.
Mix-Ins:
- 1 cup frozen mixed vegetables (corn, peas, carrots, green beans) – For color, nutrition, and texture.
- ¾ cup tomato sauce or enchilada sauce – Acts as a rich binder and adds a tangy, savory kick.
For the Pockets:
- 6–8 flour tortillas (medium, about 8-inch) – Soft and foldable, perfect for wrapping.
- 2 cups shredded cheese (cheddar, Monterey Jack, or a blend) – Divided for filling and topping.
- ½ cup mozzarella slices (optional) – Lends stretchiness and enhances the cheesy crust.
Topping:
- Fresh cilantro or parsley, chopped – For a vibrant finish and fresh flavor.
- Chopped green onions (optional) – Adds mild crunch and visual contrast.
Step-by-Step Instructions
Follow these steps for a smooth cooking process and perfect results. Each one builds toward that golden, cheesy, flavor-packed finish you’re aiming for.
Step 1: Cook the Ground Beef
Heat a large skillet over medium heat. Add the ground beef and chopped onions. Cook for 6–8 minutes, breaking the meat apart with a spatula until browned and the onions are soft.
Drain any excess fat, then stir in garlic powder, paprika, cumin, salt, and pepper. Let it cook for another 1–2 minutes to toast the spices.
Step 2: Mix in Vegetables and Sauce
Add the frozen mixed vegetables straight into the skillet. Stir for 2–3 minutes until they’re heated through.
Pour in the tomato sauce (or enchilada sauce) and stir to combine. Let it simmer for 5 minutes, allowing the flavors to blend and the mixture to thicken slightly. Remove from heat.
Step 3: Prepare the Tortillas
Warm the tortillas briefly in a microwave (wrapped in a damp paper towel for 30 seconds) or on a dry skillet. This step prevents cracking while folding.
Spoon about 2–3 tablespoons of the meat and veggie filling onto the lower third of each tortilla. Sprinkle with a bit of shredded cheese, then roll tightly like a burrito, tucking in the sides.
Step 4: Assemble in the Baking Dish
Preheat your oven to 375°F (190°C).
Lightly grease or line a 9×13 baking dish with parchment. Place the rolled tortillas seam-side down in the dish, arranging them close together to hold shape.
Sprinkle the remaining shredded cheese on top. If using mozzarella slices, lay them across the top of the rolls for that signature cheesy finish.
Step 5: Bake to Perfection
Bake uncovered for 18–22 minutes, or until the cheese is bubbling and lightly golden on top.
For extra browning, broil on high for 2 minutes—just keep an eye on it!
Step 6: Garnish and Serve
Remove from the oven and let them cool for a few minutes. Sprinkle with chopped fresh cilantro or parsley and green onions if desired.
Serve hot, straight from the dish!
Notes
- Protein Options: While ground beef is traditional, you can easily swap it with ground chicken, turkey, or even a plant-based meat alternative.
- Cheese Varieties: Use any melt-friendly cheese you love—cheddar, pepper jack, Colby, or even a smoky gouda work well.
- Spice Level: Want heat? Add chopped jalapeños to the filling or sprinkle crushed red pepper flakes during cooking.
- Tortilla Swap: Flour tortillas hold up best for baking, but whole wheat or gluten-free versions can be substituted if needed.
- Freezer Friendly: These pockets freeze great! Assemble, wrap individually in foil or plastic wrap, and freeze before baking.
- Sauce Boost: For richer flavor, stir in a tablespoon of chipotle in adobo or a splash of hot sauce into the filling.
- Make it a Meal: Serve over a bed of lettuce with a dollop of sour cream for a taco salad twist.
Watch Out for These Mistakes While Cooking
- Overfilling the Tortillas: Too much filling will lead to breakage and oozing during baking. Stick to 2–3 tablespoons max.
- Skipping the Preheat: Always preheat your oven to ensure even melting and crisping.
- Cold Tortillas: Trying to roll stiff tortillas can lead to cracks and breaks. Always warm them first.
- Too Much Liquid in the Filling: Make sure your filling isn’t watery—simmer until thick. Excess moisture causes soggy pockets.
- Uneven Rolling: If one end is thicker, it may not bake evenly. Keep your folds tight and even.
- Under-seasoning: The filling needs to be flavorful on its own. Taste it before assembly and adjust spices as needed.
- Skipping the Rest Time: Let the pockets cool for a few minutes before serving—this helps them firm up and makes for easier slicing.
What to Serve With Loaded Cheesy Pocket Tacos?
These golden, cheesy delights are already a star on the table—but pairing them with the right sides can elevate the whole experience. Whether you’re aiming for a casual weeknight dinner or a full Tex-Mex spread, these ideas will round out your plate beautifully.
8 Recommendations
- Mexican Street Corn (Elote)
Sweet corn on the cob smothered in creamy mayo, cotija cheese, lime juice, and chili powder—bold, tangy, and irresistible. - Cilantro Lime Rice
A fresh, zesty rice side balances the richness of the tacos and adds a clean contrast. - Refried Beans or Black Beans
A classic staple, smooth or whole beans make a hearty, protein-rich complement. - Guacamole and Tortilla Chips
Creamy avocado dip with crispy chips is perfect for scooping between bites or starting the meal. - Mexican Slaw
A crunchy, colorful mix of cabbage, carrots, and lime vinaigrette gives a refreshing, tangy bite. - Pico de Gallo
Fresh tomato salsa loaded with onions, cilantro, and jalapeño. Spoon it on top of the tacos or enjoy on the side. - Sour Cream or Greek Yogurt
A cooling element that’s perfect for mellowing any spice and adding creaminess. - Churros or Cinnamon Sugar Chips
For dessert, keep the theme going with a sweet crunch that ends the meal on a fun note.
Storage Instructions
Loaded Cheesy Pocket Tacos store beautifully, making them ideal for leftovers, lunchboxes, or prepping ahead.
Refrigerator Storage
- How: Place leftover tacos in an airtight container or wrap them individually in foil or plastic wrap.
- Shelf Life: Keeps well in the fridge for up to 4 days.
- Reheating: Bake at 350°F (175°C) for 10–12 minutes or microwave for 1–2 minutes. To restore crispness, use a toaster oven or air fryer.
Freezer Storage
- How: Wrap each unbaked or baked taco individually in foil or freezer paper, then place in a zip-top freezer bag.
- Shelf Life: Store for up to 2 months.
- Reheating: Bake from frozen at 375°F (190°C) for 25–30 minutes, or thaw overnight and reheat normally.
Avoid freezing with raw vegetables inside, as they may turn mushy upon thawing.
Estimated Nutrition (Per Taco, Based on 8 Servings)
These values are approximate and may vary depending on brand and portion sizes:
- Calories: 320
- Protein: 18g
- Carbohydrates: 22g
- Fat: 18g
- Saturated Fat: 8g
- Fiber: 3g
- Sugar: 4g
- Sodium: 570mg
This dish offers a satisfying balance of protein, carbs, and fats, making it a hearty and filling option for any meal.
Part 8: Frequently Asked Questions
1. Can I make these tacos ahead of time?
Yes! You can fully assemble the pocket tacos and refrigerate them (unbaked) for up to 24 hours. Just cover tightly and bake when ready.
2. How do I keep the tortillas from cracking when rolling?
Warm the tortillas first—either in the microwave with a damp paper towel or on a skillet. This makes them flexible and easier to roll without tearing.
3. Can I use corn tortillas instead?
You can, but corn tortillas are more prone to breaking when folded. If you prefer them, soften in oil or steam before use, and consider a smaller roll style.
4. Is it possible to make this vegetarian?
Absolutely. Swap the ground beef for sautéed mushrooms, black beans, or crumbled tofu. You can also use plant-based meat substitutes.
5. What type of cheese melts best for this recipe?
A mix of cheddar and Monterey Jack gives the best melt and flavor combo. Avoid pre-shredded cheese if possible, as it contains anti-caking agents that prevent smooth melting.
6. Can I reheat these in an air fryer?
Yes! Air fry at 350°F (175°C) for 5–7 minutes. This restores the crisp exterior without drying out the filling.
7. Can I add rice inside the taco pockets?
You can! Add a tablespoon or two of cooked rice to the filling to bulk them up. Just make sure the filling doesn’t get too heavy or soggy.
8. Are they spicy?
The base recipe is mild and family-friendly. To turn up the heat, add diced jalapeños, chili flakes, or spicy sauce to the meat mixture.
Conclusion
Loaded Cheesy Pocket Tacos are the perfect fusion of convenience and crave-worthy comfort food. With their customizable filling, oozy cheese, and golden baked shells, they’re an easy win for weeknights, potlucks, or even meal prepping. Whether you’re making them for your kids, friends, or just yourself—you’re in for a pocket-sized flavor bomb that delivers every single time.
Get ready to fall in love with taco night all over again.

Loaded Cheesy Pocket Tacos
- Total Time: 35 minutes
- Yield: 6–8 tacos
Description
Loaded Cheesy Pocket Tacos combine the irresistible elements of tacos and cheesy baked burritos. These golden-baked tortilla pockets are packed with seasoned ground beef, mixed veggies, and rich tomato sauce, all wrapped up with layers of melty cheese. Perfect for busy nights, family dinners, or party trays, they deliver both flavor and convenience in every bite.
Ingredients
- 1 lb ground beef
- 1/2 cup onion, finely chopped
- 1 tsp garlic powder
- 1 tsp smoked paprika
- 1/2 tsp cumin
- Salt and pepper, to taste
- 1 cup frozen mixed vegetables
- 3/4 cup tomato sauce or enchilada sauce
- 6–8 medium flour tortillas
- 2 cups shredded cheese (cheddar or Monterey Jack)
- 1/2 cup mozzarella slices (optional)
- Fresh cilantro or parsley, chopped (for garnish)
- Chopped green onions (optional)
Instructions
- Preheat oven to 375°F (190°C).
- In a skillet over medium heat, cook ground beef and onions until browned. Drain fat.
- Stir in garlic powder, paprika, cumin, salt, and pepper. Cook for 1–2 minutes.
- Add mixed vegetables and cook for 2–3 minutes.
- Stir in tomato sauce and simmer for 5 minutes. Remove from heat.
- Warm tortillas until pliable.
- Spoon 2–3 tablespoons of filling onto each tortilla. Add some shredded cheese and roll tightly.
- Place rolled tortillas seam-side down in a greased or parchment-lined 9×13 baking dish.
- Top with remaining shredded cheese and mozzarella slices.
- Bake for 18–22 minutes until cheese is melted and golden. Broil for 2 minutes if desired.
- Let rest for a few minutes, then garnish with fresh herbs and green onions. Serve hot.
- Prep Time: 15 minutes
- Cook Time: 20 minutes