

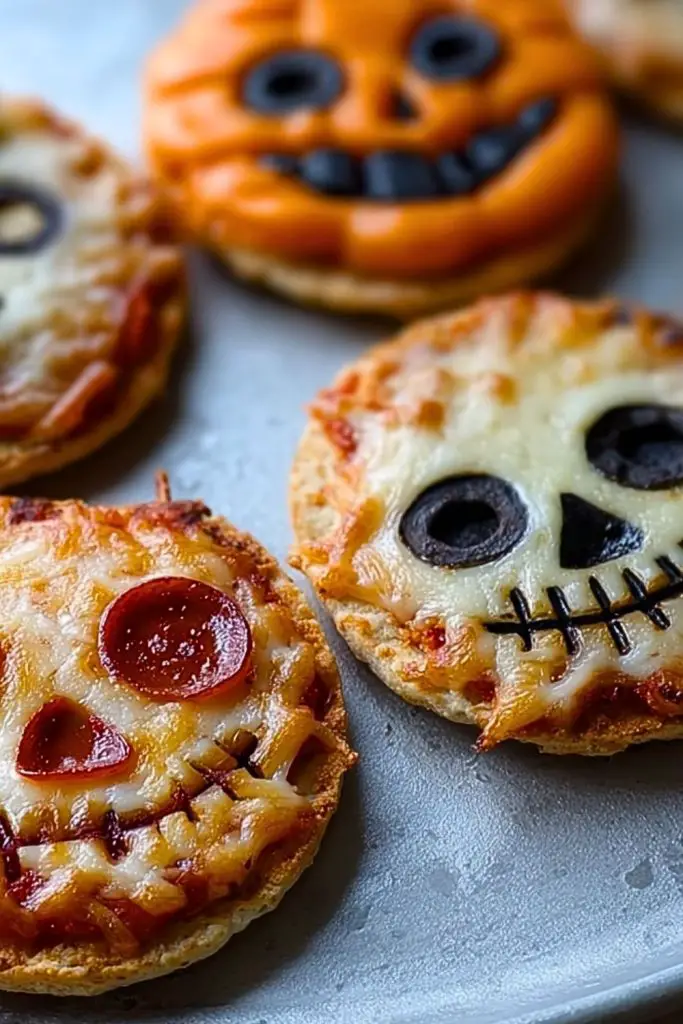
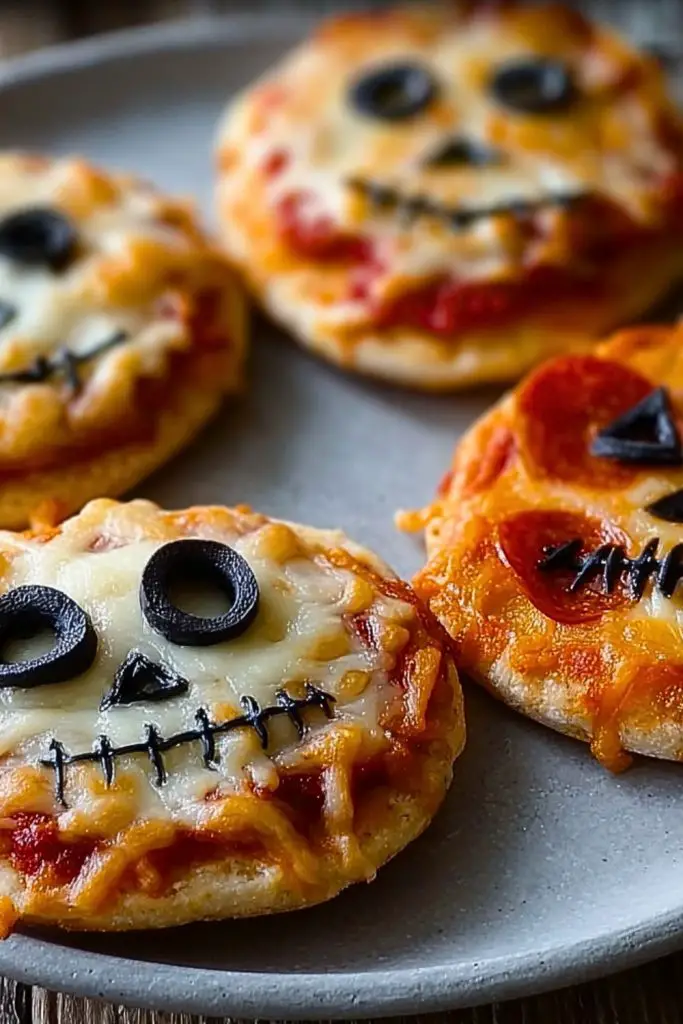
These Halloween Mini Pizzas are a spooky twist on everyone’s favorite comfort food. Each one is dressed up in frightfully fun designs—grinning jack-o’-lanterns, haunting skull faces, and creepy spiders made from black olives. Perfectly portioned for individual servings, they make the ultimate festive treat for Halloween parties, movie nights, or even a ghoulish family dinner. Whether you’re feeding kids, teens, or adults, these pizzas add a burst of creativity and seasonal flair to your Halloween food spread.
What makes them even more lovable is how customizable and easy they are to make. Start with store-bought pizza dough or flatbread for simplicity, and then top with your favorite sauce, cheese, and spooky toppings. You can make them as fun or as frightful as you like—perfect for getting the whole family involved in the kitchen. Not only do they taste amazing, but they double as edible decorations that’ll wow your guests.
Why You’ll Love This Halloween Mini Pizzas Recipe
- Quick and fun to make – Ready in under 30 minutes, perfect for busy Halloween nights.
- Kid-friendly and interactive – Let kids design their own spooky faces with toppings.
- Perfect for parties – These are bite-sized crowd-pleasers that make a great addition to any Halloween buffet.
- Customizable – Choose your favorite toppings to make each pizza unique and themed.
- Great make-ahead option – You can prep everything earlier in the day and bake them right before serving.
- Festive flair – They instantly add a spooky (and delicious) vibe to your Halloween celebration.
Preparation Phase & Tools to Use for Halloween Mini Pizzas
To create these spooky and delicious Halloween Mini Pizzas, you won’t need a haunted kitchen—just a few essential tools that make the process smooth and fun.
Essential Tools and Equipment:
- Baking Sheet or Pizza Stone: Crucial for even baking and crispy crusts. A pizza stone gives a golden finish while baking sheets work great for quantity.
- Parchment Paper: Prevents sticking and makes clean-up easy, especially when dealing with cheesy toppings.
- Rolling Pin (optional): If using homemade dough, a rolling pin helps flatten the dough evenly into mini rounds.
- Round Cookie Cutter or Glass: Ideal for cutting uniform mini pizza shapes from dough or flatbread.
- Small Bowls: Use for organizing toppings like olives, pepperoni, cheese, and sauce—great for quick access and easy decorating.
- Butter Knife or Mini Cutters: Handy for carving out jack-o’-lantern faces or skull designs from toppings.
- Oven Mitts: Safety first—always protect your hands when removing hot trays from the oven.
- Cooling Rack: Allows pizzas to cool slightly without becoming soggy on the bottom.
These tools make prep easy and give you control over creativity, especially if you’re assembling multiple themed designs.
Preparation Tips
To make your Halloween Mini Pizzas both spooky and scrumptious, follow these tips for the best results:
- Preheat your oven fully before baking to ensure the dough cooks evenly and crisps nicely on the bottom.
- Don’t overload with toppings, especially on small pizzas—it can lead to soggy crusts or uneven baking.
- Use pre-shredded mozzarella for convenience, but fresh mozzarella torn into small pieces melts better for cleaner shapes.
- Get creative with toppings: Sliced olives make excellent eyes, pepperoni rounds become jack-o’-lantern faces, and thin strips of bell pepper can mimic spider legs or stitched mouths.
- Assemble on the baking sheet to avoid transferring decorated pizzas and messing up your spooky designs.
- Keep toppings dry: Pat olives, mushrooms, or peppers dry with a paper towel so they don’t release too much moisture during baking.
- Work with chilled dough: It’s easier to cut and shape than room-temperature dough, especially when making clean mini rounds.
With a little preparation and the right tools, you’re all set to make these Halloween Mini Pizzas a festive success.
Ingredients for This Halloween Mini Pizzas Recipe
Making these mini masterpieces is all about the fun, so keep the ingredients simple and customizable. Below is a base list to get you started, but feel free to swap or add toppings to fit your spooky vision!
Dough & Sauce:
- 1 package store-bought pizza dough or 4 mini flatbreads (like pita or naan)
- 1/2 cup pizza sauce (store-bought or homemade)
Cheese:
- 1 1/2 cups shredded mozzarella cheese (or a mix of mozzarella and cheddar for color)
Toppings for Decoration:
- Sliced black olives – for skull eyes, nose, and spider legs
- Mini pepperoni slices – perfect for eyes or grinning jack-o’-lanterns
- Red bell pepper strips – use for creepy mouths or scar lines
- Yellow or orange bell pepper slices – adds pop of Halloween color
- Mushroom slices – for teeth or bone-like effects
- Fresh basil (optional) – for garnish or leafy stems on pumpkin faces
Optional Add-Ins:
- Garlic powder – a sprinkle on top adds depth of flavor
- Olive oil – brushing edges of crust gives it a golden finish
- Crushed red pepper flakes – for a subtle heat if desired
These ingredients are more than just toppings—they’re your spooky art supplies! Combine them with creativity and you’ll have a frightfully delicious batch of Halloween Mini Pizzas ready in no time.
Step 1: Prepare the Dough Base
If using store-bought pizza dough, roll it out on a floured surface until it’s about ¼-inch thick. Use a round cookie cutter, jar lid, or drinking glass to cut out circles about 3–4 inches wide. If you’re using mini flatbreads or pitas, you can skip this step and go straight to assembling. Place all your rounds on a parchment-lined baking sheet.
Step 2: Add the Sauce
Spread about 1 to 1½ teaspoons of pizza sauce on each mini round, leaving a small border around the edges to give room for bubbling cheese and crust expansion. Don’t overdo it—too much sauce can make the crust soggy.
Step 3: Sprinkle the Cheese
Top each sauced base with shredded mozzarella cheese. You want enough cheese to cover but not overwhelm—this layer will be the “canvas” for your spooky face designs. You can also mix in a little cheddar for color contrast, especially for pumpkin faces.
Step 4: Create the Halloween Faces
Here’s the fun part—decorating! Use toppings to form Halloween-themed faces:
- Skull faces: Place olive slices for eyes, a small triangle for the nose, and tiny slits for teeth using chopped olives.
- Jack-o’-lanterns: Use mini pepperoni for eyes and cut small triangles for nose and jagged mouths.
- Spiders: Use a whole black olive for the body and sliced strips for legs.
- Stitched mouths: Use red pepper slices for creepy smiles and thin strips across to mimic stitches.
Let your imagination go wild—or let the kids create their own spooky designs!
Step 5: Bake to Golden Perfection
Preheat your oven to 425°F (220°C). Bake the mini pizzas for 10–12 minutes, or until the cheese is melted, bubbly, and starting to turn golden around the edges. The crust should be lightly crisped on the bottom.
Step 6: Cool Slightly & Serve
Remove the pizzas from the oven and let them cool for a couple of minutes on a wire rack or baking sheet. This allows the cheese to set slightly so the spooky faces stay intact when serving.
Notes
- Great for parties: These mini pizzas are ideal for Halloween gatherings since they can be made in batches and served warm or at room temperature.
- Make ahead: You can assemble the pizzas up to a day in advance and refrigerate them. Just bake them fresh when it’s time to serve.
- Use what you have: Don’t feel restricted by specific toppings—zucchini slices, cherry tomatoes, even bits of string cheese can work for creative designs.
- Involve the kids: Set up a topping station and let the little ones design their own spooky faces. It’s a fun family activity and gets everyone excited to eat!
Watch Out for These Mistakes While Cooking
- Overloading the mini pizzas: Adding too much sauce or cheese can make the dough soggy and distort your spooky designs.
- Skipping the preheat: Always preheat your oven. A cold oven leads to undercooked dough and uneven baking.
- Using wet toppings: Moist toppings like canned mushrooms or wet bell peppers can release water during baking. Pat them dry before using.
- Cutting after baking: These are mini pizzas—no need to slice! Slicing may ruin the faces you’ve worked so hard to design.
- Leaving them in too long: Because they’re small, they bake fast. Keep an eye on them after 8 minutes to prevent burning the cheese.
- Assembling too far ahead without baking: If you top them too early and let them sit out, the crust can get soggy before it ever hits the oven.
- Not spacing them out: Give each pizza a little room on the baking sheet to allow for heat circulation and even baking.
- Neglecting the edges: A light brush of olive oil on the outer crust before baking gives a golden, flavorful finish.
What to Serve With Halloween Mini Pizzas?
Mini pizzas are fun on their own, but pairing them with other Halloween-inspired dishes takes your spooky spread to the next level. These complementary sides, drinks, and treats can turn your pizza night into a full-blown Halloween feast.
8 Recommendations
- Pumpkin Soup Shooters
Serve creamy pumpkin soup in mini cups or shot glasses. It’s warm, cozy, and festive—plus easy to sip between bites. - Monster Veggie Platter
Arrange cucumbers, baby carrots, cherry tomatoes, and snap peas into a monster face or skeleton shape. Add a ranch or hummus “cauldron” for dipping. - Spooky Mozzarella String Cheese Brooms
Cut string cheese in half, fray the ends with a knife, and use a pretzel stick as the handle. Tie with a chive for an adorable edible broomstick. - Witch’s Brew Punch
Make a kid-friendly drink with green juice or lime soda, add gummy worms, and serve in clear cups with dry ice fog for drama. - Ghost Deviled Eggs
Use black olive slices to make ghost faces on classic deviled eggs. They’re a protein-packed and hauntingly good side. - Mummy Hot Dogs
Wrap mini hot dogs in crescent dough strips and bake until golden. Use mustard dots for eyes to complete the look. - Sweet Potato Fries with “Blood” Ketchup
Baked or fried sweet potato fries served with a side of ketchup (bonus points if you swirl it with a bit of sriracha). - Graveyard Dirt Cups
Chocolate pudding layered with crushed Oreos and topped with candy bones or tombstones. It’s dessert with a deliciously eerie twist.
These pairings strike a balance of fun, spooky, and tasty—just like your Halloween Mini Pizzas.
Storage Instructions
Whether you’ve got leftovers or you want to prep ahead for a party, Halloween Mini Pizzas store beautifully with just a few tips:
- Refrigerator: Let the pizzas cool completely, then store them in an airtight container layered with parchment paper between stacks. They’ll stay fresh for up to 3 days.
- Freezer: Freeze fully assembled but unbaked pizzas on a tray until solid, then transfer to a freezer-safe bag or container. Bake straight from frozen at 400°F (205°C) for 12–15 minutes.
- Reheating: Reheat in the oven or toaster oven at 375°F (190°C) for 5–7 minutes to maintain a crispy crust. Avoid microwaving—they’ll turn soggy and lose their charm.
- Make-ahead tip: You can prep and refrigerate the decorated mini pizzas a few hours in advance, then bake right before serving.
Estimated Nutrition (per mini pizza)
This can vary depending on the size, toppings, and dough used, but here’s a general estimate:
- Calories: ~120
- Total Fat: 6g
- Saturated Fat: 2.5g
- Cholesterol: 12mg
- Sodium: 280mg
- Carbohydrates: 12g
- Fiber: 1g
- Sugars: 1g
- Protein: 5g
These mini pizzas are portion-controlled and easy to customize, so you can go lighter or heartier depending on your needs.
Frequently Asked Questions
1. Can I use pre-made crusts like naan or pita?
Absolutely! Mini naan rounds or small pitas make this recipe even faster. They’re sturdy, hold toppings well, and save time on dough prep.
2. Can I make these Halloween Mini Pizzas gluten-free?
Yes! Just use gluten-free pizza dough or gluten-free flatbreads as the base. Most toppings are naturally gluten-free, but double-check labels on pepperoni and sauces.
3. How far in advance can I prep the pizzas before baking?
You can assemble them up to 6–8 hours ahead. Store them in the fridge, covered with plastic wrap. Bake just before serving to keep the crust from getting soggy.
4. What’s the best cheese to use for spooky designs?
Shredded mozzarella is best for melting, but sliced mozzarella or provolone cut into shapes holds spooky details better. Mixing both gives you great texture and clarity.
5. Can I serve these cold at a party?
Yes, but they’re definitely better warm. If you must serve them cold, stick with lighter toppings and thinner crusts that won’t turn chewy.
6. What’s the best way to cut olives for spider shapes?
Use a sharp paring knife. Cut one olive in half for the body, and slice another into 8 thin strips for legs. Place them carefully on the cheese before baking.
7. Are these Halloween Mini Pizzas kid-friendly?
Definitely! They’re fun to decorate, easy to eat, and not too spicy. Kids love making faces—and eating their own creepy creations.
8. Can I make a large pizza instead of minis?
Yes! Roll out a regular-size pizza dough and decorate the whole surface with multiple spooky designs. Adjust bake time to around 12–15 minutes.
Conclusion
Halloween Mini Pizzas are the perfect way to bring spooky fun and delicious bites to your October celebrations. Whether you’re throwing a party, making snacks for the kids, or just want to try something festive, these mini pizzas check every box—easy to make, customizable, and a total crowd-pleaser. With just a few ingredients and some creativity, you’ll have Halloween treats that are as fun to make as they are to eat.

Halloween Mini Pizzas
- Total Time: 25 minutes
- Yield: 8 mini pizzas
Description
These Halloween Mini Pizzas are a spooky, fun, and fast way to add magic to your October menu! Perfect as a quick Halloween snack, party appetizer, or creative dinner idea, these easy mini pizzas are topped with ghostly, ghoulish, and pumpkin-inspired designs. Using simple ingredients and store-bought dough or flatbread, you can whip up this easy recipe in no time. Great for kids and adults alike, this festive food idea is one of the best Halloween-themed recipes for family fun, holiday gatherings, and themed food nights. Whether you’re looking for a quick dinner, party food, or spooky snack, these Halloween Mini Pizzas deliver big flavor in a small, fun package.
Ingredients
1 package store-bought pizza dough or 4 mini flatbreads
0.5 cup pizza sauce
1.5 cups shredded mozzarella cheese
0.25 cup sliced black olives
0.25 cup mini pepperoni slices
0.25 cup red bell pepper strips
0.25 cup yellow or orange bell pepper slices
0.25 cup mushroom slices
1 tablespoon olive oil
0.5 teaspoon garlic powder (optional)
1 tablespoon fresh basil (optional)
Instructions
1. Preheat oven to 425°F (220°C) and line a baking sheet with parchment paper.
2. Roll out pizza dough to ¼-inch thickness and cut into 3–4 inch rounds, or use pre-shaped flatbreads.
3. Place rounds on baking sheet and spread 1 to 1½ teaspoons of pizza sauce on each, leaving a border.
4. Sprinkle mozzarella cheese over each base. Use a mix of cheddar if desired for color.
5. Decorate with spooky faces using olives, pepperoni, bell peppers, and mushrooms.
6. Lightly brush crust edges with olive oil and sprinkle garlic powder if using.
7. Bake for 10–12 minutes until cheese is bubbly and crust is golden.
8. Let cool slightly before serving to allow cheese to set.
Notes
Assemble ahead of time and bake just before serving for convenience.
Don’t overload with toppings to keep designs clear and crust crispy.
You can freeze unbaked assembled pizzas for future spooky cravings.
- Prep Time: 15 minutes
- Cook Time: 10 minutes
- Category: Appetizer
- Method: Baked
- Cuisine: American
Nutrition
- Serving Size: 1 mini pizza
- Calories: 120
- Sugar: 1g
- Sodium: 280mg
- Fat: 6g
- Saturated Fat: 2.5g
- Unsaturated Fat: 2.5g
- Trans Fat: 0g
- Carbohydrates: 12g
- Fiber: 1g
- Protein: 5g
- Cholesterol: 12mg
Keywords: halloween mini pizzas, halloween recipes, spooky snacks, party food, easy halloween dinner, quick halloween ideas