

Garlic and herb chickpea flour snack crackers are a game-changer for those looking for a crunchy, savory, and gluten-free snack. I love how these crackers strike the perfect balance between a rich, nutty base from the chickpea flour and the fresh, aromatic punch from the herbs. They’re not just a great standalone snack, but also the perfect vessel for cheese, hummus, or your favorite dips.
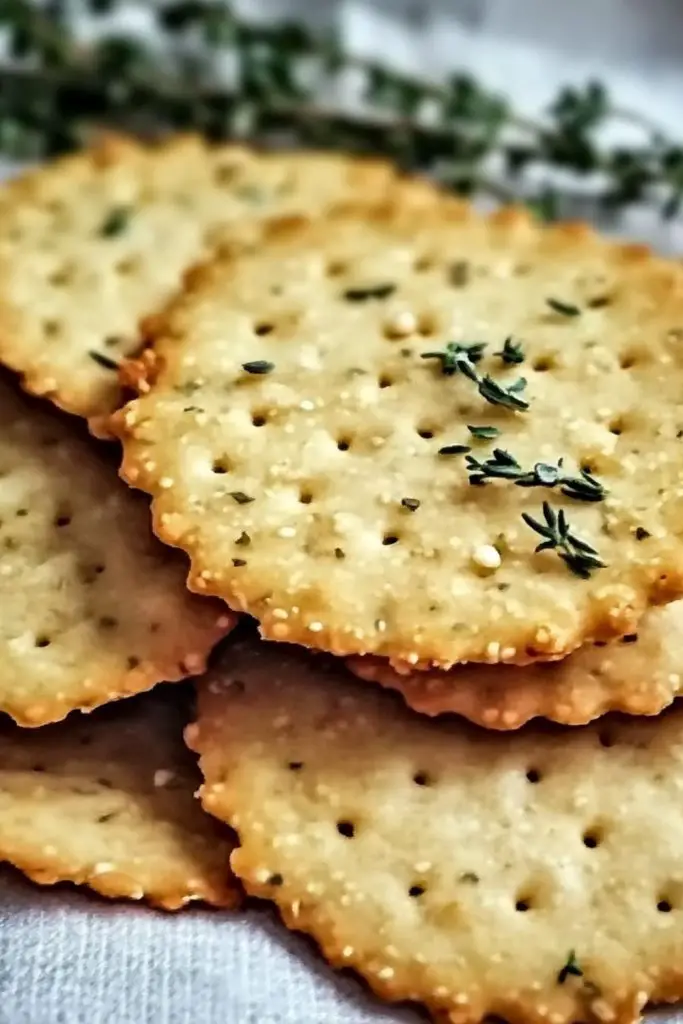
What really sets these crackers apart is their unique flavor profile. The combination of garlic and herbs, like rosemary and thyme, gives them an irresistible, savory taste, while the chickpea flour adds a delightful, slightly earthy note and a satisfying crispness. Plus, they’re naturally high in protein and fiber, making them a smarter choice for snacking.
Why You’ll Love These Garlic and Herb Chickpea Flour Snack Crackers
- Naturally Gluten-Free: Made entirely from chickpea flour, these crackers are perfect for those avoiding gluten.
- Rich in Plant Protein: Chickpea flour is packed with protein, making these crackers a more nourishing choice.
- Customizable Flavor: Easily switch up the herbs and seasonings to match your preferences or what you have on hand.
- Easy to Make: Simple ingredients and straightforward steps mean you can whip these up quickly.
- Perfect for Dipping: Sturdy enough for hummus, guacamole, or your favorite creamy dips.
What Herbs Work Best for These Garlic and Herb Chickpea Flour Snack Crackers?
Choosing the right herbs can really elevate the flavor of these chickpea crackers. Fresh or dried herbs like rosemary, thyme, parsley, or oregano work beautifully here. Rosemary and thyme provide a more robust, woodsy flavor, while parsley adds a mild, slightly peppery note. If you prefer a bit of heat, consider adding a pinch of red pepper flakes or a touch of cracked black pepper. Just keep in mind that dried herbs are more concentrated, so you’ll need less of them compared to fresh.
Options for Substitutions
- Flour Alternatives: If you want to experiment beyond chickpea flour, you can try a mix of almond flour or a gluten-free all-purpose blend, though the texture and flavor will change slightly.
- Seasoning Swaps: If garlic isn’t your thing, onion powder or even smoked paprika can add a different layer of flavor. You can also play with blends like Italian seasoning or za’atar for a more Middle Eastern twist.
- Oil Options: While olive oil adds a wonderful, rich taste, you can swap it for avocado oil or melted coconut oil for a more neutral flavor.
- Vegan Option: Most versions of this recipe are naturally vegan, but if you want a richer taste, consider adding a bit of nutritional yeast for a cheesy note without the dairy.
Ingredients for These Garlic and Herb Chickpea Flour Snack Crackers
Here’s a breakdown of the essential ingredients you’ll need for these crispy, flavorful crackers:
- Chickpea Flour: The star of the show. It gives these crackers their signature nutty taste and crisp texture, along with a good dose of plant protein and fiber.
- Garlic Powder: Adds a deep, savory flavor that pairs perfectly with the earthy chickpea base. You can also use fresh minced garlic for a more pronounced bite.
- Dried Herbs: Typically rosemary, thyme, or oregano. These herbs add layers of aroma and earthy notes, making each bite more complex and satisfying.
- Salt: Essential for enhancing all the other flavors. Sea salt or kosher salt work best for this recipe.
- Olive Oil: Provides moisture, helps bind the dough, and contributes a subtle, fruity richness to the crackers.
- Water: Used to bring the dough together. Adjust the amount depending on the humidity of your kitchen and the type of chickpea flour you use.
- Optional Add-ins: A pinch of red pepper flakes for a little heat, sesame seeds for texture, or a sprinkle of nutritional yeast for a cheesy kick.
Step 1: Prepare the Dough
In a medium bowl, whisk together the chickpea flour, garlic powder, dried herbs, and salt. Make a well in the center and add the olive oil and water. Stir until a soft, slightly sticky dough forms. If the dough feels too dry, add a tiny bit more water, a teaspoon at a time.
Step 2: Roll Out the Dough
Place the dough between two sheets of parchment paper. Using a rolling pin, roll it out as thin as possible, ideally about 1/8-inch thick. The thinner you roll, the crispier the crackers will be.
Step 3: Cut the Crackers
Carefully peel off the top sheet of parchment. Use a round cookie cutter, pizza cutter, or knife to cut the dough into your preferred cracker shapes. Transfer the cut crackers (with the parchment underneath) to a baking sheet.
Step 4: Add the Final Touches
Lightly brush the tops of the crackers with a bit more olive oil for extra crunch and a beautiful golden color. Sprinkle a little sea salt or a few extra dried herbs on top if you like.
Step 5: Bake to Perfection
Bake the crackers in a preheated oven at 350°F (175°C) for 15-20 minutes or until they turn golden and crisp around the edges. Keep a close eye on them, as they can go from perfectly crisp to overly browned quickly.
Step 6: Cool and Enjoy
Once baked, remove the crackers from the oven and let them cool completely on the baking sheet. This helps them firm up for the perfect crunch. Store in an airtight container to keep them crisp for days.
How Long to Cook Garlic and Herb Chickpea Flour Snack Crackers
The baking time is crucial for achieving that perfectly crisp texture. Here’s a rough guide:
- Initial Bake: 15-20 minutes at 350°F (175°C), or until the crackers are lightly golden around the edges.
- Crisp Factor: If you prefer an extra crunchy bite, you can leave them in for an additional 2-3 minutes, but keep a close eye on them to avoid burning.
- Cooling Time: Allow the crackers to cool completely on the baking sheet before transferring them to a container. They will continue to crisp up as they cool.
Tips for Perfect Garlic and Herb Chickpea Flour Snack Crackers
- Roll Thin for Crunch: The thinner the dough, the crispier the crackers. Aim for about 1/8-inch thickness.
- Uniform Size Matters: Cutting the crackers into even shapes ensures they bake at the same rate, preventing some from burning while others remain undercooked.
- Season to Taste: Don’t be afraid to experiment with seasoning. Add a bit of cracked black pepper, sesame seeds, or even a hint of smoked paprika for a flavor twist.
- Brush for Extra Flavor: A light brush of olive oil before baking adds a beautiful golden color and enhances the flavor.
- Let Them Cool Completely: Resist the urge to snack too soon! Cooling them completely makes a big difference in texture.
- Storage is Key: Keep them in an airtight container to maintain that satisfying crunch for up to a week.
Watch Out for These Mistakes While Cooking
- Dough Too Thick: Rolling the dough too thick will result in softer, less crispy crackers. Aim for about 1/8-inch for the best crunch.
- Overcrowding the Pan: Make sure your crackers have a little space between them. Crowding can lead to uneven baking.
- Skipping the Oil Brush: A light brush of olive oil before baking adds flavor and helps the crackers brown nicely.
- Underbaking: These crackers continue to crisp as they cool, but if they’re underbaked, they’ll remain soft. Always check for a light golden color around the edges.
- Ignoring the Resting Time: Don’t skip the cooling step – it’s crucial for getting that satisfying crunch.
What to Serve with Garlic and Herb Chickpea Flour Snack Crackers?
These crackers are super versatile and pair beautifully with a wide range of dips and spreads. Here are some tasty options:
1. Classic Hummus
The creamy, tangy texture of hummus pairs perfectly with the hearty crunch of these chickpea crackers.
2. Tzatziki Sauce
This refreshing Greek yogurt dip with cucumber and garlic is a fantastic contrast to the crispy, savory crackers.
3. Olive Tapenade
A rich, salty blend of olives, capers, and garlic makes for a bold and briny match.
4. Roasted Red Pepper Dip
Sweet, smoky, and slightly spicy – this dip adds a burst of flavor to every bite.
5. Guacamole
A creamy, spicy avocado dip that adds a fresh, bright note to the earthy flavors of the crackers.
6. Baba Ganoush
Smoky, creamy, and a little nutty – a Middle Eastern classic that’s perfect for dipping.
7. Herbed Cheese Spread
Soft, creamy cheese like Boursin or whipped feta pairs beautifully with the garlicky, herby notes.
8. Marinated Olives
A simple yet delicious pairing, adding a salty, briny contrast to the crunchy crackers.
Storage Instructions
To keep your Garlic and Herb Chickpea Flour Snack Crackers fresh and crispy:
- Airtight Container: Store the completely cooled crackers in an airtight container at room temperature for up to 1 week.
- Extended Freshness: For a longer shelf life, keep them in a cool, dry place away from moisture and direct sunlight.
- Freezing Option: You can also freeze the dough before baking. Just roll it out, cut into shapes, and freeze on a baking sheet before transferring to a freezer-safe bag. When ready to bake, add an extra 2-3 minutes to the baking time.
Estimated Nutrition
Here’s a rough estimate for a typical serving (about 10-12 crackers, depending on the size):
- Calories: 150
- Protein: 6g
- Fat: 5g
- Carbohydrates: 18g
- Fiber: 3g
- Sugars: 1g
- Sodium: 150mg
Note: These values can vary depending on the exact ingredients used, like the type of oil or herbs, and any additional toppings you might add.
Frequently Asked Questions
1. Can I use fresh herbs instead of dried?
Yes, you can! Just keep in mind that fresh herbs have a higher moisture content and a milder flavor, so you’ll need to use about three times as much fresh herbs as dried.
2. Are these crackers gluten-free?
Absolutely. Chickpea flour is naturally gluten-free, making these crackers a great option for those with gluten sensitivities.
3. Can I make these crackers ahead of time?
Yes! They store well for about a week in an airtight container, making them perfect for meal prep or on-the-go snacking.
4. What if I don’t have chickpea flour?
You can substitute other gluten-free flours like almond flour or a gluten-free all-purpose blend, but this will slightly change the flavor and texture.
5. Can I add cheese to this recipe?
Definitely! Grated Parmesan or nutritional yeast can add a nice, cheesy flavor to the dough. Just reduce the salt a bit to balance the flavors.
6. How do I keep the crackers crispy?
Make sure to cool them completely before storing and use an airtight container to keep moisture out. You can also re-crisp them in the oven for a few minutes if needed.
7. Can I make these crackers without oil?
Yes, but they may be a bit less crispy and rich. You can try substituting a bit of water or aquafaba (chickpea brine) for a lower-fat version.
8. What’s the best way to roll out the dough?
Place the dough between two sheets of parchment paper to prevent sticking and make rolling easier. Aim for an even, thin layer for the crispiest crackers.
Conclusion
Garlic and Herb Chickpea Flour Snack Crackers are a delicious, wholesome alternative to store-bought options. They’re packed with flavor, naturally gluten-free, and surprisingly easy to make. Whether you’re pairing them with a creamy dip or enjoying them on their own, these crackers are sure to become a staple in your snacking rotation. Plus, they’re endlessly customizable – try adding seeds, cheese, or a dash of heat to make them truly your own. Happy snacking!
Garlic and Herb Chickpea Flour Snack Crackers Recipe
- Total Time: 25 minutes
- Yield: About 30-40 crackers
Description
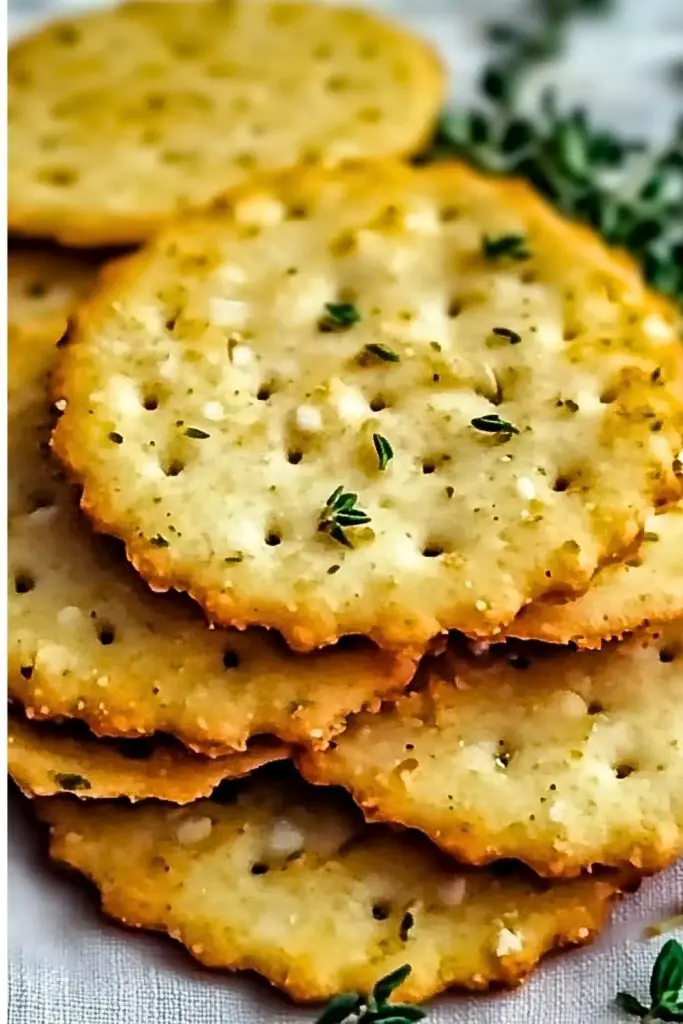
Crunchy, savory, and naturally gluten-free, these garlic and herb chickpea flour crackers are the perfect homemade snack. Packed with plant protein and fiber, they pair beautifully with dips, spreads, or just on their own. Quick to make, endlessly customizable, and full of flavor – a great addition to your snack lineup!
Ingredients
- 1 cup chickpea flour
- 1/2 teaspoon garlic powder
- 1 teaspoon dried rosemary (or herb of choice)
- 1/2 teaspoon salt
- 2 tablespoons olive oil
- 3–4 tablespoons water (as needed)
- Optional: sesame seeds, red pepper flakes, nutritional yeast
Instructions
- Preheat your oven to 350°F (175°C) and line a baking sheet with parchment paper.
- In a medium bowl, whisk together the chickpea flour, garlic powder, dried herbs, and salt.
- Add the olive oil and 3 tablespoons of water. Mix until a soft dough forms. Add more water if needed, a teaspoon at a time.
- Place the dough between two sheets of parchment paper and roll out to about 1/8-inch thickness.
- Cut the dough into desired cracker shapes using a knife or cookie cutter.
- Transfer the parchment with the cut crackers onto the baking sheet.
- Optionally, brush the tops with a bit more olive oil and sprinkle with extra herbs or salt.
- Bake for 15-20 minutes, or until the crackers are golden and crisp around the edges.
- Let cool completely before storing in an airtight container.
- Prep Time: 10 minutes
- Cook Time: 15 minutes