

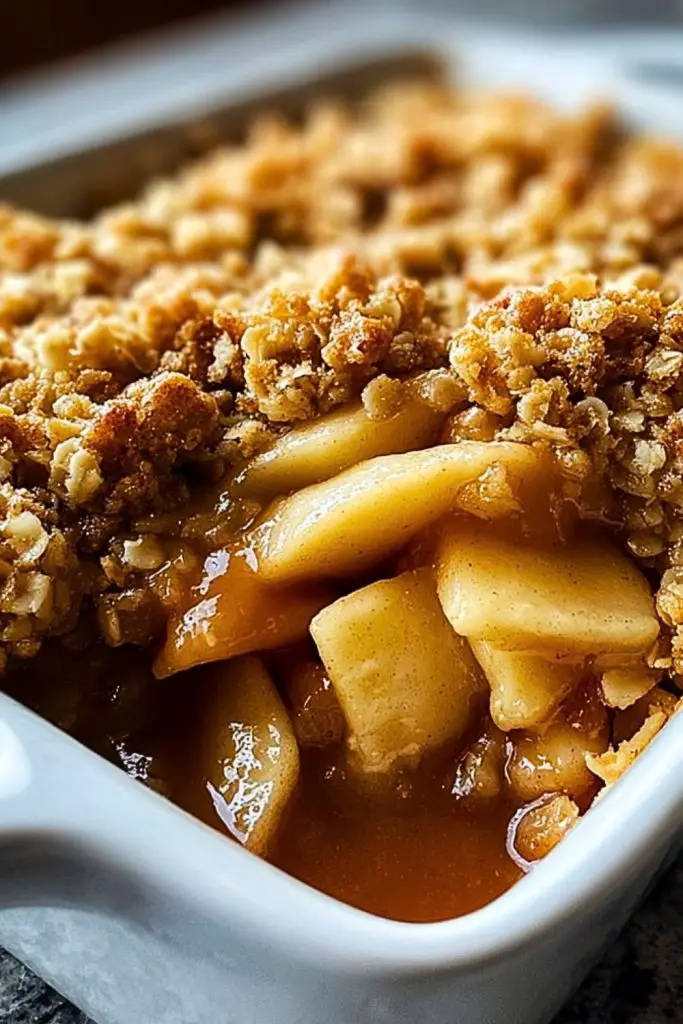
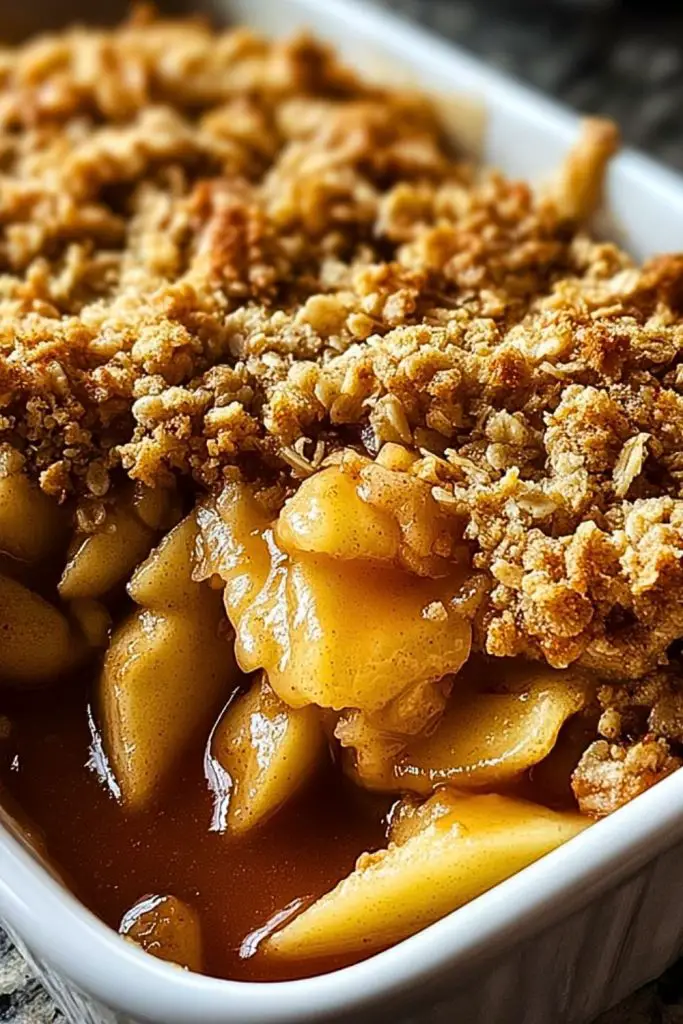
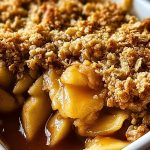
Golden, bubbling, and brimming with cinnamon-kissed apples beneath a crunchy oat topping—this Easy Apple Crisp is the kind of dessert that feels like a warm hug. It’s comfort food at its finest: sweet, tangy apples wrapped in a silky spiced sauce, topped with a buttery crumble that adds just the right amount of texture and indulgence. Whether served warm with a scoop of vanilla ice cream or enjoyed cold the next morning (if it lasts that long), it never fails to satisfy.
What makes this apple crisp so easy? It comes together in under an hour with basic pantry staples and no fussy dough. You don’t even need to peel every apple perfectly—just slice, mix, and bake. It’s the perfect go-to dessert for cozy fall nights, quick weeknight cravings, or holiday dinners when you need something classic and crowd-pleasing.
Why You’ll Love This Easy Apple Crisp
- Requires minimal prep and no special skills.
- Perfect blend of sweet, tart, and buttery textures.
- Customizable with nuts, dried fruit, or different apples.
- Great for make-ahead or next-day leftovers.
- Comforting and nostalgic flavor profile.
Preparation Phase & Tools to Use
To pull this dessert together smoothly, a few essential kitchen tools will make all the difference:
- 9×13-inch baking dish: Ideal for even baking and allows enough space for generous portions.
- Mixing bowls (large and medium): Needed for separating apple filling and crumble topping preparations.
- Apple peeler or paring knife: Helps speed up prep, especially when making multiple servings.
- Pastry cutter or fork: Crucial for cutting butter into the topping to get that perfect crumble texture.
- Measuring cups and spoons: Ensure precise balance of spice and sweetness.
Each of these tools makes prep quicker, more efficient, and ensures consistent results every time you bake.
Preparation Tips
Choose a mix of apple varieties for depth of flavor—Granny Smith for tartness, Honeycrisp or Fuji for sweetness. Don’t overmix the topping; you want crumbly chunks, not a paste. Chill your butter before cutting it into the topping to achieve a crisp, golden finish. And if your apples are especially juicy, consider tossing them with a tablespoon of flour or cornstarch to thicken the filling just right. Lastly, let the crisp rest for at least 10 minutes after baking—it helps the juices settle and makes serving neater.
Ingredients for this Easy Apple Crisp
For the Apple Filling:
- 6 cups sliced apples (Granny Smith, Honeycrisp, or Fuji recommended)
- 2 tablespoons lemon juice
- 1/2 cup granulated sugar
- 1/4 cup brown sugar, packed
- 1 teaspoon ground cinnamon
- 1/4 teaspoon ground nutmeg
- 1/4 teaspoon salt
- 1 tablespoon cornstarch (optional, for thickening)
For the Crisp Topping:
- 3/4 cup all-purpose flour
- 3/4 cup rolled oats
- 1/2 cup brown sugar, packed
- 1/4 cup granulated sugar
- 1 teaspoon cinnamon
- 1/4 teaspoon salt
- 1/2 cup unsalted butter, chilled and cubed
- Optional: 1/2 cup chopped pecans or walnuts
Step 1: Prep the Apples
Wash, core, and slice the apples into thin, even wedges. If desired, peel them for a softer texture. Place them in a large bowl and toss with lemon juice to prevent browning and enhance flavor.
Step 2: Mix the Apple Filling
To the bowl of apples, add granulated sugar, brown sugar, cinnamon, nutmeg, salt, and cornstarch (if using). Mix thoroughly until apples are evenly coated. Transfer the mixture to a greased 9×13-inch baking dish.
Step 3: Make the Crisp Topping
In a medium bowl, combine flour, oats, brown sugar, granulated sugar, cinnamon, and salt. Add the chilled, cubed butter. Using a pastry cutter or fork, cut the butter into the dry ingredients until the mixture forms pea-sized crumbles. Stir in chopped nuts if using.
Step 4: Assemble the Crisp
Evenly sprinkle the crumble topping over the apple filling in the baking dish, covering all the apples for an even bake and golden texture.
Step 5: Bake the Crisp
Place the baking dish in a preheated 350°F (175°C) oven. Bake for 40-45 minutes or until the topping is golden brown and the apple filling is bubbling around the edges.
Step 6: Cool and Serve
Let the apple crisp rest for at least 10 minutes before serving. This allows the filling to set and makes it easier to serve. Best enjoyed warm with a scoop of vanilla ice cream or a dollop of whipped cream.
Notes
This Easy Apple Crisp is very forgiving and can be customized to suit your taste or what you have on hand. Want more crunch? Add extra oats or a handful of chopped nuts to the topping. Prefer it sweeter? Increase the brown sugar in the filling or drizzle with caramel sauce when serving. If you’re short on time, you can even prepare the crisp topping a day ahead and store it in the fridge until ready to bake. Using different apple varieties gives a more complex flavor—don’t be afraid to experiment.
Watch Out for These Mistakes While Cooking
- Using overly soft apples: This can lead to a mushy filling. Stick with firm, crisp apples.
- Skipping the cornstarch: If your apples are very juicy, omitting cornstarch can make the filling too runny.
- Overmixing the topping: You want a crumbly texture, not a doughy one.
- Underbaking: The topping needs to turn golden and slightly crisp—make sure it bakes long enough.
- Not chilling the butter: Warm butter will blend too smoothly and won’t create the crumbly texture you want.
Storage Instructions
Store leftover apple crisp covered in the refrigerator for up to 4 days. To reheat, place a portion in the oven or toaster oven at 300°F for 10–15 minutes to re-crisp the topping. Microwaving works in a pinch, but the topping will soften. For longer storage, you can freeze the unbaked crisp for up to 3 months. When ready to enjoy, bake it straight from frozen—just add an extra 15–20 minutes to the baking time.
Estimated Nutrition (Per Serving)
- Calories: ~310
- Total Fat: 13g
- Saturated Fat: 7g
- Carbohydrates: 49g
- Sugar: 31g
- Fiber: 3g
- Protein: 2g
- Sodium: 105mg
- Cholesterol: 30mg
Frequently Asked Questions
What are the best apples to use?
Granny Smith, Honeycrisp, Fuji, or a mix of these for balanced sweet-tart flavor and firm texture.
Can I make it gluten-free?
Yes, use certified gluten-free oats and a 1:1 gluten-free flour blend.
Do I need to peel the apples?
Peeling is optional—leaving the skins on adds fiber and a rustic feel, but peeled apples give a softer texture.
Can I use quick oats instead of rolled oats?
Yes, but the topping will be softer and less chewy.
Can I prepare this ahead of time?
Absolutely. Assemble the filling and topping separately and store in the fridge. Combine just before baking.
Is it okay to freeze apple crisp?
Yes. Freeze it unbaked, tightly covered, for up to 3 months. Bake from frozen, adding extra time.
What can I serve with apple crisp?
Vanilla ice cream, whipped cream, caramel drizzle, or even Greek yogurt.
How do I know when it’s done baking?
The topping should be golden brown and the filling bubbling at the edges.
Conclusion
Easy Apple Crisp is a timeless, no-fail dessert that brings together simple ingredients to create something magical. Whether you’re hosting a dinner party, baking with kids, or just craving something cozy and sweet, this crisp hits the mark every single time. With its flexible ingredients, rich flavor, and irresistible texture, it deserves a regular spot in your recipe rotation.
Easy Apple Crisp
- Total Time: 1 hour
- Yield: 8 servings
Description
Craving a cozy dessert that’s easy and crowd-pleasing? This Easy Apple Crisp is a classic treat layered with warm cinnamon-spiced apples and topped with a buttery oat crumble. Whether you need quick breakfast ideas, an easy dessert recipe, or comforting food ideas for a chilly evening, this apple crisp delivers every time. It’s one of those simple and satisfying dishes that makes the kitchen smell like fall and tastes like homemade love in every bite. Serve it warm with ice cream for the ultimate indulgence or enjoy it chilled as a sweet snack.
Ingredients
6 cups sliced apples
2 tablespoons lemon juice
1/2 cup granulated sugar
1/4 cup brown sugar
1 teaspoon ground cinnamon
1/4 teaspoon ground nutmeg
1/4 teaspoon salt
1 tablespoon cornstarch
3/4 cup all-purpose flour
3/4 cup rolled oats
1/2 cup brown sugar
1/4 cup granulated sugar
1 teaspoon cinnamon
1/4 teaspoon salt
1/2 cup unsalted butter, chilled and cubed
1/2 cup chopped pecans or walnuts (optional)
Instructions
1. Wash, core, and slice the apples into thin wedges. Peel if preferred. Toss in lemon juice.
2. Add sugars, cinnamon, nutmeg, salt, and cornstarch to the apples. Mix well. Transfer to a greased 9×13-inch baking dish.
3. In a bowl, combine flour, oats, sugars, cinnamon, and salt. Add cold cubed butter and cut it in with a pastry cutter until crumbly. Add nuts if using.
4. Sprinkle the crumble evenly over the apple mixture in the baking dish.
5. Bake in a preheated 350°F (175°C) oven for 40–45 minutes, or until the top is golden and the edges are bubbling.
6. Let the crisp cool for 10 minutes before serving.
Notes
Use a mix of tart and sweet apples like Granny Smith and Honeycrisp for the best flavor balance.
Keep butter cold while mixing the topping to ensure a crisp texture.
For extra crunch, include chopped nuts or increase the amount of oats slightly.
- Prep Time: 15 minutes
- Cook Time: 45 minutes
- Category: Dessert
- Method: Baking
- Cuisine: American
Nutrition
- Serving Size: 1 portion
- Calories: 310
- Sugar: 31g
- Sodium: 105mg
- Fat: 13g
- Saturated Fat: 7g
- Unsaturated Fat: 5g
- Trans Fat: 0g
- Carbohydrates: 49g
- Fiber: 3g
- Protein: 2g
- Cholesterol: 30mg
Keywords: easy apple crisp, quick dessert, fall recipe, apple dessert, oat crumble, healthy snack, comfort food, breakfast ideas, dessert ideas, easy recipe, food ideas