

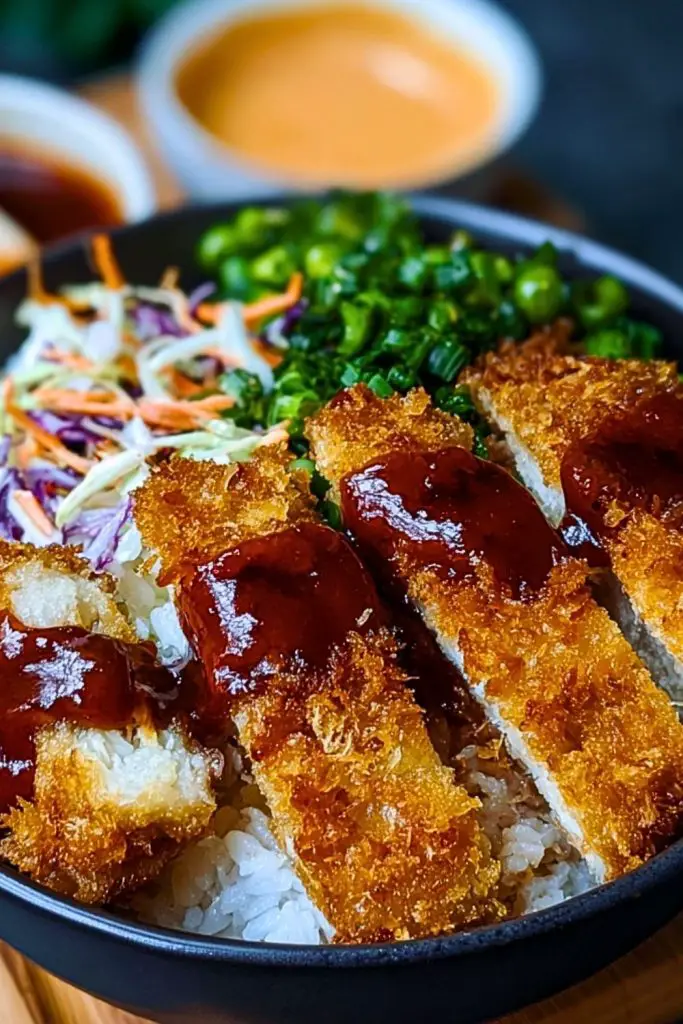
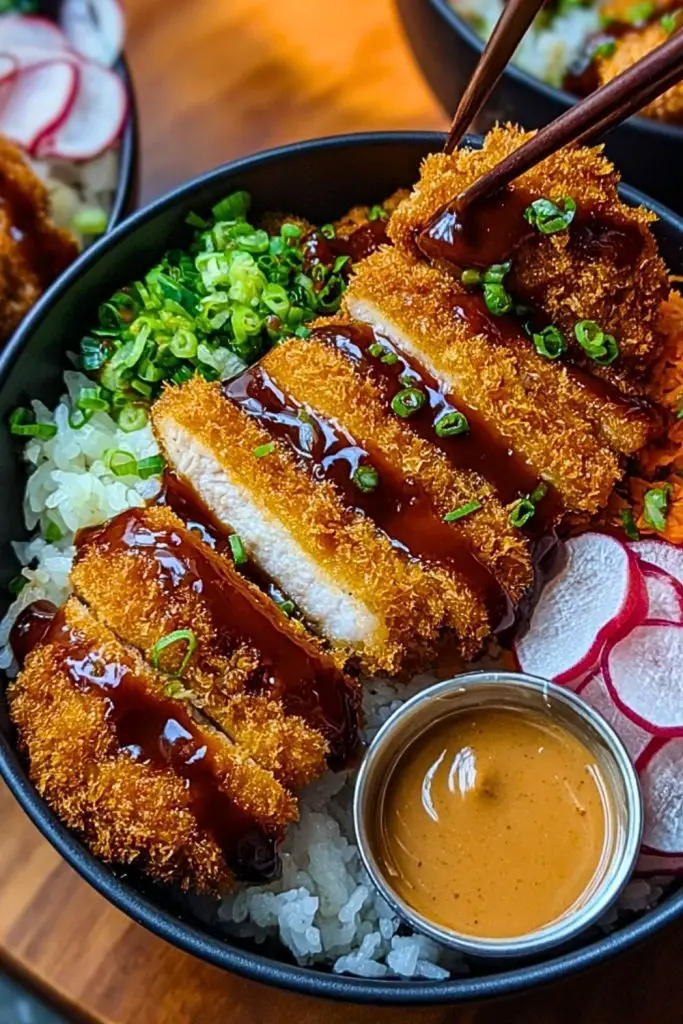
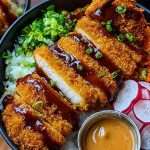
Golden, crunchy, and utterly satisfying—this Crispy Japanese Katsu Bowl is everything comfort food should be. Perfectly fried chicken katsu sits atop a bed of fluffy white rice, drizzled generously with creamy sesame mayo and a rich tonkatsu sauce. Finished with a sprinkle of freshly chopped parsley, every bite is a delightful balance of crispy, savory, and tender textures.
This dish combines the charm of classic Japanese home cooking with bold, crave-worthy flavors. Whether you’re trying to elevate your weeknight dinner or impress someone with a homemade Japanese meal, this bowl delivers in both taste and presentation. It’s the kind of recipe you’ll want to bookmark and revisit often—it’s quick enough for a casual dinner but impressive enough to serve to guests.
Why You’ll Love This Crispy Japanese Katsu Bowl Recipe
- Crispy perfection: The panko-breaded cutlet is fried to a golden crunch without being greasy.
- Savory and balanced: The sweet tang of tonkatsu sauce and creamy mayo bring rich, umami-packed flavor.
- Customizable: Swap the chicken for pork, tofu, or even shrimp—this recipe is versatile.
- Quick prep: With just a few easy steps, you’ll have a restaurant-style bowl in under 30 minutes.
- Meal-prep friendly: Make extra katsu and freeze for easy future meals.
Preparation Phase & Tools to Use (Essential Tools and Equipment, and the Importance of Each Tool)
Before diving into the cooking process, gather your tools to streamline the experience and ensure everything comes out perfectly crisp and tender.
- Cutting Board & Sharp Knife: You’ll need these to trim and slice the chicken evenly. A sharp knife ensures clean cuts and avoids tearing the meat, which helps in even frying.
- Meat Mallet or Rolling Pin: Used to pound the chicken to an even thickness. This ensures it cooks uniformly and stays juicy inside.
- Mixing Bowls (x3): One each for flour, beaten eggs, and panko breadcrumbs to coat the chicken. Proper breading setup makes the process cleaner and more efficient.
- Tongs: Great for dipping the chicken into each coating station without making a mess.
- Heavy-Bottomed Skillet or Frying Pan: Ensures even oil heat distribution, critical for crisp, golden frying.
- Thermometer (optional but recommended): To monitor oil temperature and prevent soggy or burnt katsu.
- Paper Towels + Wire Rack: For draining excess oil after frying without making the crust soggy.
- Rice Cooker or Pot with Lid: Perfectly cooked rice is the base of this dish—fluffy and slightly sticky.
Having everything prepped and within arm’s reach makes the process smoother, especially when frying, where timing is key.
Preparation Tips
- Pound evenly: Flattening the chicken helps it cook faster and more uniformly—plus, it creates a broader surface for crispiness.
- Use cold eggs: Cold eggs help firm up the coating and prevent it from sliding off during frying.
- Don’t skip the panko: Japanese panko breadcrumbs are lighter and crispier than regular breadcrumbs, which gives that signature crunch.
- Preheat the oil properly: Wait until the oil hits around 340–350°F (170–175°C) before frying. Lower temps = soggy katsu.
- Drain properly: Always let the katsu rest on a wire rack, not paper towels alone, to keep the bottom crisp.
- Slice last-minute: Slice the chicken just before serving to keep juices locked in and crust intact.
Preparation is more than half the battle—set yourself up right, and you’ll get the perfect katsu every time.
Ingredients for This Crispy Japanese Katsu Bowl Recipe
Here’s everything you’ll need to create a restaurant-worthy katsu bowl at home. The ingredients are simple but come together for a bold and satisfying meal.
For the Chicken Katsu:
- 2 boneless, skinless chicken breasts (or thighs)
- ½ teaspoon salt
- ½ teaspoon black pepper
- ½ cup all-purpose flour
- 2 large eggs, beaten
- 1 cup Japanese panko breadcrumbs
- Vegetable oil, for frying
For the Bowl:
- 2 cups freshly cooked short-grain white rice (like sushi rice)
- 2 tablespoons chopped fresh parsley or green onion (for garnish)
For the Sauces:
- Tonkatsu Sauce
- 2 tablespoons ketchup
- 1 tablespoon Worcestershire sauce
- 1 teaspoon soy sauce
- ½ teaspoon sugar
- Creamy Sesame Mayo Sauce
- 3 tablespoons Japanese mayonnaise (like Kewpie)
- 1 tablespoon sesame oil
- 1 teaspoon rice vinegar
- Optional: a pinch of chili flakes for heat
These pantry-friendly ingredients transform into something far greater than the sum of their parts. Don’t skip the sauces—they’re essential for flavor layering.
Step 1: Prepare the Chicken
Start by slicing each chicken breast horizontally to create thinner cutlets, or use a meat mallet to gently pound the chicken to an even thickness (about ½ inch). Season both sides with salt and pepper.
Step 2: Set Up the Breading Station
Prepare three shallow bowls:
- One with flour
- One with beaten eggs
- One with panko breadcrumbs
Dip each chicken piece into the flour, then the egg, and finally coat thoroughly with panko. Press the breadcrumbs in firmly for maximum crunch.
Step 3: Fry the Katsu
In a large skillet, heat about ½ inch of vegetable oil over medium heat until it reaches 340–350°F (170–175°C). Fry the chicken cutlets for 3–4 minutes per side or until golden brown and cooked through. Drain on a wire rack.
Step 4: Cook the Rice
While the chicken is frying, cook your short-grain white rice according to package instructions or using a rice cooker. Fluff once done.
Step 5: Make the Sauces
Tonkatsu Sauce: In a small bowl, mix ketchup, Worcestershire sauce, soy sauce, and sugar. Stir until smooth.
Sesame Mayo Sauce: In another bowl, whisk together Japanese mayo, sesame oil, and rice vinegar. Add chili flakes if you like a bit of heat.
Step 6: Assemble the Bowl
Scoop hot rice into bowls. Slice the crispy katsu into strips and place over the rice. Drizzle both sauces generously over the chicken. Garnish with chopped parsley or green onion.
Step 7: Serve and Enjoy
Serve immediately while hot and crispy. Add a side of miso soup or pickled vegetables for an authentic Japanese touch.
Notes
- Make it lighter: For a healthier twist, you can bake or air-fry the breaded chicken instead of deep-frying.
- Use pork or tofu: Traditional katsu is often made with pork cutlets. You can also make this vegetarian by using extra-firm tofu.
- Double the batch: Make extra chicken katsu and freeze the uncooked breaded cutlets for quick future meals.
Watch Out for These Mistakes While Cooking
- Skipping the panko: Regular breadcrumbs don’t create the same airy, crispy texture that Japanese panko does.
- Crowding the pan: Frying too many pieces at once lowers the oil temperature, leading to greasy, soggy katsu.
- Not checking oil temperature: If the oil isn’t hot enough, the coating will absorb oil. Too hot, and the outside will burn before the chicken cooks through.
- Slicing too early: Cutting the chicken straight out of the pan releases juices and softens the crust. Rest for a few minutes first.
- Using wet rice: Mushy or overcooked rice makes the bowl feel heavy. Go for fluffy, slightly sticky short-grain rice.
- Undermixing sauces: Lumpy sauces can ruin the final presentation. Whisk thoroughly until smooth.
- Overcooking the chicken: Pounded thin chicken cooks fast. Use a thermometer (165°F/74°C internal temp) or cut to check doneness.
- Skipping the wire rack: Draining on paper towels alone traps steam underneath and softens the crust—use a wire rack for crisp perfection.
What to Serve With Crispy Japanese Katsu Bowl?
A Crispy Japanese Katsu Bowl is satisfying on its own, but pairing it with the right side dishes elevates the experience and brings variety to the table.
Here are 8 Recommendations:
1. Miso Soup
A warm bowl of miso soup with tofu and seaweed balances the richness of the katsu with its savory, umami flavors.
2. Pickled Ginger or Daikon
These tangy, crisp pickles cut through the fried elements and refresh your palate between bites.
3. Cucumber Sunomono Salad
A light, vinegary cucumber salad adds a refreshing crunch and contrast to the warm rice and chicken.
4. Edamame with Sea Salt
Steamed and lightly salted edamame offer a protein-rich, satisfying snack or side.
5. Japanese Potato Salad
Creamy, slightly sweet, and loaded with crunchy veggies, this is a comforting and familiar side that complements the katsu.
6. Steamed Vegetables with Sesame Dressing
Broccoli, carrots, or snap peas tossed with a simple sesame sauce make a great, healthy addition.
7. Tamago (Japanese Sweet Omelet)
Soft, slightly sweet tamago pairs wonderfully with the savory-salty notes of the katsu bowl.
8. Green Tea or Iced Matcha Latte
For a drink pairing, go with a classic Japanese beverage like green tea to cleanse the palate and round out the meal.
These sides offer a mix of textures and temperatures that beautifully balance the crunchy, hot katsu bowl.
Storage Instructions
If you have leftovers, here’s how to keep everything tasting fresh:
- Chicken Katsu: Store in an airtight container in the fridge for up to 3 days. For best results, reheat in an air fryer or oven at 375°F (190°C) until crisp—about 8–10 minutes. Avoid microwaving, as it will make the coating soggy.
- Rice: Refrigerate in a sealed container for up to 4 days. Sprinkle a bit of water over it and reheat in the microwave or on the stovetop with a lid to steam it back to life.
- Sauces: Both the tonkatsu and sesame mayo sauces will keep in the fridge for up to 1 week in sealed containers.
- Freezing: You can freeze uncooked, breaded chicken katsu cutlets in a single layer, then transfer to a freezer bag. They’ll keep for up to 2 months. Fry straight from frozen—just add 1–2 minutes extra cooking time.
Estimated Nutrition (Per Serving — 1 katsu bowl)
- Calories: 690 kcal
- Protein: 34g
- Carbohydrates: 58g
- Fat: 34g
- Saturated Fat: 6g
- Unsaturated Fat: 25g
- Trans Fat: 0g
- Cholesterol: 160mg
- Sugar: 6g
- Sodium: 820mg
- Fiber: 2g
- Serving Size: 1 rice bowl with chicken and sauces
- Category: Dinner / Japanese Fusion
- Diet: Can be made dairy-free
- Keywords: chicken katsu, Japanese dinner, crispy chicken bowl, easy katsu, katsu rice bowl
Frequently Asked Questions
1. Can I use pork instead of chicken for this recipe?
Absolutely! Pork loin or pork shoulder cutlets work perfectly and are actually the traditional choice in a classic tonkatsu. Just make sure to pound them thin for even cooking.
2. Is it possible to make this recipe gluten-free?
Yes—use gluten-free panko and substitute the all-purpose flour with a gluten-free flour blend. Also, double-check the soy sauce and Worcestershire sauce to ensure they are gluten-free varieties.
3. Can I air fry the chicken instead of deep-frying?
Definitely. Spray the breaded chicken with a light coat of oil and air fry at 400°F (200°C) for 12–15 minutes, flipping halfway through, until golden and cooked through.
4. How do I keep the chicken katsu crispy after cooking?
Let it rest on a wire rack instead of paper towels to prevent steam from softening the crust. Only slice it right before serving.
5. What rice should I use for this bowl?
Short-grain white rice (like sushi rice or Japanese rice) is best. It’s slightly sticky and pairs well with the texture of the katsu.
6. Can I make the sauces ahead of time?
Yes! Both the tonkatsu sauce and the sesame mayo can be made 3–5 days in advance and stored in the fridge in airtight containers.
7. Is Japanese mayonnaise necessary?
Japanese mayo like Kewpie has a richer, umami-packed flavor. If unavailable, you can substitute with regular mayo, but you might want to add a touch of rice vinegar and sugar for a similar taste.
8. Can I serve this without rice?
Absolutely. Swap the rice for salad greens or soba noodles to turn it into a crispy katsu salad or noodle bowl.
Conclusion
This Crispy Japanese Katsu Bowl Recipe is a true celebration of textures and flavors—crunchy, juicy, savory, and satisfying. Whether you’re deep-frying for that unbeatable golden crust or air frying for a lighter twist, the result is a bowl that hits every craving. With versatile options for protein, sauce, and sides, it’s a go-to dish you’ll want to make again and again.
Ready to master your own homemade katsu bowl? Grab your ingredients and start frying—this Japanese comfort dish is just a few steps away from becoming your new favorite dinner idea.
Crispy Japanese Katsu Bowl Recipe
- Total Time: 30 minutes
- Yield: 2 servings
Description
Craving a satisfying dinner idea that’s crispy, flavorful, and fast? This Crispy Japanese Katsu Bowl recipe delivers everything you want in a comforting, restaurant-style meal—right at home. With juicy fried chicken, fluffy white rice, and rich sauces like sesame mayo and tangy tonkatsu, it’s the ultimate easy recipe for a quick dinner or lunch. Whether you’re exploring Japanese food ideas or need a go-to healthy snack with protein and flavor, this katsu bowl checks all the boxes. Perfect for weeknights, meal prep, or when you need new dinner ideas that don’t require hours in the kitchen.
Ingredients
2 boneless skinless chicken breasts
0.5 teaspoon salt
0.5 teaspoon black pepper
0.5 cup all-purpose flour
2 large eggs, beaten
1 cup Japanese panko breadcrumbs
vegetable oil for frying
2 cups cooked short-grain white rice
2 tablespoons chopped parsley or green onion
2 tablespoons ketchup
1 tablespoon Worcestershire sauce
1 teaspoon soy sauce
0.5 teaspoon sugar
3 tablespoons Japanese mayonnaise
1 tablespoon sesame oil
1 teaspoon rice vinegar
optional pinch of chili flakes
Instructions
1. Slice chicken breasts horizontally or pound them to an even thickness of ½ inch. Season both sides with salt and pepper.
2. Set up three bowls: one with flour, one with beaten eggs, and one with panko. Dredge the chicken in flour, then egg, then panko.
3. Heat ½ inch of vegetable oil in a skillet to 340–350°F. Fry chicken for 3–4 minutes per side until golden brown. Drain on a wire rack.
4. Cook short-grain white rice according to instructions or using a rice cooker.
5. Prepare the sauces. For tonkatsu sauce, mix ketchup, Worcestershire, soy sauce, and sugar until smooth. For sesame mayo, whisk together mayo, sesame oil, and vinegar (add chili flakes if desired).
6. Slice the fried chicken into strips. Fill bowls with hot rice, place chicken on top, and drizzle with both sauces.
7. Garnish with chopped parsley or green onions. Serve immediately.
8. Enjoy with optional sides like miso soup or pickled vegetables.
Notes
Pound chicken evenly for uniform cooking and maximum crispiness.
Let fried chicken rest on a wire rack—not paper towels—to stay crunchy.
You can freeze uncooked, breaded chicken for up to 2 months for quick meals later.
- Prep Time: 15 minutes
- Cook Time: 15 minutes
- Category: Dinner
- Method: Frying
- Cuisine: Japanese
Nutrition
- Serving Size: 1 bowl
- Calories: 690
- Sugar: 6g
- Sodium: 820mg
- Fat: 34g
- Saturated Fat: 6g
- Unsaturated Fat: 25g
- Trans Fat: 0g
- Carbohydrates: 58g
- Fiber: 2g
- Protein: 34g
- Cholesterol: 160mg
Keywords: chicken katsu, katsu bowl, Japanese dinner, easy recipe, crispy chicken, dinner ideas