

If you’ve ever browsed the snack aisle during February and felt that familiar flutter of nostalgia at the sight of Little Debbie Valentine Cakes, you’re not alone. I remember the first time I bit into one of those soft, heart-shaped, pink-glazed cakes as a kid—I was hooked. This copycat version brings that magic back, only better. It’s more tender, more flavorful, and perfect for any celebration of love (or just when you’re craving something sweet and adorable).
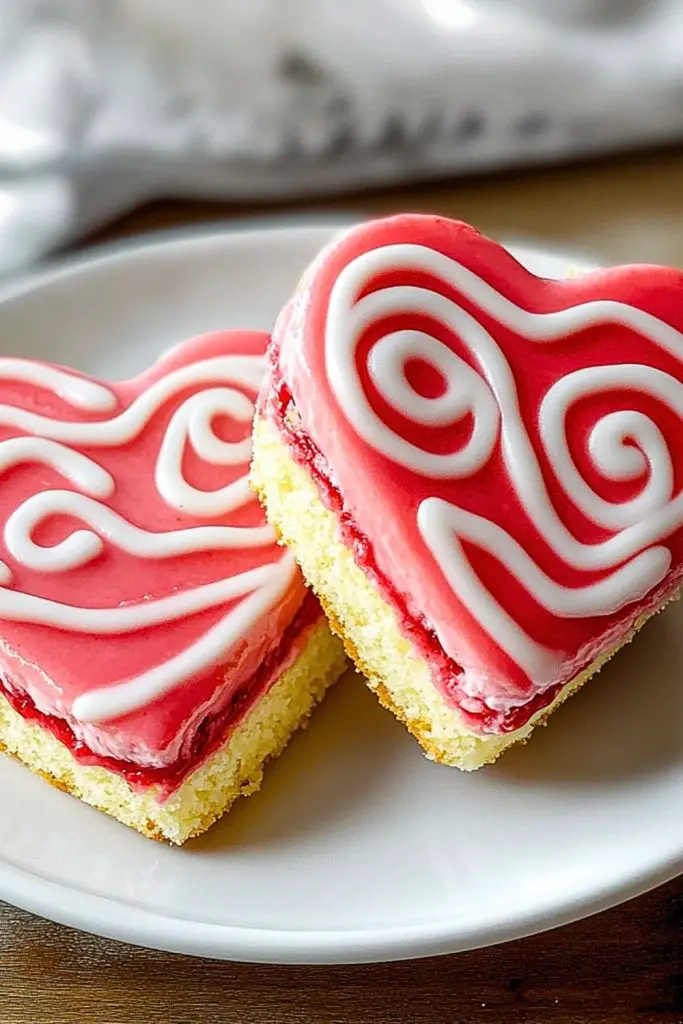
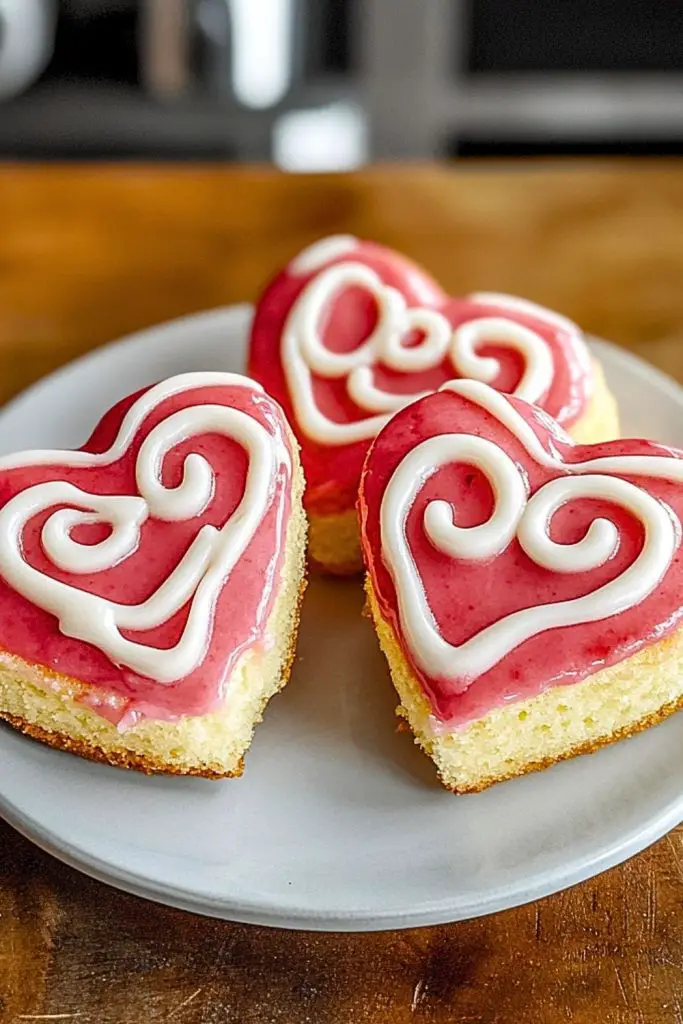
I decided to recreate these iconic treats not only to relive the taste but to elevate it. They’re made with layers of rich red velvet cake and fluffy vanilla sponge, all sandwiched between a buttery base and sealed under a glossy pink glaze. Topped with a swirl of white icing and a scatter of red sprinkles, these heart cakes aren’t just cute—they’re a total sensory delight.
Why You’ll Love This Copycat Little Debbie Valentine Cakes Recipe
- They taste better than the original with fresher, more balanced flavors.
- Perfect for gifting or parties thanks to their charming look.
- Great make-ahead dessert, ideal for freezing and enjoying later.
- Customizable, so you can adjust the filling, glaze, or even cake flavors.
- Fun to bake, especially with kids or for themed events.
What Type of Cake Should I Use for Copycat Little Debbie Valentine Cakes?
The original Little Debbie cakes use a combination of red velvet and a light vanilla sponge, and that’s exactly the route I took. For the base, a buttery sugar cookie-style layer adds structure. Then comes a vibrant, moist red velvet cake and a fluffy vanilla layer. Each tier plays a role: the red velvet gives richness and color, the vanilla adds airiness, and the cookie base keeps everything neatly together. You can bake all three layers fresh, or use store-bought sponge cakes to save time—just don’t skip that signature heart shape!
Options for Substitutions
If you’re missing an ingredient or need a diet-friendly alternative, here are some helpful swaps:
- Red Velvet Cake: You can use chocolate cake instead if you don’t have cocoa and red coloring—just reduce the sugar slightly.
- Vanilla Cake Layer: A boxed white cake mix works well if you’re in a hurry. Or try almond or lemon flavoring for a twist.
- Base Cookie Layer: Use shortbread or even graham cracker crust for a crunchier base.
- Pink Glaze: Mix powdered sugar with a splash of milk and pink food coloring. Beet juice works as a natural alternative.
- Filling: Traditional marshmallow crème or buttercream are both great, but cream cheese frosting adds an extra tangy contrast.
- Sprinkles & Decorations: Red sanding sugar or mini heart-shaped sprinkles keep it festive, but you can go minimal with just the white icing swirl.
Ingredients for Copycat Little Debbie Valentine Cakes
Each component of this cake serves a purpose in recreating that iconic look and taste. Here’s a breakdown of the ingredients and why they matter:
- All-Purpose Flour – The backbone of both the cookie base and cake layers, providing structure and tenderness.
- Unsalted Butter – Adds richness and moisture, especially important in the base and frosting.
- Granulated Sugar – Sweetens both the red velvet and vanilla layers while contributing to their texture.
- Eggs – Help bind the ingredients and give the cake its soft, bouncy texture.
- Buttermilk – Key for that signature red velvet tang and fluffy crumb.
- Cocoa Powder – Just a hint adds the subtle chocolate note to red velvet cake.
- Vanilla Extract – Essential for flavor depth in both the sponge and frosting.
- Baking Powder & Baking Soda – These leaveners ensure lift and lightness in the cake layers.
- Salt – A little goes a long way to balance sweetness and enhance flavor.
- Red Food Coloring – Brings the red velvet to life with a vibrant, festive hue.
- Powdered Sugar – Used in the glaze and frosting for a smooth, sweet finish.
- Milk – Helps thin out the glaze for that pourable, glossy effect.
- Marshmallow Crème or Cream Cheese Frosting – Provides that fluffy, creamy layer in the middle.
- Pink Gel Food Coloring – Gives the glaze that lovely pastel-pink finish.
- Sprinkles & White Icing – For the decorative heart swirl and festive touch on top.
Step 1: Prepare the Cookie Base
Start by preheating your oven to 350°F (175°C). Line a baking sheet with parchment paper. In a mixing bowl, cream together butter and sugar until light and fluffy. Add in flour and a pinch of salt, mixing until a dough forms. Press this evenly into a parchment-lined rectangular pan and bake for 12–15 minutes or until lightly golden. Let it cool completely.
Step 2: Make the Red Velvet Cake Layer
In a separate bowl, whisk together flour, cocoa powder, baking soda, and salt. In another bowl, beat butter and sugar until fluffy. Add in eggs, one at a time, followed by vanilla and red food coloring. Alternate adding dry ingredients and buttermilk. Pour the batter into a second lined sheet pan and bake for about 20 minutes. Let cool and carefully trim to match the cookie base dimensions.
Step 3: Bake the Vanilla Cake Layer
Follow a similar process to the red velvet layer, but skip the cocoa and food coloring. Use a basic vanilla cake recipe, ensuring it’s light and airy. Spread the batter into a pan and bake until golden and springy—roughly 18–20 minutes. Cool, then trim to size.
Step 4: Assemble the Layers
Place the cookie base on your work surface. Spread a thin layer of frosting (or marshmallow crème) over it. Lay the red velvet layer on top, gently pressing it down. Spread more frosting, then add the vanilla layer. Chill the stacked cake in the fridge for 30 minutes to firm up.
Step 5: Cut Out the Heart Shapes
Once the layers are set, use a heart-shaped cookie cutter to punch out individual cakes. Clean the cutter between uses for neat edges. Carefully transfer each heart to a wire rack set over a tray.
Step 6: Prepare and Apply the Glaze
In a bowl, mix powdered sugar with milk and pink food coloring until you get a thick but pourable glaze. Spoon it over each heart cake, letting it drip slightly over the edges. Let sit until the glaze sets—about 20–30 minutes.
Step 7: Decorate
Pipe a white icing heart on top of each cake, then scatter red sprinkles for that classic Valentine’s Day flair. Allow all decorations to set completely before serving or storing.
How Long to Cook the Copycat Little Debbie Valentine Cakes
Each layer of this cake requires individual baking time, and the full process takes a bit of patience—but the result is totally worth it. Here’s a quick timing guide:
- Cookie Base: 12–15 minutes at 350°F (175°C), until just golden.
- Red Velvet Cake: 18–20 minutes, also at 350°F, until a toothpick comes out clean.
- Vanilla Cake Layer: 18–20 minutes, same temperature.
- Chill Time Before Cutting: Minimum 30 minutes.
- Glaze Set Time: 20–30 minutes at room temperature.
Altogether, plan for around 2 to 2.5 hours including baking, assembly, and cooling.
Tips for Perfect Copycat Little Debbie Valentine Cakes
- Use parchment paper in all pans so you can lift layers out easily and trim them cleanly.
- Cool cakes completely before stacking—warm layers can slide or melt the filling.
- Trim the edges of each layer before assembly to ensure clean lines and easier cutting.
- Chill the assembled layers before cutting into hearts to get the sharpest shapes.
- Use gel food coloring for vibrant red and pink without thinning the batter or glaze.
- Spoon glaze gently over cakes and let gravity do the work for a smooth finish.
- Pipe icing after the glaze has set to keep the heart designs crisp and clean.
Watch Out for These Mistakes While Cooking
Even though these cakes are fun and rewarding to make, a few slip-ups can throw off the results. Here’s what to avoid:
- Cutting layers unevenly: If the cakes or base aren’t level, the stack will lean and cut poorly.
- Skipping chill time: Warm cake layers will be harder to cut cleanly and may cause the filling to ooze.
- Using thin glaze: If your glaze is too runny, it won’t coat the hearts properly. Aim for a thick, pourable consistency.
- Rushing decoration: Let the glaze set before adding icing or sprinkles or you’ll lose definition.
- Overmixing batter: This can lead to dense cake layers. Mix until just combined.
What to Serve With Copycat Little Debbie Valentine Cakes?
These cakes shine as the centerpiece of any sweet table, but you can definitely round out the experience with these delightful pairings:
Hot Chocolate with Whipped Cream
A cozy, creamy drink balances the cake’s sweetness beautifully—especially with marshmallows or a peppermint stick.
Fresh Strawberries or Raspberries
Their natural tartness cuts the richness of the cake layers and frosting.
Sparkling Rosé or Berry Mocktail
The bubbles and fruity notes add a light contrast and festive touch.
Vanilla Ice Cream
The cold creaminess is a classic companion to any rich cake—especially with red velvet.
Espresso or Dark Roast Coffee
Bitterness from coffee contrasts the sweet glaze and marshmallow or buttercream filling.
Creamy Yogurt Parfaits
Serve alongside for a lighter option on a dessert tray, especially with granola or fruit.
Chocolate-Covered Pretzels
Sweet meets salty—these provide a crunchy balance to the soft texture of the cakes.
Mini Cheese Platter
For a party spread, balance your sweets with some savory: brie, gouda, or aged cheddar with crackers.
Storage Instructions
These copycat Little Debbie Valentine Cakes store quite well, especially if you make them ahead for a party or special occasion. Here’s how to keep them fresh:
- Room Temperature: Store in an airtight container for up to 2 days if your filling isn’t cream cheese-based.
- Refrigerator: If using cream cheese frosting, keep them chilled in a sealed container for up to 5 days. Let sit at room temp for 10–15 minutes before serving to soften the glaze and cake layers.
- Freezer: Freeze undecorated cakes (after cutting but before glazing) for up to 1 month. Wrap individually in plastic wrap and store in a zip-top freezer bag. Glaze after thawing for best texture.
Pro tip: Add a sheet of parchment between layers if stacking in a container to prevent sticking.
Estimated Nutrition (per individual heart cake)
Note: This will vary depending on frosting and cake layer choices, but here’s an approximate breakdown:
- Calories: 320–360 kcal
- Fat: 16g
- Carbohydrates: 45g
- Sugar: 28g
- Protein: 3g
- Fiber: 0.5g
- Sodium: 180mg
These are indulgent little cakes, meant to be enjoyed as a treat—just like the original. Portion control becomes easy with their individual size!
Frequently Asked Questions
What size cutter should I use for the heart cakes?
A 3 to 4-inch heart-shaped cookie cutter works best. It gives you a snack-sized treat similar to the original, but you can size up or down as needed.
Can I use boxed cake mix instead of homemade?
Absolutely! A boxed red velvet and white cake mix can save time. Just make sure to bake them in thin layers to mimic the classic sandwich style.
How can I make these gluten-free?
Swap the all-purpose flour for a reliable 1:1 gluten-free baking blend in the cake and cookie base. Check your frosting and glaze ingredients for any hidden gluten.
Do I have to use marshmallow crème in the filling?
No—feel free to use cream cheese frosting, vanilla buttercream, or even whipped ganache for a richer version. Marshmallow crème just keeps it closest to the original.
Can I make them ahead for a party?
Yes! You can bake and assemble the layers a day or two in advance, refrigerate them, then glaze and decorate the day of serving.
My glaze is too thin—how do I fix it?
Add more powdered sugar, a tablespoon at a time, until it thickens to the right consistency. It should coat a spoon slowly before dripping.
Can kids help with this recipe?
Definitely. They can help cut out the hearts, stir the glaze, and add sprinkles—just supervise closely around sharp cutters and hot ovens.
How do I get clean edges when cutting the hearts?
Chill the cake stack until firm before cutting. Wipe your cookie cutter clean between each press for neat, professional-looking hearts.
Conclusion
These Copycat Little Debbie Valentine Cakes are so much more than a nostalgic treat—they’re a heartfelt project, a festive dessert, and a true joy to share. Whether you’re making them for a party, a Valentine’s gift, or just to relive a sweet memory, they offer the perfect balance of taste and charm. With soft layers, creamy filling, and that iconic pink glaze, they’re sure to win hearts with every bite.

Copycat Little Debbie Valentine Cakes
- Total Time: 2 hours 25 minutes
- Yield: 12–16 heart cakes
Description
These Copycat Little Debbie Valentine Cakes are heart-shaped layered treats with a buttery cookie base, rich red velvet and vanilla sponge layers, filled with marshmallow or cream cheese frosting, and topped with a glossy pink glaze, icing swirl, and festive sprinkles.
Ingredients
- 1 cup (2 sticks) unsalted butter, softened (divided for base and cakes)
- 2 cups all-purpose flour (for base)
- 1/2 tsp salt
- 1 1/4 cups granulated sugar
- 2 large eggs
- 1/2 cup buttermilk
- 1 tbsp cocoa powder
- 1 1/2 cups all-purpose flour (for cake layers)
- 1/2 tsp baking soda
- 1 tsp baking powder
- 1 tsp vanilla extract
- 1 tbsp red food coloring (gel preferred)
- 1/2 cup milk (for glaze)
- 2 1/2 cups powdered sugar
- Pink gel food coloring
- 1 cup marshmallow creme or cream cheese frosting
- Red sprinkles and white decorating icing
Instructions
- Preheat oven to 350°F (175°C). Line pans with parchment paper.
- For the cookie base: Mix 1/2 cup butter, 2 cups flour, and salt until dough forms. Press into pan and bake for 12–15 minutes. Cool completely.
- For red velvet layer: Beat 1/2 cup butter with 3/4 cup sugar. Add 1 egg, vanilla, cocoa, and red food coloring. Alternate adding 3/4 cup flour with buttermilk and baking soda. Spread in pan, bake 18–20 mins. Cool and trim.
- For vanilla layer: Beat 1/2 cup butter with 1/2 cup sugar. Add 1 egg, vanilla. Mix flour, baking powder, and salt. Add alternately with 1/4 cup milk. Bake 18–20 mins. Cool and trim.
- Assemble: Layer cookie base, frosting, red velvet, more frosting, and vanilla layer. Chill for 30 minutes.
- Cut out hearts with a 3-4 inch cutter. Transfer to wire rack.
- Prepare glaze: Mix powdered sugar, milk, and pink coloring until pourable. Spoon over hearts.
- Let glaze set 20–30 minutes. Decorate with white icing swirl and red sprinkles.
- Prep Time: 40 minutes
- Chill Time: 1 hour
- Cook Time: 45 minutes