

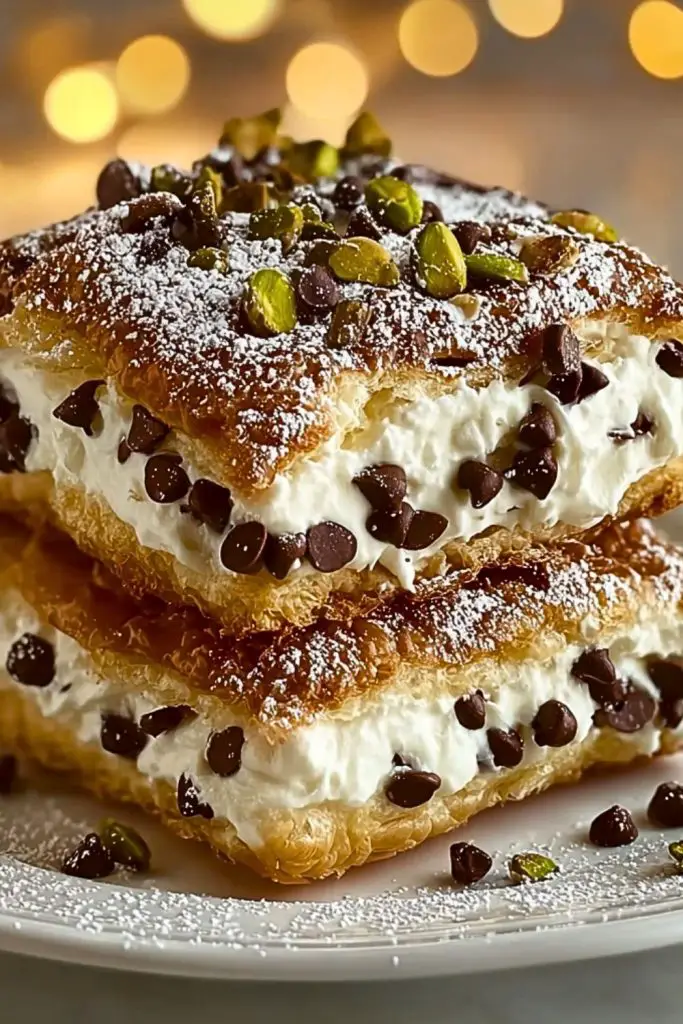
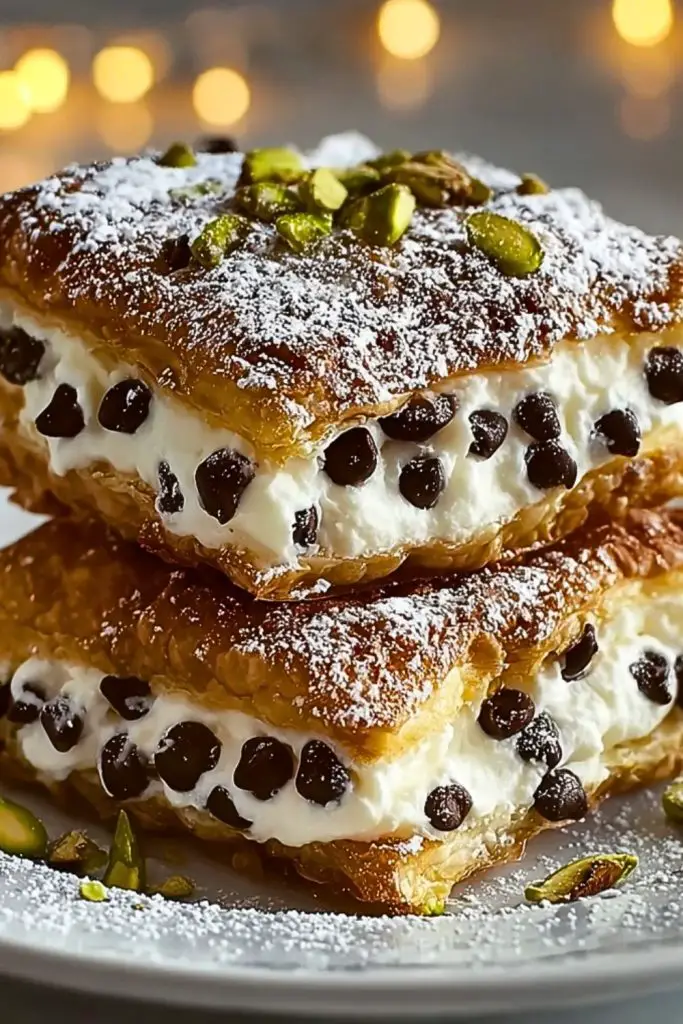
Golden, flaky pastry layers sandwich a rich, creamy ricotta filling dotted with sweet chocolate chips — Classic Cannoli Squares are the dreamy dessert you didn’t know you needed. Inspired by the traditional Sicilian cannoli, this version transforms the beloved pastry into an easy-to-make, shareable treat that’s as elegant as it is indulgent. Every bite delivers a perfect balance of crispiness and creaminess, with a dusting of powdered sugar and a hint of pistachio crunch on top to tie it all together.
Unlike their tubular cousins, these squares skip the deep fryer and deliver all the nostalgic cannoli flavor in a much more convenient, no-fuss format. They’re perfect for holiday trays, dinner party finales, or just when you’re craving a decadent sweet fix that impresses without the stress.
Why You’ll Love This Classic Cannoli Squares Recipe
- Easy elegance: All the charm of a cannoli, without the need for a pastry tube or frying oil.
- Make-ahead magic: These squares keep beautifully in the fridge, making them perfect for prepping ahead.
- Flavor-packed filling: Creamy ricotta, vanilla, and mini chocolate chips offer a rich, satisfying taste.
- Customizable toppings: Add crushed pistachios, orange zest, or even a drizzle of chocolate.
- Perfect texture contrast: Flaky pastry + silky filling = irresistible.
Preparation Phase & Tools to Use (Essential Tools and the Importance of Each)
Creating Classic Cannoli Squares is straightforward, but using the right tools makes all the difference in achieving a bakery-quality result. Here’s what you’ll need and why:
- Baking Sheet: A sturdy, rimmed baking sheet ensures even baking of your pastry layers, keeping them crisp and golden without over-browning.
- Parchment Paper: Prevents sticking and promotes even puffing of the pastry. It also makes cleanup a breeze.
- Rolling Pin: Useful if you’re slightly stretching store-bought puff pastry to the desired size or thickness.
- Mixing Bowls: At least one large bowl for combining the ricotta filling smoothly and thoroughly.
- Fine Mesh Sieve or Cheesecloth: Essential for draining ricotta — the drier the cheese, the creamier your filling will be.
- Offset Spatula: Helps spread the filling evenly and smoothly between pastry layers.
- Sharp Knife or Pastry Cutter: To cut clean, even squares once assembled.
- Sifter or Fine Mesh Strainer: For that final snowy dusting of powdered sugar on top.
These tools will streamline the process and ensure your layers bake evenly and your filling comes together light and smooth.
Preparation Tips
- Drain Your Ricotta Thoroughly: Place it in a cheesecloth-lined sieve over a bowl and refrigerate for a few hours or overnight. Excess moisture will ruin the texture of the filling.
- Use Cold Puff Pastry: Keep your puff pastry chilled until you’re ready to bake. This helps it puff up properly and achieve that flaky texture.
- Cool Pastry Completely Before Assembling: A warm pastry can melt your filling and create a soggy mess.
- Chill Before Cutting: Once assembled, pop the finished dessert into the fridge for an hour or more to set up clean, professional-looking slices.
- Don’t Overfill: Too much filling can cause spillage when slicing or serving. Use a steady hand and spread evenly.
- Add Vanilla & Citrus Zest to Ricotta: A touch of vanilla and some lemon or orange zest adds authentic cannoli flavor and brightness to the filling.
- Toast the Pistachios: Lightly toasting chopped pistachios enhances their flavor and adds crunch to the final touch.
Ingredients for Classic Cannoli Squares
To recreate the rich, creamy, and crisp delight of Classic Cannoli Squares, here’s everything you’ll need:
For the Pastry Layers:
- 2 sheets of puff pastry, thawed (store-bought or homemade)
- 1 egg, beaten (for egg wash)
- Powdered sugar, for dusting
For the Cannoli Filling:
- 2 cups whole milk ricotta cheese, well-drained
- ¾ cup powdered sugar, sifted
- 1 teaspoon pure vanilla extract
- ½ teaspoon orange or lemon zest (optional but recommended for traditional flavor)
- ¾ cup mini semi-sweet chocolate chips
Toppings (Optional but Recommended):
- 2 tablespoons chopped pistachios
- Extra chocolate chips
- Extra powdered sugar, for final dusting
Ingredient Notes:
- Ricotta: Be sure to drain it overnight if it’s too wet — this makes the difference between a creamy vs. watery filling.
- Puff Pastry: Always keep it chilled until just before baking for the best rise.
- Mini Chocolate Chips: These work best to distribute evenly through the filling without overpowering it.
Step 1: Prepare the Puff Pastry
Preheat your oven to 400°F (200°C). Line a large baking sheet with parchment paper.
Unfold the two sheets of puff pastry onto a lightly floured surface. Gently roll them out to smooth creases and ensure even thickness.
Transfer both sheets to separate parchment-lined baking sheets.
Brush the top of each with a light coating of beaten egg to promote golden browning.
Prick the pastry all over with a fork to prevent excessive puffing.
Bake for 15–18 minutes, or until golden brown and crisp.
Remove from oven and let cool completely.
Step 2: Prepare the Cannoli Filling
In a large bowl, combine drained ricotta, sifted powdered sugar, vanilla extract, and optional citrus zest.
Mix until smooth and creamy — use a hand mixer for extra lightness, if desired.
Gently fold in mini chocolate chips until evenly distributed.
Refrigerate for 15–20 minutes to firm up slightly.
Step 3: Assemble the Cannoli Squares
Place one baked pastry sheet on a serving tray or cutting board.
Spread the chilled ricotta filling evenly across the entire surface using an offset spatula.
Top with the second baked pastry sheet and gently press to set.
Optional: Press lightly with your palm to secure the top layer without squishing the filling.
Step 4: Garnish and Chill
Sprinkle the top with powdered sugar, extra mini chocolate chips, and chopped pistachios.
Refrigerate for at least 1 hour to allow the dessert to set and become easier to slice.
Step 5: Slice and Serve
Using a sharp knife or pastry cutter, slice the chilled dessert into squares or bars.
Serve cold or at room temperature — both are delightful!
Notes
- Drain Ricotta Thoroughly: This is non-negotiable. Wet ricotta will make your filling runny and can soak into the pastry, ruining that flaky texture.
- Make-Ahead Friendly: These squares actually taste better after a few hours in the fridge. It gives the filling time to firm up and the flavors to meld beautifully.
- Customize to Taste: Add cinnamon, swap in mascarpone, or mix in chopped candied orange peel for a fun twist on the classic flavor.
- Portion Control Tip: Cut into smaller squares for mini dessert bites at parties or buffets — they’re rich, so a little goes a long way.
- Use a Serrated Knife: When cutting the squares, a serrated knife will help you slice through the crisp pastry without squishing the filling.
Watch Out for These Mistakes While Cooking
- Skipping the Ricotta Drain: This is the #1 mistake. Undrained ricotta = watery, unstable filling.
- Using Warm Pastry: Never layer your filling on pastry that’s still warm — it will melt the filling and compromise texture.
- Overbaking the Puff Pastry: Dark brown edges mean overcooked pastry. Aim for a golden, crisp finish.
- Too Much Filling: It’s tempting, but piling on excess filling will cause the layers to slide and make slicing a nightmare.
- Uneven Cooling Time: If you don’t allow both pastry and filling to cool sufficiently before assembly, you’ll end up with soggy or runny squares.
- Using Full-Sized Chocolate Chips: They make the filling harder to slice and overpower the ricotta. Mini chips are ideal.
- Skipping the Chill Time Before Slicing: Slicing too early will lead to messy edges and uneven portions.
- Not Pricking the Pastry Before Baking: This small step helps control puffiness and keeps your layers from ballooning.
What to Serve With Classic Cannoli Squares
Classic Cannoli Squares are rich, creamy, and perfectly sweet — but pairing them with the right beverage or dish can turn a simple dessert into a full-on experience. Whether you’re serving them at a dinner party, brunch, or as a midweek treat, here’s how to elevate the moment.
8 Delicious Pairings
1. Espresso or Strong Coffee
The bold bitterness of a fresh espresso cuts beautifully through the sweet, creamy filling. It’s the most authentic Italian pairing you can offer.
2. Vin Santo or Sweet Dessert Wine
A chilled glass of Vin Santo or Moscato is a perfect match — smooth, sweet, and slightly floral to echo the delicate notes in the cannoli cream.
3. Fresh Berries
Serve a small bowl of raspberries or sliced strawberries on the side for a bright, tangy contrast that lightens the dessert.
4. Limoncello Shots
Hosting a dinner party? A cold shot of limoncello adds a vibrant citrus kick that complements the orange or lemon zest in the filling.
5. Amaretto on Ice
This almond-flavored liqueur has a rich, nutty taste that pairs wonderfully with the pistachio topping and ricotta base.
6. Vanilla Bean Gelato
A small scoop of gelato beside a square makes for a creamy-on-creamy experience, but with just enough chill to contrast the flaky pastry.
7. Toasted Nuts or Biscotti
Serve some chopped toasted almonds or biscotti for extra crunch and a rustic Italian dessert board vibe.
8. Chilled Prosecco
If you’re feeling festive, bubbly prosecco adds a refreshing finish and makes even a simple dessert feel like a celebration.
Storage Instructions
Classic Cannoli Squares are easy to store and even better the next day, once the flavors have had time to meld. Here’s how to keep them fresh and delicious:
- Refrigerator: Place the squares in an airtight container and refrigerate for up to 3–4 days. Layer parchment paper between rows if stacking to prevent sticking.
- Freezer: While the filling itself freezes well, the puff pastry can lose its crispness when thawed. If you do freeze them, wrap each square tightly in plastic wrap and foil, then freeze for up to 1 month. Thaw in the fridge overnight, and re-crisp the pastry lightly in a toaster oven before serving if desired.
- Avoid Room Temperature Storage: Because of the dairy-based filling, always refrigerate when not serving.
- Do Not Freeze Assembled Squares for Long-Term Use: For best texture, freeze the filling and baked pastry separately, then assemble fresh.
Estimated Nutrition (Per Square, based on 16 servings)
- Calories: 220
- Total Fat: 13g
- Saturated Fat: 6g
- Unsaturated Fat: 6g
- Trans Fat: 0g
- Cholesterol: 35mg
- Sodium: 105mg
- Carbohydrates: 20g
- Sugar: 8g
- Fiber: 1g
- Protein: 5g
- Serving Size: 1 square (approx. 2″x2″)
- Category: Dessert
- Method: Baking
- Cuisine: Italian
- Diet: Vegetarian
- Keywords: Easy dessert, Italian sweets, no-fry cannoli, puff pastry dessert, ricotta recipe
Frequently Asked Questions
1. Can I use mascarpone instead of ricotta?
Yes, but it will change the texture. Mascarpone is creamier and richer, while ricotta has a traditional, slightly grainy texture typical of classic cannoli.
2. Do I need to drain the ricotta if it looks thick already?
Yes — even if it looks firm, it still likely contains excess moisture that could thin out the filling over time. Draining ensures stability and creaminess.
3. Can I make Classic Cannoli Squares ahead of time?
Absolutely. You can prepare them a day in advance. Just store them in the refrigerator in an airtight container, and they’ll taste even better after resting.
4. Can I use homemade puff pastry?
Definitely! If you’re comfortable making your own, it will enhance the flavor and flakiness even more — just make sure it’s rolled thin and baked until golden.
5. What if I don’t have mini chocolate chips?
Chop regular chocolate into small chunks or use finely chopped dark chocolate. Avoid large pieces that can make slicing messy.
6. How do I keep the pastry crispy after assembly?
Be sure the pastry is completely cool before adding the filling, and don’t let them sit out at room temperature too long after slicing. Store in the fridge and serve cold for the best texture.
7. Can I make this gluten-free?
Yes! Use a gluten-free puff pastry brand, and double-check that all your other ingredients (especially chocolate chips and powdered sugar) are certified gluten-free.
8. Can I double the recipe for a crowd?
You sure can. Just double all ingredients and use a larger tray or make two separate batches. They’re perfect for parties and easy to slice into bite-sized squares.
Conclusion
Classic Cannoli Squares take everything you love about traditional cannoli — the creamy ricotta filling, the light crunch, the sweet chocolate — and make it accessible, mess-free, and completely crowd-pleasing. With flaky puff pastry as the base and no frying involved, it’s a modern dessert that honors its roots while saving you time and effort.
Whether you’re hosting a holiday dinner, bringing dessert to a potluck, or just treating yourself to something special, these squares deliver bakery-worthy results with minimal fuss. Once you taste them, don’t be surprised if they become your new go-to Italian dessert!

Classic Cannoli Squares
- Total Time: 1 hour 45 minutes
- Yield: 16 squares
- Diet: Vegetarian
Description
Classic Cannoli Squares are an irresistible twist on the beloved Italian dessert — without the fuss of frying. Flaky puff pastry replaces the traditional shell, layered with a sweet, creamy ricotta filling studded with mini chocolate chips and topped with a dusting of powdered sugar and crunchy pistachios. Whether you’re searching for easy dessert ideas, Italian-inspired treats, or a show-stopping party dessert, this quick recipe delivers elegance and indulgence in every bite. Great for entertaining, holiday spreads, or simple sweet cravings, it’s a crowd-pleaser that’s easy to make ahead and easier to love.
Ingredients
2 sheets puff pastry, thawed
1 egg, beaten
Powdered sugar, for dusting
2 cups whole milk ricotta cheese, well-drained
0.75 cup powdered sugar, sifted
1 teaspoon vanilla extract
0.5 teaspoon orange or lemon zest (optional)
0.75 cup mini semi-sweet chocolate chips
2 tablespoons chopped pistachios
Extra chocolate chips, for topping
Extra powdered sugar, for final dusting
Instructions
1. Preheat oven to 400°F (200°C) and line two baking sheets with parchment paper.
2. Roll out puff pastry sheets to even thickness and place on the lined sheets.
3. Brush each with beaten egg and prick all over with a fork.
4. Bake for 15–18 minutes, until golden and crisp. Let cool completely.
5. In a bowl, mix drained ricotta, powdered sugar, vanilla, and zest until smooth.
6. Fold in mini chocolate chips. Chill filling for 15–20 minutes.
7. Place one pastry sheet on a board or tray. Spread ricotta filling evenly.
8. Top with the second pastry sheet and gently press down to secure.
9. Dust with powdered sugar, top with pistachios and extra chips.
10. Refrigerate for at least 1 hour before slicing into squares and serving.
Notes
Drain your ricotta overnight for the creamiest, most stable filling.
Always cool your pastry fully before assembly to avoid a soggy texture.
Chill the assembled dessert before slicing to get clean, sharp squares.
- Prep Time: 25 minutes
- Cook Time: 18 minutes
- Category: Dessert
- Method: Baking
- Cuisine: Italian
Nutrition
- Serving Size: 1 square
- Calories: 220
- Sugar: 8g
- Sodium: 105mg
- Fat: 13g
- Saturated Fat: 6g
- Unsaturated Fat: 6g
- Trans Fat: 0g
- Carbohydrates: 20g
- Fiber: 1g
- Protein: 5g
- Cholesterol: 35mg
Keywords: easy dessert, Italian sweets, no-fry cannoli, puff pastry dessert, ricotta recipe