

Chicken Kiev with Garlic Butter is one of those classic dishes that instantly transports me to a cozy, old-school European kitchen. The moment I slice into the golden, crisp crust and watch that river of garlicky herb butter spill out—it’s pure magic. I’ve made this dish for special dinners, date nights at home, and even casual Sunday meals when I want to impress without too much fuss. It always wins hearts.
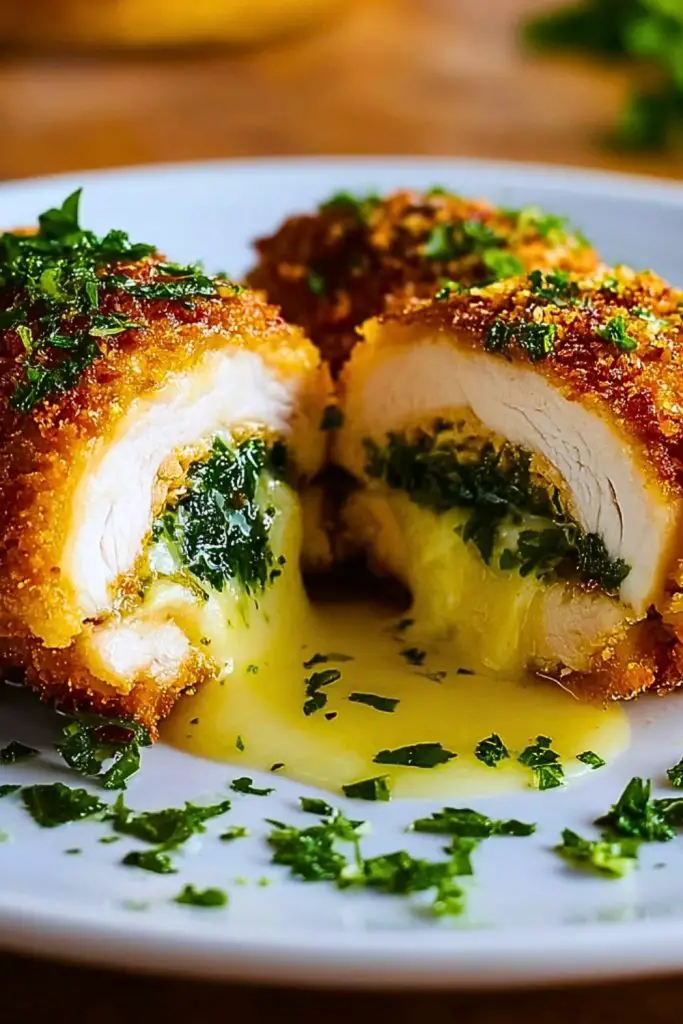
What makes Chicken Kiev so special to me is how it combines comfort with elegance. The chicken breast stays juicy and tender, wrapped around a rich, flavorful garlic butter that’s infused with fresh herbs and a touch of lemon. Once it’s breaded and pan-fried to a crispy perfection, you get the perfect bite: crunch, tenderness, and that melt-in-your-mouth butter center. Whether you’re cooking it for the first time or giving it a nostalgic revisit, this dish never disappoints.
Why You’ll Love This Chicken Kiev with Garlic Butter
- Flavor Explosion: That garlic-herb butter core is intensely flavorful and fragrant.
- Crispy on the Outside, Juicy on the Inside: The breaded coating keeps the chicken moist while adding an irresistible crunch.
- Impressive Yet Simple: It looks restaurant-quality, but it’s surprisingly easy to make with the right steps.
- Versatile Dish: Works for holidays, dinner parties, or a hearty midweek meal.
- Comfort Food With a Gourmet Twist: Classic ingredients elevated to a whole new level.
What’s the Secret to a Perfect Chicken Kiev with Garlic Butter?
The secret lies in how you wrap and seal the garlic butter inside the chicken. Getting that butter to stay tucked in during cooking is the real challenge, and that’s why technique matters just as much as the ingredients. I always chill the garlic butter in advance, so it’s firm when I roll it into the chicken breast. Then I tightly secure the roll with toothpicks or wrap it in plastic and freeze it for a short while—this helps keep everything intact when it hits the hot pan.
Another key detail is getting that breadcrumb crust just right. I use a double-dipping method (flour, then egg, then breadcrumbs—twice!) to create a solid, golden crust that won’t crack or leak during frying. Trust me, taking the time with these small steps makes a huge difference.
Options for Substitutions
- Herbs: Instead of parsley and dill, you can experiment with tarragon, chives, or basil for different herbal notes.
- Butter Filling: Add a touch of grated Parmesan or a hint of lemon zest to customize the flavor. You can even swap in compound butter with chili flakes if you want heat.
- Breadcrumbs: Panko works beautifully for extra crunch, but you can use crushed cornflakes or even almond flour for a gluten-free alternative.
- Chicken: Boneless, skinless chicken thighs can be used, though they’re trickier to roll—great for those who like a richer taste.
- Pan-Frying Oil: Use neutral oils like canola or avocado, but clarified butter (ghee) adds a deeper flavor if you’re feeling indulgent.
- Baking Option: For a lighter version, you can bake it instead of frying. It won’t be quite as crispy but still absolutely delicious.
Ingredients for this Chicken Kiev with Garlic Butter
- Boneless, Skinless Chicken Breasts
These are the star of the dish. You’ll need them to be large and thick enough to pound and roll, creating space for the butter filling. - Unsalted Butter
This is the rich, creamy base of the garlic-herb center. Use high-quality butter for the best flavor payoff. - Garlic Cloves
Finely minced garlic infuses the butter with that signature, aromatic punch that makes Chicken Kiev irresistible. - Fresh Parsley and Dill
These herbs brighten the butter filling and balance the richness. Fresh herbs are best, but dried can be used in a pinch. - Lemon Zest
Just a hint of zest cuts through the richness and adds a subtle citrusy lift. - Salt and Pepper
Essential for seasoning both the chicken and the butter mixture. - All-Purpose Flour
Forms the base layer for the breading, helping the egg stick to the chicken. - Eggs
Beaten eggs create the glue that binds the flour and breadcrumbs together for that crispy outer layer. - Breadcrumbs (preferably Panko)
These provide the signature crunch. Panko breadcrumbs are extra airy and create the best crust. - Cooking Oil (for frying)
A neutral oil like vegetable or sunflower works well to get that golden, crispy crust without overpowering the flavor. - Toothpicks or kitchen twine
Optional, but helpful to secure the chicken roll during cooking and keep the butter inside where it belongs.
Step 1: Make the Garlic Herb Butter
In a small bowl, combine softened unsalted butter with finely minced garlic, chopped fresh parsley and dill, a pinch of salt, black pepper, and a bit of lemon zest. Mix it until smooth. Shape it into a log using plastic wrap and refrigerate for at least 30 minutes, or freeze for 15 minutes until firm.
Step 2: Prepare the Chicken
Place each chicken breast between two sheets of plastic wrap or parchment paper. Pound gently with a meat mallet or rolling pin until about 1/4 inch thick. Be careful not to tear the meat—you want it thin but still intact.
Step 3: Add the Butter Filling
Once the butter is firm, slice it into small logs or disks. Place one piece in the center of each pounded chicken breast. Fold the sides in, then roll it tightly from one end to the other, enclosing the butter completely. Secure with toothpicks if needed.
Step 4: Chill the Chicken Rolls
Place the rolled chicken in the freezer for 15–20 minutes. This firms everything up and helps prevent the butter from leaking out during cooking.
Step 5: Bread the Chicken
Set up three bowls: one with flour, one with beaten eggs, and one with breadcrumbs. Coat each chilled chicken roll first in flour, then egg, then breadcrumbs. For extra crispiness, dip once more in egg and breadcrumbs.
Step 6: Fry to Golden Perfection
In a deep skillet, heat oil over medium heat. Once hot, carefully lower in the chicken rolls and fry for about 3–4 minutes per side until golden brown. Don’t overcrowd the pan—work in batches if needed.
Step 7: Finish in the Oven
Transfer the browned chicken to a baking dish and place in a preheated oven at 375°F (190°C) for 15–18 minutes, or until the internal temperature reaches 165°F (74°C). Let them rest for 5 minutes before serving to keep the butter from gushing out too quickly.
How Long to Cook the Chicken Kiev with Garlic Butter
Once the chicken rolls are breaded and browned in the pan, they’ll need about 15 to 18 minutes in the oven at 375°F (190°C) to finish cooking through. I always check with a meat thermometer to make sure the internal temperature reaches 165°F (74°C). That ensures the chicken is fully cooked while keeping the inside juicy and the butter nice and melty.
If your rolls are on the thicker side, they may need a couple of extra minutes in the oven. Let them rest for 5 minutes before slicing to avoid the butter spilling out too quickly and to let the juices settle.
Tips for Perfect Chicken Kiev with Garlic Butter
- Chill the Butter Well: Cold butter is much easier to roll and stays sealed during cooking.
- Pound Evenly: A uniformly thin chicken breast cooks evenly and rolls more easily without tearing.
- Double-Coat the Breading: For an extra-crispy crust and to lock in the filling, dip in egg and breadcrumbs twice.
- Use Toothpicks for Security: Secure the edges if you’re worried about the butter leaking out—just remember to remove them before serving.
- Don’t Rush the Frying: Let the oil heat up properly and fry in batches to avoid soggy, oil-logged crusts.
- Rest Before Serving: Let the chicken sit for a few minutes post-baking so the melted butter stays where it should—inside the chicken, not all over your plate.
Watch Out for These Mistakes While Cooking
- Skipping the Chill Time: Not chilling the butter or the rolled chicken can lead to leaks during cooking. Always give them a quick freeze before breading and frying.
- Over-Pounding the Chicken: If the meat is too thin or gets torn, the butter will escape. Aim for even thickness, not paper-thin slices.
- Loose Rolling: A sloppy roll won’t seal the butter properly. Tuck in the sides and roll it tight, just like a burrito.
- Overcrowding the Pan: Frying too many at once drops the oil temperature and leads to greasy, soggy crusts. Cook in batches.
- Skipping the Thermometer: Guesswork can leave you with undercooked chicken or dry, overdone meat. Use a thermometer to hit 165°F.
- Serving Immediately After Baking: Letting the chicken rest is key—it helps the butter settle and stay inside when you slice.
What to Serve With Chicken Kiev with Garlic Butter?
Creamy Mashed Potatoes
Fluffy and buttery, they soak up the extra garlic butter beautifully.
Steamed or Roasted Broccoli
A fresh and green contrast to the rich chicken.
Simple Garden Salad
Light and crisp greens with a vinaigrette balance out the richness.
Crusty Bread or Dinner Rolls
Perfect for mopping up every last drop of melted butter.
Lemon-Herb Couscous
A zesty side dish that complements the herb butter filling.
Buttered Sweet Corn
A naturally sweet veggie that pairs wonderfully with the savory chicken.
A Light White Wine (like Sauvignon Blanc)
Optional, but it elevates the whole experience with a refreshing touch.
Garlic Sautéed Mushrooms
Earthy, savory mushrooms are a rich but balanced side dish choice.
Storage Instructions
Chicken Kiev with Garlic Butter is best enjoyed fresh, but you can absolutely store leftovers.
- Refrigerator: Store any cooled leftovers in an airtight container for up to 3 days. Reheat in a 350°F (175°C) oven for about 10–12 minutes to maintain crispness. Avoid microwaving—it makes the crust soggy.
- Freezer: If you want to prep ahead, you can freeze the uncooked, breaded chicken rolls. Place them on a tray in a single layer until solid, then transfer to a freezer-safe bag. They’ll keep for up to 2 months. Bake directly from frozen at 375°F (190°C) for 25–30 minutes, or until the center reaches 165°F.
Estimated Nutrition
Per serving (1 stuffed chicken breast):
- Calories: ~460
- Protein: 38g
- Fat: 27g
- Saturated Fat: 12g
- Unsaturated Fat: 13g
- Trans Fat: <0.5g
- Carbohydrates: 18g
- Fiber: 1g
- Sugar: 1g
- Cholesterol: 130mg
- Sodium: 420mg
These values are estimates and may vary depending on the exact ingredients and portion size. If you’re using extra cheese or a heavier breading, the calorie and fat content will go up slightly.
Frequently Asked Questions
What’s the origin of Chicken Kiev?
Chicken Kiev is often associated with Russian or Ukrainian cuisine, though its exact origin is debated. What’s certain is that it became a European restaurant classic, celebrated for its buttery filling and crisp coating.
Can I make Chicken Kiev in advance?
Yes! You can prep and roll the chicken with the garlic butter, then store it in the fridge for up to 24 hours or freeze it for later. Bread just before cooking for the crispiest results.
How do I keep the butter from leaking out?
Chilling (or even freezing) the butter-filled chicken roll is key. Also, roll it tightly and seal the edges well. Toothpicks or wrapping in plastic before chilling helps hold it all together.
Can I bake instead of fry?
Absolutely. While frying gives a golden crunch, baking is a lighter option. Just spray the breaded chicken with a little oil and bake at 400°F (200°C) for 25–30 minutes, or until cooked through.
What herbs work best in the garlic butter?
Parsley and dill are traditional, but you can also try chives, tarragon, basil, or thyme. Go with what you like or have on hand.
Can I use chicken thighs?
Yes, boneless skinless thighs can work, but they’re harder to roll and seal due to their shape. They’re juicier though, so it’s a worthy experiment if you’re up for it.
Is it safe to eat if some butter leaks out?
Definitely. It might not look as perfect, but it’ll still taste fantastic. Just serve it with something to catch that butter—like mashed potatoes or rice.
What kind of breadcrumbs are best?
Panko breadcrumbs are ideal for their light, airy crunch. Regular or homemade breadcrumbs can work too but won’t be quite as crispy.
Conclusion
Chicken Kiev with Garlic Butter is one of those dishes that looks and tastes far more complicated than it really is. Once you master the few key techniques—chilling that butter, sealing your roll tight, and getting that crisp golden crust—you’re in for a seriously impressive, flavor-packed meal. It brings a blend of comfort, elegance, and old-world charm to the dinner table. Whether you’re cooking for guests or just treating yourself, this is a recipe that truly delivers every time.

Chicken Kiev with Garlic Butter
- Total Time: 1 hour
- Yield: 2 servings
Description
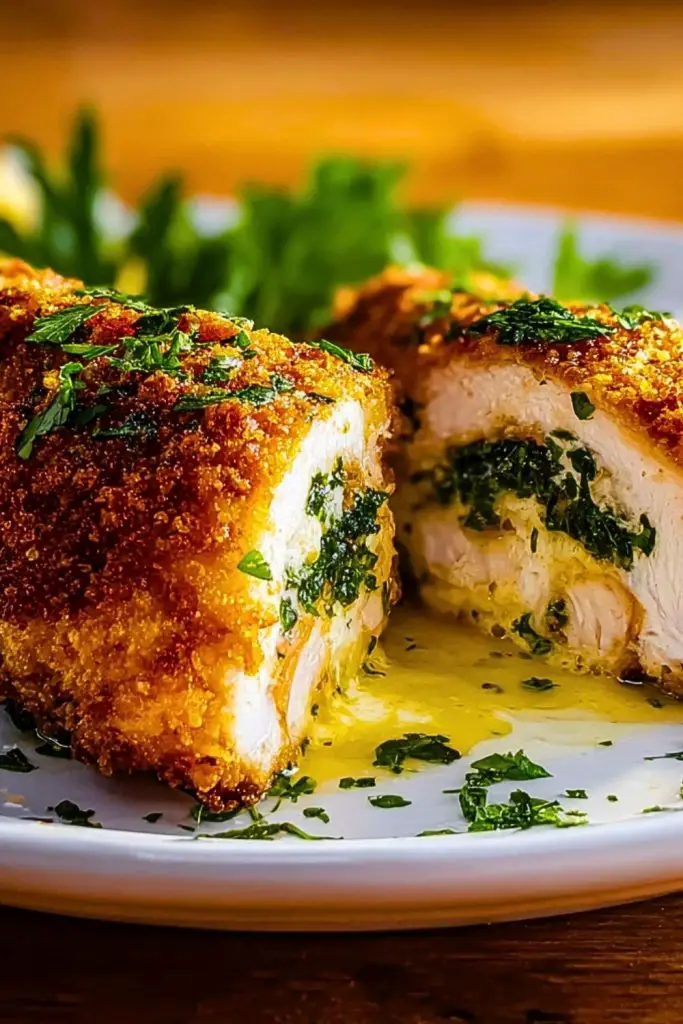
Golden, crispy Chicken Kiev with Garlic Butter is a rich and comforting dish that wraps tender chicken breast around a flavorful core of herbed garlic butter. With its crunchy breadcrumb coating and buttery explosion inside, this classic favorite is perfect for a cozy dinner or an impressive meal for guests.
Ingredients
2 large boneless, skinless chicken breasts
6 tablespoons unsalted butter, softened
3 cloves garlic, finely minced
1 tablespoon fresh parsley, finely chopped
1 tablespoon fresh dill, finely chopped
1 teaspoon lemon zest
1/2 teaspoon salt
1/4 teaspoon black pepper
1/2 cup all-purpose flour
2 large eggs, beaten
1 cup panko breadcrumbs
1/2 cup vegetable oil (for frying)
Toothpicks or kitchen twine (optional)
Instructions
1. In a bowl, mix softened butter, minced garlic, parsley, dill, lemon zest, salt, and pepper. Shape into a log using plastic wrap and chill in the fridge for 30 minutes or freeze for 15 minutes.
2. Place chicken breasts between plastic wrap and pound to about 1/4 inch thickness using a meat mallet.
3. Slice chilled garlic butter into disks. Place one in the center of each chicken piece, fold the sides, and roll tightly. Secure with toothpicks if needed.
4. Freeze the chicken rolls for 15-20 minutes to firm up.
5. Set up breading stations with flour, beaten eggs, and breadcrumbs. Dredge each roll in flour, then egg, then breadcrumbs. Repeat egg and breadcrumb step for extra crunch.
6. Heat oil in a skillet over medium heat. Fry chicken rolls 3-4 minutes per side until golden. Don’t overcrowd the pan.
7. Transfer to a baking dish and bake at 375°F (190°C) for 15-18 minutes or until internal temperature reaches 165°F (74°C).
8. Let rest 5 minutes before serving to avoid butter spilling out.
Notes
Serving Size: 1 stuffed chicken breast
Calories: 460
Protein: 38g
Fat: 27g
Saturated Fat: 12g
Unsaturated Fat: 13g
Trans Fat: <0.5g
Cholesterol: 130mg
Carbohydrates: 18g
Fiber: 1g
Sugar: 1g
Sodium: 420mg
- Prep Time: 30 minutes
- Cook Time: 30 minutes
- Category: Main Dish
- Method: Baking, Frying
- Cuisine: European
Nutrition
- Serving Size: 1 stuffed chicken breast
- Calories: 460
- Sugar: 1g
- Sodium: 420mg
- Fat: 27g
- Saturated Fat: 12g
- Unsaturated Fat: 13g
- Trans Fat: <0.5g
- Carbohydrates: 18g
- Fiber: 1g
- Protein: 38g
- Cholesterol: 130mg
Keywords: chicken, garlic butter, comfort food, stuffed chicken, classic