

If you’ve ever dreamed of a dessert that blends rich chocolate cake, fluffy whipped cream, gooey caramel, and crunchy candy bar bits, the Butterfinger Bomb Cake is your ultimate indulgence. This show-stopping treat layers intense chocolatey goodness with creamy, crispy, and nutty textures in every bite. The name isn’t just for fun — it explodes with flavor, combining the best elements of a candy bar and a bakery masterpiece.
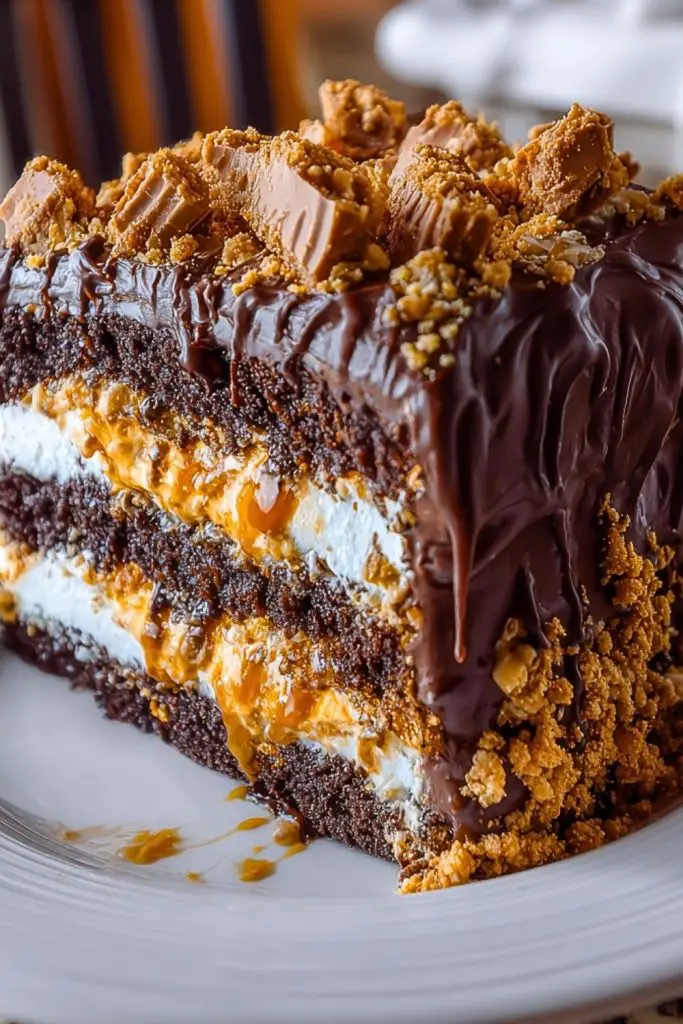
Perfect for birthdays, potlucks, or any time you want to impress a crowd, this decadent cake is surprisingly simple to assemble. It starts with moist chocolate cake layers and is filled with whipped cream and crushed Butterfingers, then drenched in caramel sauce and smothered in a luscious chocolate ganache. Each forkful delivers a punch of sweet, salty, crunchy, and creamy — no one can resist going back for seconds.
Why You’ll Love This Butterfinger Bomb Cake
- It’s packed with layers of flavor and texture — crunchy, creamy, fudgy, and fluffy.
- Uses a simple boxed cake mix base for easy prep without compromising taste.
- A guaranteed hit at any event, from parties to holiday dinners.
- No fancy baking skills required — just layering and drizzling.
- Perfect for make-ahead desserts as it tastes even better after chilling overnight.
Preparation Phase & Tools to Use
Essential Tools and Equipment:
- 9-inch round cake pans: Crucial for creating evenly baked layers. Nonstick or parchment-lined is best.
- Electric mixer: For whipping the cream and blending your cake batter to a smooth consistency.
- Mixing bowls: At least two large ones for cake and whipped cream layers.
- Spatula or offset spatula: Helps spread fillings and ganache evenly.
- Saucepan or microwave-safe bowl: For melting chocolate and caramel.
- Serrated knife: For leveling cake layers if needed.
- Cake stand or plate: Ideal for stacking and serving the finished cake.
Each of these tools plays a key role in executing the layers and keeping the process smooth, especially when working with sticky ingredients like caramel and ganache.
Preparation Tips
To make the process seamless, bake your cake layers a day ahead and let them cool completely before assembling. Chill your mixing bowl and beaters before whipping the cream to help it fluff up faster and stay stable. When crushing the Butterfingers, leave a few chunky bits for that signature crunch throughout the cake. Warm the caramel sauce just slightly so it drizzles smoothly without melting the whipped cream. And finally, let the assembled cake chill for at least 2 hours (or overnight) to allow the flavors to meld and set up for cleaner slicing.
Ingredients for this Butterfinger Bomb Cake
For the Cake:
- 1 box devil’s food chocolate cake mix (plus ingredients listed on box — eggs, oil, water)
- 1 teaspoon vanilla extract (optional, for enhanced flavor)
For the Whipped Cream Layer:
- 2 cups heavy whipping cream
- 1/2 cup powdered sugar
- 1 teaspoon vanilla extract
For the Filling and Topping:
- 1 cup caramel sauce (store-bought or homemade)
- 6 regular-size Butterfinger bars, crushed (reserve a handful for garnish)
- 1/2 cup chocolate ganache or melted semi-sweet chocolate chips
Optional Garnish:
- Extra crushed Butterfingers
- Chocolate drizzle
- Caramel drizzle
Step 1: Bake the Chocolate Cake
Prepare the devil’s food cake mix according to package directions, adding a teaspoon of vanilla for an extra flavor boost. Divide the batter between two 9-inch cake pans and bake until a toothpick comes out clean (usually 25–30 minutes). Let the cakes cool completely, then level them with a serrated knife if necessary. Slice each layer horizontally to create 4 thinner layers total.
Step 2: Make the Whipped Cream
Chill your mixing bowl and beaters for about 10 minutes. Pour in the heavy cream, vanilla, and powdered sugar. Whip on medium-high speed until stiff peaks form. This will be your fluffy, sweet layer that balances the richness of the cake.
Step 3: Crush the Butterfingers
Place the Butterfinger bars in a ziplock bag and crush them with a rolling pin or mallet. You want a mix of fine bits and larger crunchy chunks. Set aside a small handful for topping.
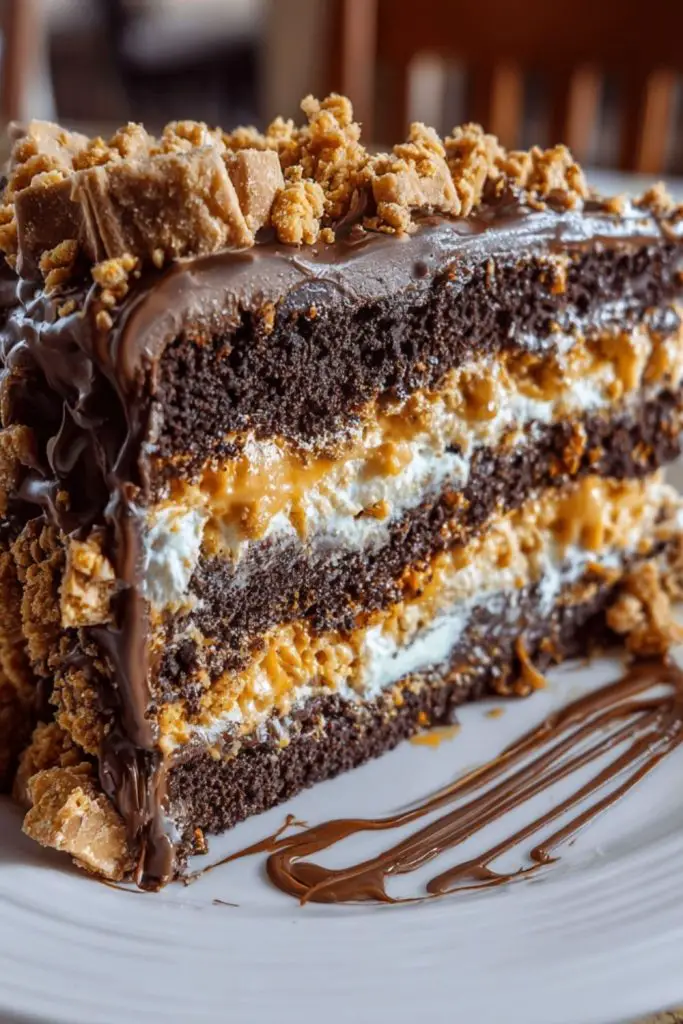
Step 4: Assemble the Cake Layers
Place the first cake layer on your serving plate or cake stand. Spread a layer of whipped cream evenly across the top. Sprinkle a generous amount of crushed Butterfingers and drizzle with caramel. Repeat this process with each cake layer, building up delicious, gooey layers.
Step 5: Add the Ganache Topping
Once all the layers are stacked, pour the melted chocolate ganache over the top of the cake, letting it drip slightly down the sides for a dramatic effect. Use a spatula to gently spread if needed.
Step 6: Garnish and Chill
Top the cake with the remaining crushed Butterfingers and a final drizzle of caramel and chocolate if desired. Chill the cake in the fridge for at least 2 hours, preferably overnight, to let the layers set and meld together beautifully.
Notes
This Butterfinger Bomb Cake is a celebration of flavors and textures, and a few smart tips can elevate it even more. Let your cake cool fully before slicing to avoid crumbling. Using stabilized whipped cream (with a bit of powdered sugar) will help the layers hold their shape longer. When assembling, take your time between layers to prevent slipping or sliding. And remember, this cake shines best when given time to chill — it allows the caramel to seep into the cake layers and the whipped cream to firm up slightly.
Watch Out for These Mistakes While Cooking
- Not letting the cake cool completely: Warm cake can melt the whipped cream and cause layers to shift or collapse.
- Over-whipping the cream: If you go too far, it turns to butter. Stop at stiff peaks.
- Using hot ganache: Always let ganache cool a bit before pouring it on top or it will melt the whipped topping.
- Skipping the chill time: The cake needs at least 2 hours in the fridge to firm up — don’t rush it.
- Slicing too soon: Cutting into the cake before it’s set will make a mess of your beautiful layers.
Storage Instructions
Wrap the cake tightly with plastic wrap or store in an airtight cake container. It will keep well in the refrigerator for up to 4 days. The whipped cream stays stable, and the flavors deepen over time. Avoid freezing as the texture of whipped cream and caramel can change after thawing.
Estimated Nutrition
Per slice (based on 12 servings):
- Calories: 530
- Total Fat: 32g
- Saturated Fat: 17g
- Cholesterol: 90mg
- Sodium: 320mg
- Total Carbohydrates: 58g
- Dietary Fiber: 2g
- Sugars: 45g
- Protein: 5g
Frequently Asked Questions
Can I make this cake in advance?
Yes! In fact, it tastes even better the next day after chilling overnight. Just store it covered in the refrigerator.
What can I use instead of Butterfinger bars?
You can substitute with any crisp, peanut-buttery candy bar like Reese’s Sticks or even crushed toffee bars.
Can I use Cool Whip instead of homemade whipped cream?
Absolutely, if you’re short on time. Just know the flavor and texture will be slightly different.
How do I make the ganache?
Melt 1/2 cup semi-sweet chocolate chips with 1/4 cup heavy cream. Stir until smooth and glossy.
Can this cake be frozen?
It’s not recommended. The whipped cream and caramel don’t freeze and thaw well, making the cake soggy.
What if I don’t have round cake pans?
You can use a 9×13-inch pan and build layers flat instead — it’ll be just as delicious.
Is this cake suitable for kids?
Yes, though it’s quite rich. You might want to cut smaller slices for little ones.
How do I transport this cake safely?
Chill the cake first, then place it in a sturdy cake carrier or box. Keep it cool during transport if possible.
Conclusion
Butterfinger Bomb Cake is the ultimate treat for dessert lovers who crave indulgence with every bite. Rich, layered, and irresistibly crunchy, it’s a sweet explosion of texture and flavor. Whether it’s your first time making a layered cake or you’re a seasoned dessert enthusiast, this recipe is a no-fail way to impress and delight. Make it ahead, serve it chilled, and watch it vanish slice by slice.

Butterfinger Bomb Cake
- Total Time: 3 hours
- Yield: 12 servings
Description
This Butterfinger Bomb Cake is the ultimate dessert explosion! Layers of moist chocolate cake, fluffy whipped cream, gooey caramel, and crushed Butterfinger candy bars come together to create one of the most irresistible treats you’ll ever make. Whether you’re searching for an easy dessert idea, a show-stopping birthday cake, or just a new food idea to impress, this easy recipe is packed with crowd-pleasing textures and flavors. Perfect for holidays, parties, or a decadent weekend bake, it’s one of those quick dessert ideas that taste like you spent hours in the kitchen. Great for chocolate lovers and anyone who enjoys fun, candy-loaded cake recipes.
Ingredients
2 cups heavy whipping cream
1/2 cup powdered sugar
1 teaspoon vanilla extract
1 cup caramel sauce
6 regular-size Butterfinger bars, crushed
1/2 cup chocolate ganache or melted semi-sweet chocolate chips
1 box devil’s food chocolate cake mix
3 large eggs (as listed on cake mix box)
1/2 cup vegetable oil (as listed on cake mix box)
1 1/4 cups water (as listed on cake mix box)
1 teaspoon vanilla extract (optional)
Instructions
1. Preheat oven and prepare cake mix according to box instructions, adding 1 teaspoon of vanilla extract if desired.
2. Divide batter between two 9-inch round cake pans and bake as directed (about 25–30 minutes).
3. Let cakes cool completely, then slice each in half horizontally to create 4 thin layers.
4. Chill your mixing bowl and beaters for 10 minutes. Whip heavy cream, vanilla, and powdered sugar to stiff peaks.
5. Crush Butterfinger bars using a ziplock bag and rolling pin, leaving some chunks for texture.
6. Place first cake layer on a serving plate. Spread whipped cream over the top.
7. Sprinkle with crushed Butterfingers and drizzle with caramel sauce.
8. Repeat with remaining layers: cake, cream, Butterfingers, caramel.
9. After stacking all layers, pour slightly cooled ganache over the top. Let it drip down the sides.
10. Garnish with extra crushed Butterfingers and optional chocolate/caramel drizzle.
11. Chill the cake for at least 2 hours or overnight before serving.
Notes
Chill your whipped cream tools in advance to ensure it whips up perfectly.
Let ganache cool before pouring to avoid melting the whipped cream.
Always allow the cake to chill before slicing for clean, firm layers.
- Prep Time: 30 minutes
- Cook Time: 30 minutes
- Category: Dessert
- Method: No-Bake Assembly
- Cuisine: American
Nutrition
- Serving Size: 1 slice
- Calories: 530
- Sugar: 45g
- Sodium: 320mg
- Fat: 32g
- Saturated Fat: 17g
- Unsaturated Fat: 11g
- Trans Fat: 0g
- Carbohydrates: 58g
- Fiber: 2g
- Protein: 5g
- Cholesterol: 90mg
Keywords: easy dessert, candy cake, butterfinger recipe, chocolate cake, party dessert, no-bake layer cake, birthday cake, quick dessert idea