

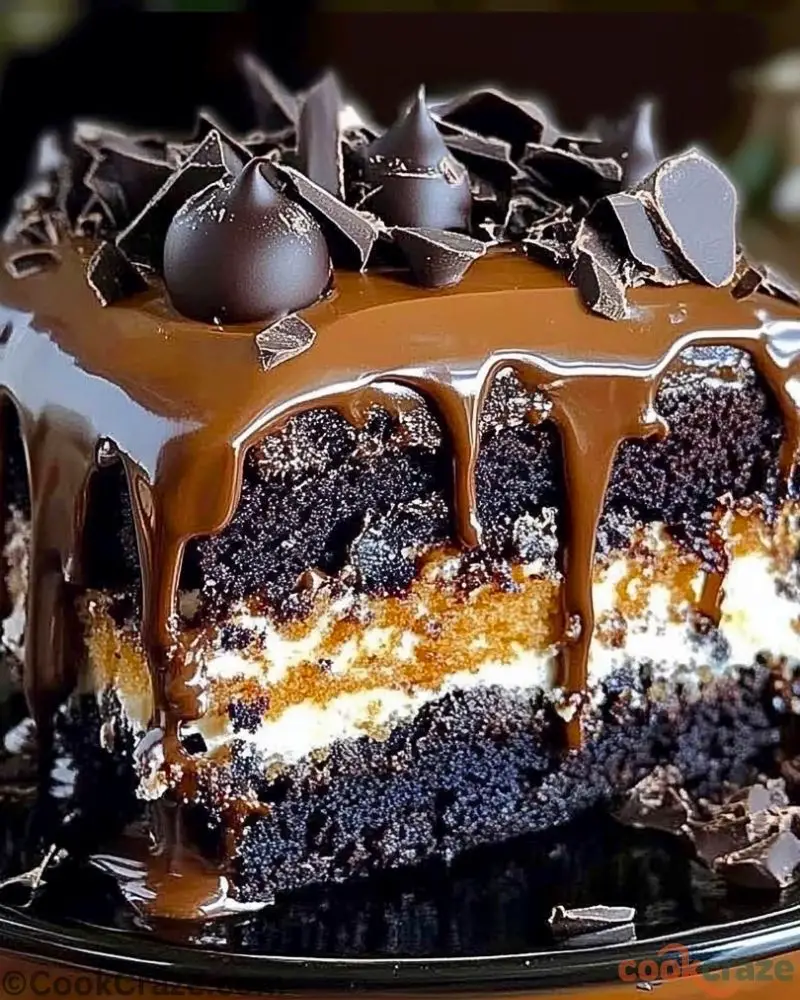
There’s something magical about a chocolate cake that melts in your mouth, leaving behind the perfect balance of rich cocoa, velvety cream, and a hint of indulgent caramel. Bonnie’s Blue Ribbon Chocolate Dream Cake is exactly that—a decadent masterpiece layered with creamy filling, covered in a silky ganache, and topped with dark chocolate pieces for an extra touch of elegance. Whether it’s for a celebration or just a personal treat, this cake delivers a slice of pure bliss.
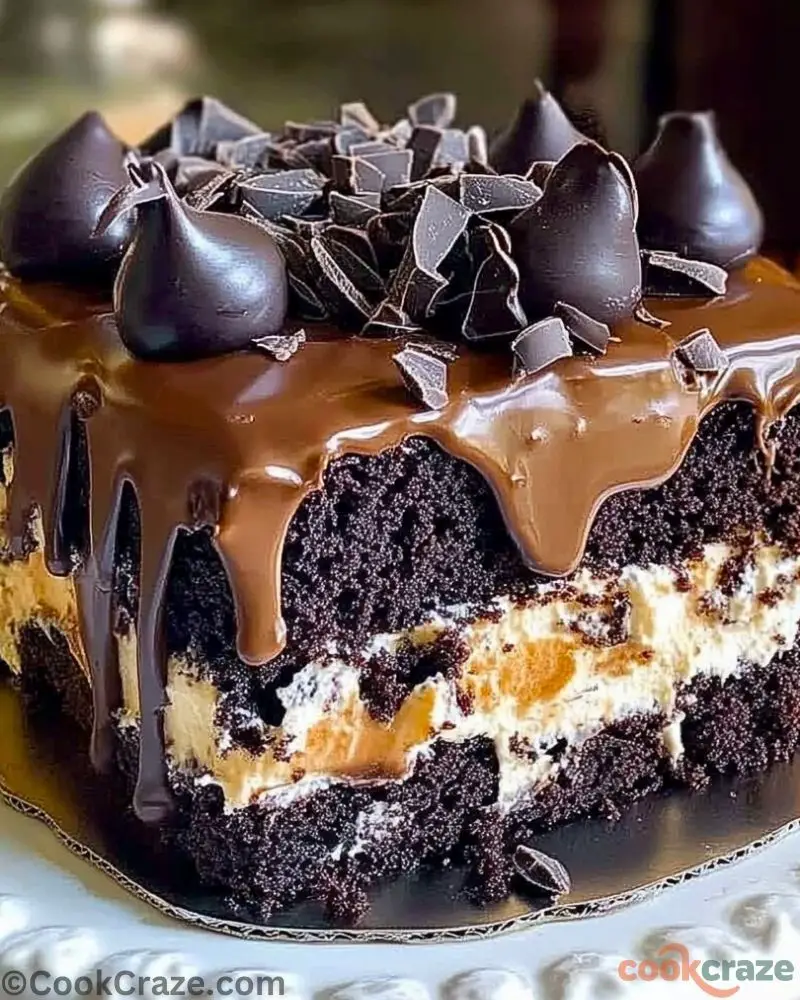
I’ve always believed that a truly great chocolate cake should feel like a warm hug. This recipe is inspired by traditional layered cakes but with an extra dreamy twist: a combination of deep, moist chocolate cake, a luscious caramel-infused cream filling, and a glossy chocolate drizzle. Topped with chocolate chunks and kisses, every bite is a delightful explosion of texture and flavor.
Why You’ll Love This Chocolate Dream Cake
- Rich & Moist: This cake isn’t just chocolatey; it’s intensely fudgy and moist, thanks to a perfect balance of ingredients.
- Decadent Layers: A velvety cream and caramel filling elevate this cake beyond a typical chocolate dessert.
- Easy to Make, Stunning to Serve: Despite its gourmet appearance, this cake is surprisingly simple to put together.
- Perfect for Any Occasion: Whether it’s a birthday, anniversary, or just a weekend treat, this cake never fails to impress.
What Makes the Perfect Chocolate Cake Base?
The secret to a truly dreamy chocolate cake lies in the base. For this recipe, a rich and moist chocolate cake is the foundation, and achieving the right texture is key. A combination of high-quality cocoa powder and a touch of coffee enhances the depth of chocolate flavor, making each bite irresistibly rich. The balance of wet and dry ingredients ensures the cake stays soft and fudgy without being too dense.
One crucial factor is not overmixing the batter. Overworking the flour can lead to a tougher cake, so gently folding the ingredients together is the way to go. Baking at the right temperature also helps maintain an even rise, creating a cake that’s perfectly tender and ready to soak up all the creamy, dreamy fillings.
Options for Substitutions
Dairy-Free Version
If you need a dairy-free alternative, swap out the butter for coconut oil or a plant-based butter substitute. For the cream filling, coconut cream or a dairy-free whipped topping works beautifully.
Gluten-Free Option
A high-quality gluten-free flour blend can replace regular flour at a 1:1 ratio. Make sure to check that all other ingredients, including cocoa powder, are gluten-free.
Sweetener Adjustments
You can replace granulated sugar with coconut sugar or a sugar substitute like monk fruit sweetener for a lower-sugar version. Just note that different sweeteners may slightly alter the texture.
Chocolate Choices
For a more intense chocolate flavor, opt for dark chocolate with 70% or higher cocoa content. If you prefer a milder taste, semi-sweet chocolate works just as well.
Egg Replacements
To make this cake egg-free, use a flaxseed egg (1 tablespoon ground flaxseed mixed with 3 tablespoons water per egg). Applesauce or mashed banana can also act as an egg substitute for added moisture.
Ingredients for This Chocolate Dream Cake
For the Chocolate Cake Base
- All-Purpose Flour – The foundation of the cake, giving it structure while keeping it soft and tender.
- Unsweetened Cocoa Powder – Provides the deep, rich chocolate flavor that makes this cake irresistible.
- Granulated Sugar – Sweetens the cake and helps keep it moist.
- Eggs – Adds stability and richness, creating a fluffy and moist texture.
- Vegetable Oil – Ensures the cake stays moist and soft instead of dry or crumbly.
- Buttermilk – Adds a subtle tanginess and helps create a tender crumb.
- Hot Coffee or Hot Water – Enhances the chocolate flavor and makes the batter extra smooth.
- Baking Powder & Baking Soda – These leavening agents work together to give the cake a perfect rise.
- Salt – A pinch enhances all the flavors, balancing the sweetness.
- Vanilla Extract – Adds warmth and depth to the overall flavor.
For the Creamy Caramel Filling
- Heavy Cream – Creates the rich and luscious texture of the filling.
- Caramel Sauce – Adds a sweet, buttery layer of indulgence between the cake layers.
- Powdered Sugar – Sweetens and thickens the filling to the perfect consistency.
- Cream Cheese or Mascarpone – Provides a slight tang and luxurious creaminess to balance the sweetness.
For the Chocolate Ganache Topping
- Dark or Semi-Sweet Chocolate – The star of the ganache, giving it a smooth, glossy finish.
- Heavy Cream – Helps create a silky, pourable texture for the perfect drip effect.
- Butter – Adds shine and richness to the ganache.
For the Decoration
- Chocolate Chunks & Chocolate Kisses – For the ultimate finishing touch, adding texture and extra chocolatey goodness on top.
Step 1: Prepare the Chocolate Cake Batter
Preheat your oven to 350°F (175°C) and grease two 8-inch round cake pans. Line them with parchment paper for easy removal. In a large mixing bowl, whisk together the flour, cocoa powder, sugar, baking powder, baking soda, and salt. In a separate bowl, beat the eggs, buttermilk, oil, and vanilla extract until well combined. Gradually add the wet ingredients to the dry mixture, stirring gently. Finally, pour in the hot coffee or water and mix until smooth. The batter will be thin—this ensures a moist cake!
Step 2: Bake the Cake Layers
Divide the batter evenly between the prepared cake pans. Bake for 30-35 minutes, or until a toothpick inserted into the center comes out clean. Allow the cakes to cool in the pans for 10 minutes, then transfer them to a wire rack to cool completely.
Step 3: Make the Creamy Caramel Filling
In a mixing bowl, beat the cream cheese (or mascarpone) and powdered sugar until smooth. Gradually add heavy cream and continue whipping until light and fluffy. Fold in the caramel sauce until well combined. Refrigerate until ready to use.
Step 4: Prepare the Chocolate Ganache
Chop the dark or semi-sweet chocolate and place it in a heatproof bowl. Heat the heavy cream in a small saucepan until just simmering (do not boil). Pour the hot cream over the chocolate and let it sit for 2-3 minutes. Stir until smooth, then add butter to create a glossy finish. Let the ganache cool slightly until it thickens but is still pourable.
Step 5: Assemble the Cake
Place one cooled cake layer on a serving plate. Spread a generous amount of the caramel cream filling evenly over the top. Place the second cake layer on top and gently press down.
Step 6: Drizzle the Ganache and Decorate
Pour the slightly cooled chocolate ganache over the top of the cake, letting it drip down the sides for a stunning effect. While the ganache is still soft, sprinkle chocolate chunks on top and arrange chocolate kisses for a beautiful finish.
How Long to Cook the Chocolate Dream Cake
The baking time for Bonnie’s Blue Ribbon Chocolate Dream Cake is approximately 30-35 minutes at 350°F (175°C). However, oven temperatures may vary, so it’s best to check for doneness by inserting a toothpick into the center—if it comes out clean or with just a few moist crumbs, your cake is ready.
Once baked, allow the cakes to cool in their pans for 10 minutes before transferring them to a wire rack. Let them cool completely before assembling to prevent the filling and ganache from melting.
Tips for the Perfect Chocolate Dream Cake
- Use Room Temperature Ingredients – This ensures even mixing and a smoother batter, resulting in a more tender cake.
- Don’t Overmix the Batter – Stir gently until just combined to keep the cake light and fluffy. Overmixing can lead to a dense texture.
- Enhance the Chocolate Flavor – Adding hot coffee instead of hot water deepens the chocolate taste without making the cake taste like coffee.
- Chill the Cake Layers – If your cake feels too soft to handle, wrap the layers in plastic wrap and chill them for 30 minutes before assembling.
- Smooth Ganache Application – Let the ganache cool slightly before pouring so it thickens just enough for a beautiful drip effect.
- Use High-Quality Chocolate – Since chocolate is the star, opt for a good brand of dark or semi-sweet chocolate for the ganache and decorations.
- Let the Cake Set Before Serving – After assembling, refrigerate the cake for at least 30 minutes to allow the flavors to meld together beautifully.
Watch Out for These Mistakes While Cooking
- Skipping the Parchment Paper: Even if you grease the pans, parchment paper ensures the cake releases smoothly without breaking.
- Overbaking the Cake: Baking too long will make the cake dry. Always check a few minutes before the suggested time.
- Not Cooling the Cake Properly: Assembling a warm cake will cause the filling and ganache to melt and slide off.
- Pouring Ganache Too Soon: Let the ganache cool slightly before drizzling; otherwise, it will be too runny.
- Overwhipping the Cream Filling: Whipping too much can turn the cream into butter—stop once it holds soft peaks.
- Using Low-Quality Chocolate: The better the chocolate, the richer and smoother your ganache will be.
- Not Leveling the Cake Layers: If your cakes have domed tops, trim them for an even, professional-looking stack.
- Rushing the Refrigeration Time: Allow the cake to chill before serving for the best texture and flavor.
What to Serve With Chocolate Dream Cake?
1. A Scoop of Vanilla Ice Cream
The creamy, cold contrast of vanilla ice cream perfectly balances the rich chocolate flavors.
2. Fresh Berries
Strawberries, raspberries, or blueberries add a tart, fruity freshness to complement the sweetness.
3. Whipped Cream
A dollop of lightly sweetened whipped cream enhances each bite without overpowering the chocolate.
4. Espresso or Coffee
A hot cup of espresso or black coffee cuts through the richness and enhances the deep cocoa notes.
5. Salted Caramel Drizzle
Adding extra caramel sauce over the top or on the plate takes indulgence to the next level.
6. A Glass of Red Wine
A bold red wine, like a Cabernet Sauvignon, pairs beautifully with the intense chocolate flavors.
7. Chocolate-Dipped Strawberries
For an elegant touch, serve with fresh strawberries dipped in dark chocolate.
8. A Scoop of Peanut Butter or Hazelnut Spread
A side of peanut butter or Nutella adds an extra layer of decadence for nut lovers.
Storage Instructions
Refrigerating the Cake
To keep Bonnie’s Blue Ribbon Chocolate Dream Cake fresh, store it in an airtight container in the refrigerator. It will stay moist and delicious for 4-5 days. Before serving, let it sit at room temperature for about 15-20 minutes to soften.
Freezing for Later
For longer storage, freeze the cake by wrapping individual slices or whole layers in plastic wrap, followed by a layer of foil. Place them in a freezer-safe container or bag and freeze for up to 3 months. Thaw in the refrigerator overnight before enjoying.
Storing the Ganache and Filling
If you have leftover caramel filling or ganache, refrigerate them in separate airtight containers for up to 5 days. Reheat the ganache gently over low heat or in the microwave before drizzling.
Estimated Nutrition (Per Serving)
Serving Size: 1 slice (based on 12 servings)
- Calories: ~480 kcal
- Carbohydrates: 55g
- Sugar: 38g
- Fat: 26g
- Saturated Fat: 14g
- Protein: 6g
- Fiber: 3g
- Sodium: 220mg
Note: These values are approximate and can vary based on ingredient brands and substitutions.
Frequently Asked Questions
1. Can I Make This Cake Ahead of Time?
Yes! You can bake the cake layers a day in advance and store them tightly wrapped at room temperature. The caramel filling and ganache can also be prepared ahead and refrigerated. Assemble the cake just before serving for the best texture.
2. What Can I Use Instead of Buttermilk?
If you don’t have buttermilk, mix 1 cup of milk with 1 tablespoon of lemon juice or vinegar and let it sit for 5 minutes before using.
3. How Do I Get Perfect Drips with the Ganache?
Make sure the ganache has cooled slightly but is still pourable. If it’s too warm, it will be too runny; if too cold, it won’t drip smoothly.
4. Can I Use Store-Bought Caramel Sauce?
Absolutely! If you’re short on time, a high-quality store-bought caramel sauce works just as well in the filling.
5. What If I Don’t Have Two Cake Pans?
You can bake the cake in one deep pan and slice it into layers after cooling. Just adjust the baking time, as a thicker cake will take longer to bake.
6. How Do I Prevent My Cake from Sticking to the Pan?
Use parchment paper at the bottom of the cake pans and grease the sides well with butter or cooking spray.
7. Can I Make This Cake Gluten-Free?
Yes! Substitute all-purpose flour with a 1:1 gluten-free flour blend, and ensure all other ingredients, including cocoa powder, are gluten-free.
8. How Can I Make the Cake More Chocolaty?
Use dark chocolate cocoa powder and increase the coffee in the batter to intensify the chocolate flavor. You can also add chocolate chips to the batter for extra richness.
Conclusion
Bonnie’s Blue Ribbon Chocolate Dream Cake is a true showstopper—moist, rich, and layered with irresistible caramel filling and glossy ganache. Whether you’re making it for a special occasion or just because, this cake is guaranteed to impress.
Bonnie’s Blue Ribbon Chocolate Dream Cake
- Total Time: 1 hour 45 minutes
- Yield: 12 servings
Description
A rich and indulgent chocolate cake layered with creamy caramel filling and topped with a silky ganache. This dreamy dessert is perfect for birthdays, celebrations, or any time you crave a decadent chocolate treat. Moist, fudgy, and full of deep cocoa flavor, this cake is a must-try for chocolate lovers!
Ingredients
For the Chocolate Cake:
- 2 cups all-purpose flour
- 3/4 cup unsweetened cocoa powder
- 2 cups granulated sugar
- 1 1/2 teaspoons baking powder
- 1 1/2 teaspoons baking soda
- 1 teaspoon salt
- 2 large eggs
- 1 cup buttermilk
- 1/2 cup vegetable oil
- 2 teaspoons vanilla extract
- 1 cup hot coffee or hot water
For the Caramel Cream Filling:
- 8 oz cream cheese (or mascarpone), softened
- 1/2 cup powdered sugar
- 1 cup heavy cream
- 1/3 cup caramel sauce
For the Chocolate Ganache:
- 8 oz dark or semi-sweet chocolate, chopped
- 1 cup heavy cream
- 2 tablespoons butter
For Decoration:
- Chocolate chunks
- Chocolate kisses
Instructions
- Prepare the Cake Batter
- Preheat oven to 350°F (175°C). Grease and line two 8-inch round cake pans.
- In a large bowl, whisk together flour, cocoa powder, sugar, baking powder, baking soda, and salt.
- In another bowl, beat eggs, buttermilk, oil, and vanilla extract until combined.
- Gradually add the wet ingredients to the dry ingredients, mixing gently.
- Pour in hot coffee (or water) and stir until smooth. The batter will be thin.
- Bake the Cakes
- Divide batter evenly between the prepared pans.
- Bake for 30-35 minutes or until a toothpick inserted in the center comes out clean.
- Cool cakes in the pans for 10 minutes, then transfer to a wire rack to cool completely.
- Make the Caramel Cream Filling
- In a mixing bowl, beat cream cheese and powdered sugar until smooth.
- Slowly add heavy cream, whipping until fluffy.
- Fold in caramel sauce and refrigerate until needed.
- Prepare the Chocolate Ganache
- Heat heavy cream until just simmering (do not boil).
- Pour over chopped chocolate and let sit for 2-3 minutes. Stir until smooth.
- Add butter and mix until glossy. Let cool slightly.
- Assemble the Cake
- Place one cake layer on a serving plate. Spread the caramel filling evenly over the top.
- Place the second cake layer on top and gently press down.
- Decorate with Ganache and Chocolate
- Pour the slightly cooled ganache over the cake, allowing it to drip down the sides.
- Sprinkle chocolate chunks on top and arrange chocolate kisses for a beautiful finish.
- Refrigerate for at least 30 minutes before serving to set the layers.
- Prep Time: 30 minutes
- Cooling Time: 40 minutes
- Cook Time: 35 minutes