

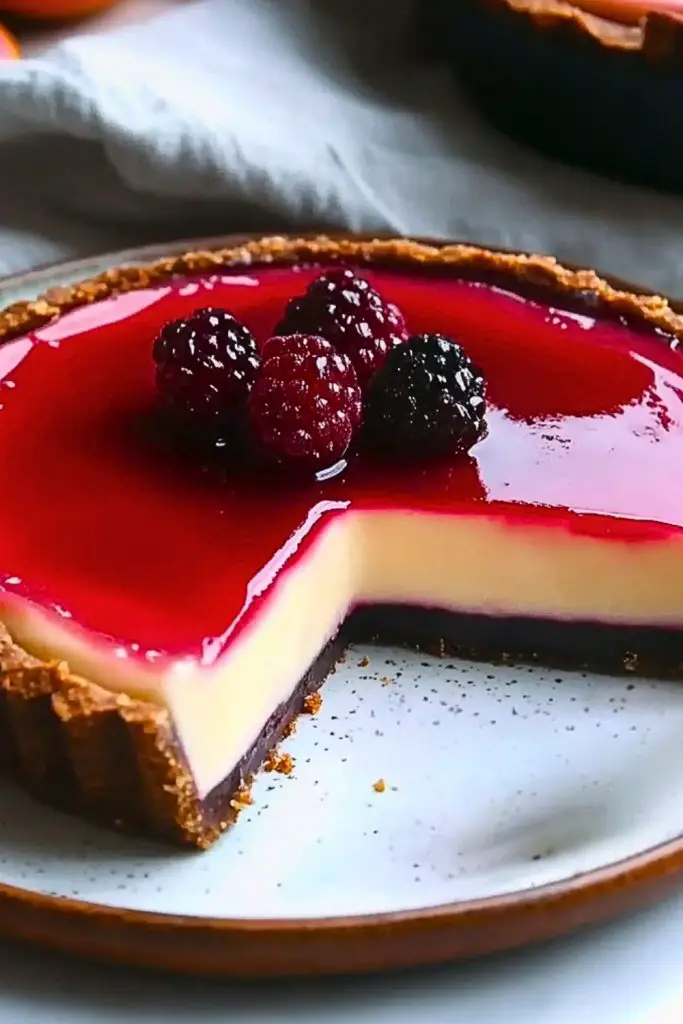
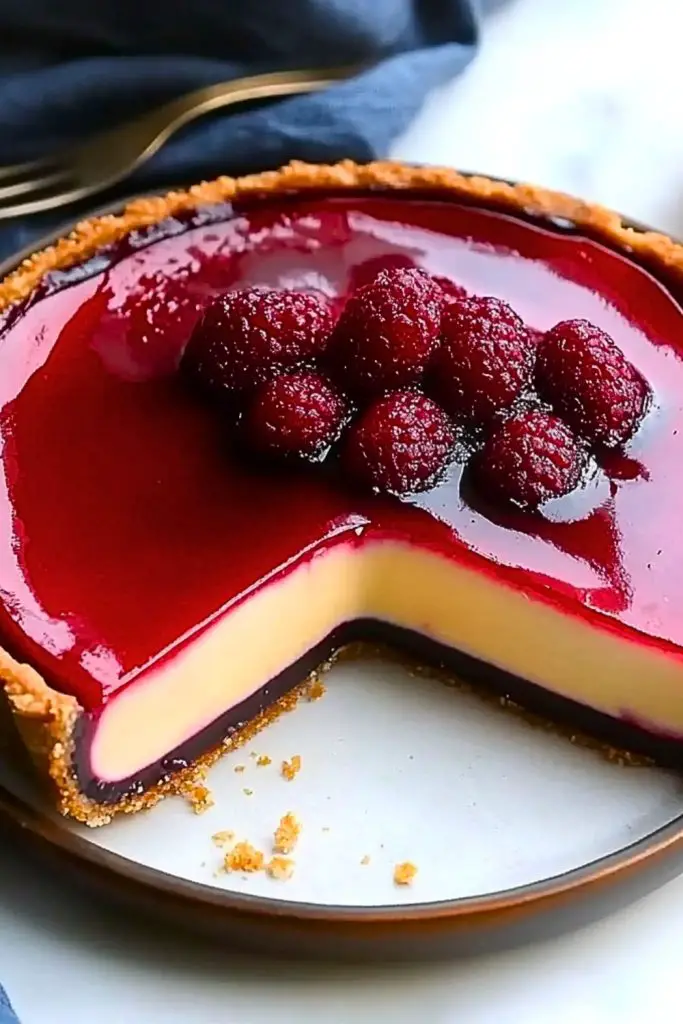
Silky, elegant, and strikingly vibrant, the Blood Orange Panna Cotta Tart is the ultimate showstopper dessert. With a crisp chocolate cookie crust, a luscious layer of creamy panna cotta, and a brilliant, jewel-toned blood orange glaze, every bite is a harmonious blend of flavors and textures. The tartness of the blood orange perfectly balances the sweet, creamy center, creating a taste sensation that’s both refreshing and indulgent.
Whether you’re planning a romantic dinner, a festive gathering, or simply want to impress at a weekend brunch, this tart offers the perfect centerpiece. The fresh burst of blood orange paired with the velvetiness of the panna cotta ensures this dessert will be remembered long after the last slice is gone.
Why You’ll Love This Blood Orange Panna Cotta Tart Recipe
- Gorgeous Presentation: The vibrant blood orange glaze and jewel-like finish make this tart a visual masterpiece.
- Perfect Flavor Balance: Creamy, rich panna cotta contrasted by the tangy brightness of blood orange offers a flawless harmony of taste.
- Texture Heaven: A crunchy chocolate crust, silky panna cotta, and smooth citrus glaze create an irresistible mouthfeel.
- Make-Ahead Friendly: Ideal for entertaining, you can prepare it ahead of time without stress.
- Light Yet Satisfying: Despite its richness, this tart feels light and refreshing, perfect for finishing a meal on a high note.
Preparation Phase & Tools to Use for Blood Orange Panna Cotta Tart Recipe
To achieve a flawless Blood Orange Panna Cotta Tart, having the right tools at hand is key. Each piece of equipment plays a vital role in bringing out the beauty and structure of the tart:
- Tart Pan with Removable Bottom: Essential for easy removal and maintaining the beautiful edges of the crust.
- Food Processor: Perfect for finely crushing the chocolate cookies and blending the crust ingredients evenly.
- Mixing Bowls: Multiple bowls are needed for preparing the crust, panna cotta filling, and blood orange glaze separately.
- Saucepan: Crucial for gently heating the cream mixture and dissolving the gelatin properly without overheating.
- Whisk: Helps achieve a smooth, lump-free panna cotta mixture.
- Fine Mesh Sieve: Ensures a silky smooth panna cotta by straining out any bits of undissolved gelatin or zest.
- Offset Spatula: Handy for evenly spreading the layers and smoothing the glaze.
- Measuring Cups and Spoons: Accuracy is everything for balance in flavors and texture.
- Refrigerator Space: As this tart sets in stages, make sure you have a clear spot to chill each layer properly.
Preparation Tips
- Choose Quality Chocolate Cookies: A good-quality cookie for the crust elevates the overall flavor and texture.
- Use Fresh Blood Oranges: Freshly squeezed juice not only tastes better but also brings out the vibrant color of the glaze.
- Hydrate Gelatin Properly: Sprinkle gelatin over cold water and let it bloom for a few minutes before adding to warm liquids. This prevents clumping.
- Don’t Rush Cooling: Allow each layer to chill adequately before adding the next to prevent colors and textures from blending undesirably.
- Strain the Panna Cotta Mixture: Straining ensures a creamy, flawless panna cotta without any unexpected bits.
- Room Temperature Ingredients: Bring your cream and milk close to room temperature before mixing to prevent sudden temperature shocks that can affect texture.
Ingredients for This Blood Orange Panna Cotta Tart Recipe
For the Chocolate Cookie Crust:
- 1 ½ cups chocolate cookie crumbs (like Oreos without filling)
- 5 tablespoons unsalted butter, melted
- 2 tablespoons granulated sugar
- Pinch of salt
For the Panna Cotta Layer:
- 1 ¼ cups heavy cream
- ¾ cup whole milk
- ⅓ cup granulated sugar
- 1 teaspoon pure vanilla extract
- 2 ½ teaspoons powdered gelatin
- 3 tablespoons cold water (for blooming the gelatin)
For the Blood Orange Glaze:
- ¾ cup fresh blood orange juice (about 3–4 blood oranges)
- 2 tablespoons granulated sugar
- 1 teaspoon powdered gelatin
- 1 tablespoon cold water (for blooming the gelatin)
For Garnish:
- Fresh raspberries
- Powdered sugar (for dusting)
- Optional: extra blood orange zest for a fragrant pop
Step 1: Prepare the Chocolate Cookie Crust
- Preheat your oven to 350°F (175°C).
- In a food processor, pulse the chocolate cookies until fine crumbs form.
- Add the melted butter, sugar, and a pinch of salt to the crumbs. Pulse until evenly combined.
- Press the mixture firmly into the bottom and sides of a tart pan with a removable bottom.
- Bake the crust for 8–10 minutes. Remove from the oven and let it cool completely.
Step 2: Make the Panna Cotta Filling
- In a small bowl, sprinkle the powdered gelatin over 3 tablespoons of cold water. Let it bloom for about 5 minutes.
- In a saucepan, heat the heavy cream, milk, and sugar over medium heat. Stir until the sugar dissolves and the mixture is hot but not boiling.
- Remove from heat and stir in the bloomed gelatin until fully dissolved.
- Add the vanilla extract and stir to combine.
- Strain the mixture through a fine mesh sieve for an ultra-smooth texture.
- Pour the panna cotta mixture into the cooled tart crust.
- Refrigerate for at least 3–4 hours, or until fully set.
Step 3: Prepare the Blood Orange Glaze
- Bloom the gelatin in a small bowl with 1 tablespoon of cold water.
- In a small saucepan, gently heat the blood orange juice and sugar over low heat until warm, not boiling.
- Remove from heat and stir in the bloomed gelatin until completely dissolved.
- Let the glaze cool to room temperature (but not set).
Step 4: Assemble the Tart
- Once the panna cotta layer is fully set, gently pour the cooled blood orange glaze over it.
- Tilt the tart pan slightly if needed to evenly spread the glaze without disturbing the panna cotta.
- Return to the refrigerator and chill for an additional 1–2 hours, until the glaze is firm.
Step 5: Garnish and Serve
- Once fully set, carefully remove the tart from the pan.
- Top with fresh raspberries and a light dusting of powdered sugar.
- Slice and serve chilled for the most refreshing experience!
Notes
- Choose High-Quality Ingredients: Since the tart has few components, the flavor of each one stands out. Use fresh blood oranges, real vanilla extract, and high-quality chocolate cookies for the crust.
- Control the Temperature: When heating the cream or juice mixtures, avoid letting them boil. Gentle heating preserves the delicate texture of the panna cotta and the bright flavor of the blood orange glaze.
- Layer Cooling Is Critical: Ensure the panna cotta is fully set before pouring the glaze. Rushing can lead to colors mixing and layers blurring.
- Customize Garnishes: Aside from raspberries, edible flowers, mint leaves, or thin slices of blood orange can be used to elevate the presentation.
- Bloom Gelatin Properly: Always bloom your gelatin first. It ensures the panna cotta and glaze set with the perfect silky firmness without being rubbery.
Watch Out for These Mistakes While Cooking
- Skipping the Gelatin Blooming Step: Pouring gelatin straight into hot liquid without blooming will cause clumps, leading to an uneven texture.
- Overheating the Cream or Juice: Boiling can ruin the flavor and cause separation. Heat gently until just warm.
- Pouring the Glaze Too Soon: If the panna cotta isn’t fully set, the blood orange glaze will seep through and ruin the clean layers.
- Not Straining the Panna Cotta Mixture: Tiny bits of gelatin or undissolved sugar can create a grainy finish if not strained out.
- Uneven Crust Thickness: Press the crust evenly across the pan to avoid spots that are too thick or thin, ensuring even baking and easier slicing.
- Overloading with Garnish: Keep it elegant; too much fruit or powdered sugar can weigh down the glaze or overpower the clean flavors.
- Using Warm Glaze: Letting the glaze cool to room temperature before pouring prevents it from melting the set panna cotta.
- Removing from the Tart Pan Prematurely: Always ensure the entire tart is properly chilled and firm before unmolding to avoid breakage.
What to Serve With Blood Orange Panna Cotta Tart Recipe
Pairing your Blood Orange Panna Cotta Tart with the right side items or beverages can elevate it into a full sensory experience. Whether you’re planning a brunch, a fancy dinner party, or an afternoon tea, these additions make the tart even more memorable.
8 Recommendations
1. Fresh Berry Salad
A light mix of strawberries, blueberries, and blackberries tossed with a hint of mint and honey complements the tart’s citrus notes without overpowering them.
2. Sparkling Wine or Champagne
The bubbly freshness of a dry sparkling wine cuts through the creamy richness of the panna cotta layer and amplifies the tart blood orange glaze.
3. Espresso or Strong Coffee
A rich, dark espresso offers a deep, bitter contrast to the tart’s sweet and tangy flavors, perfect for an elegant finish to a meal.
4. Lemon Sorbet
A small scoop of lemon or blood orange sorbet refreshes the palate and ties in with the tart’s bright citrus theme.
5. Almond Biscotti
These crunchy Italian cookies offer texture contrast and a light almond flavor that complements the tart’s citrusy sweetness.
6. Whipped Mascarpone
A dollop of whipped mascarpone cream, slightly sweetened and flavored with vanilla or a touch of orange zest, adds extra indulgence.
7. Herbal Tea
Chamomile, mint, or a mild citrus-infused herbal tea provides a calming pairing, especially if serving the tart in the afternoon.
8. Pistachio Crumble
Sprinkle a bit of lightly salted, crushed pistachios on the plate or around the tart for a nutty crunch and a pop of color.
Storage Instructions
- Refrigeration: Always store the Blood Orange Panna Cotta Tart in the refrigerator. Cover it loosely with plastic wrap or place it inside an airtight container to prevent it from absorbing other odors.
- Shelf Life: For best flavor and texture, consume the tart within 3 to 4 days. After that, the gelatin structure may start to loosen and the crust may soften.
- Freezing: Freezing is not recommended. The panna cotta’s creamy texture and the blood orange glaze can become grainy and separate once thawed.
- Serving Tip: Before serving leftovers, allow the tart to sit at room temperature for about 10 minutes to enhance its creamy texture and flavor.
Estimated Nutrition
Please note these values are approximate and can vary depending on the brands of ingredients used and portion sizes.
Per Slice (based on 10 slices):
- Calories: ~320 kcal
- Total Fat: 20g
- Saturated Fat: 12g
- Cholesterol: 60mg
- Sodium: 130mg
- Total Carbohydrates: 28g
- Dietary Fiber: 1g
- Sugars: 18g
- Protein: 4g
- Vitamin C: 25% of Daily Value (thanks to the blood orange juice!)
- Calcium: 10% of Daily Value
This tart strikes a satisfying balance between indulgent and refreshing, making it a sweet treat you can enjoy without feeling weighed down.
Frequently Asked Questions
1. Can I use regular oranges instead of blood oranges?
Yes, you can substitute regular oranges if blood oranges aren’t available. Keep in mind, regular oranges will produce a lighter, more golden glaze instead of the vibrant deep red hue.
2. How do I know when the panna cotta layer is set?
The panna cotta should feel firm yet slightly jiggly when you gently tap the pan. It usually takes about 3–4 hours to fully set in the refrigerator.
3. Can I make the tart ahead of time?
Absolutely! This tart is perfect for making a day in advance. It actually tastes better after a full chill, allowing the flavors to meld beautifully.
4. What can I use instead of gelatin?
If you’re avoiding gelatin, you can try agar-agar as a vegetarian substitute. However, the texture will be slightly firmer, so adjust the amount according to the product’s instructions.
5. Why did my blood orange glaze sink into the panna cotta?
If the panna cotta isn’t fully set before pouring on the glaze, the weight of the liquid can break through. Always ensure the panna cotta is firm to the touch before layering.
6. Can I flavor the panna cotta layer differently?
Definitely! You can infuse the cream with herbs like lavender, basil, or even tea before setting it, or swap the vanilla for almond extract for a new twist.
7. How can I prevent my crust from crumbling when slicing?
Ensure the crust is packed firmly when you build it. Also, chilling it thoroughly after baking and before filling helps maintain its structure.
8. Is it possible to make this tart gluten-free?
Yes! Simply use gluten-free chocolate cookies for the crust, and double-check that all other ingredients (like gelatin) are gluten-free certified.
Conclusion
The Blood Orange Panna Cotta Tart is not just a dessert—it’s a full sensory experience. With its dazzling jewel-toned glaze, rich creamy layer, and crisp chocolatey base, it offers an irresistible harmony of flavors and textures. Perfect for impressing at gatherings or treating yourself to something special, this tart is the kind of recipe that will have guests begging for seconds—and the recipe! Light, refreshing, yet satisfyingly rich, it stands out among elegant dessert ideas and is truly a must-try for anyone who loves a blend of sweet and tart perfection.

Blood Orange Panna Cotta Tart Recipe
- Total Time: 5 hours 35 minutes
- Yield: 1 tart (serves about 8–10)
Description
Get ready to fall in love with a dessert that’s as stunning as it is delicious — the Blood Orange Panna Cotta Tart! This easy recipe features a crisp chocolate cookie crust, a silky panna cotta filling, and a dazzling blood orange glaze that steals the show. Perfect for quick breakfast ideas, easy dinner desserts, or when you’re hunting for beautiful food ideas to wow your guests, this tart hits all the right notes. The vibrant citrus flavor, luxurious creamy texture, and dramatic colors make this an unforgettable treat. Whether you need breakfast ideas, healthy snack inspirations, or simply a gorgeous dinner idea, this tart brings a touch of elegance to any table. Light, tangy, and rich — it’s everything you crave in one show-stopping dessert!
Ingredients
For the Chocolate Cookie Crust:
- 1 ½ cups chocolate cookie crumbs
- 5 tablespoons unsalted butter, melted
- 2 tablespoons granulated sugar
- Pinch of salt
For the Panna Cotta Layer:
- 1 ¼ cups heavy cream
- ¾ cup whole milk
- ⅓ cup granulated sugar
- 1 teaspoon pure vanilla extract
- 2 ½ teaspoons powdered gelatin
- 3 tablespoons cold water (for blooming gelatin)
For the Blood Orange Glaze:
- ¾ cup fresh blood orange juice
- 2 tablespoons granulated sugar
- 1 teaspoon powdered gelatin
- 1 tablespoon cold water (for blooming gelatin)
For Garnish:
- Fresh raspberries
- Powdered sugar
- Optional: blood orange zest
Instructions
1. Prepare the Crust:
- Preheat oven to 350°F (175°C).
- Pulse chocolate cookies into fine crumbs.
- Mix with melted butter, sugar, and salt.
- Press firmly into a tart pan with a removable bottom.
- Bake for 8–10 minutes. Cool completely.
2. Make the Panna Cotta:
- Bloom gelatin in 3 tablespoons of cold water.
- Heat cream, milk, and sugar until warm.
- Stir in bloomed gelatin and vanilla extract.
- Strain the mixture.
- Pour into cooled crust. Refrigerate until fully set (3–4 hours).
3. Prepare the Blood Orange Glaze:
- Bloom gelatin in 1 tablespoon of cold water.
- Warm the blood orange juice and sugar gently.
- Stir in the bloomed gelatin until dissolved.
- Cool to room temperature.
4. Assemble the Tart:
- Pour cooled glaze over set panna cotta.
- Chill until glaze is firm (1–2 hours).
5. Garnish and Serve:
- Top with raspberries and a dusting of powdered sugar.
- Carefully unmold and slice to serve!
- Prep Time: 25 minutes
- Chill Time: 5 hours
- Cook Time: 10 minutes