
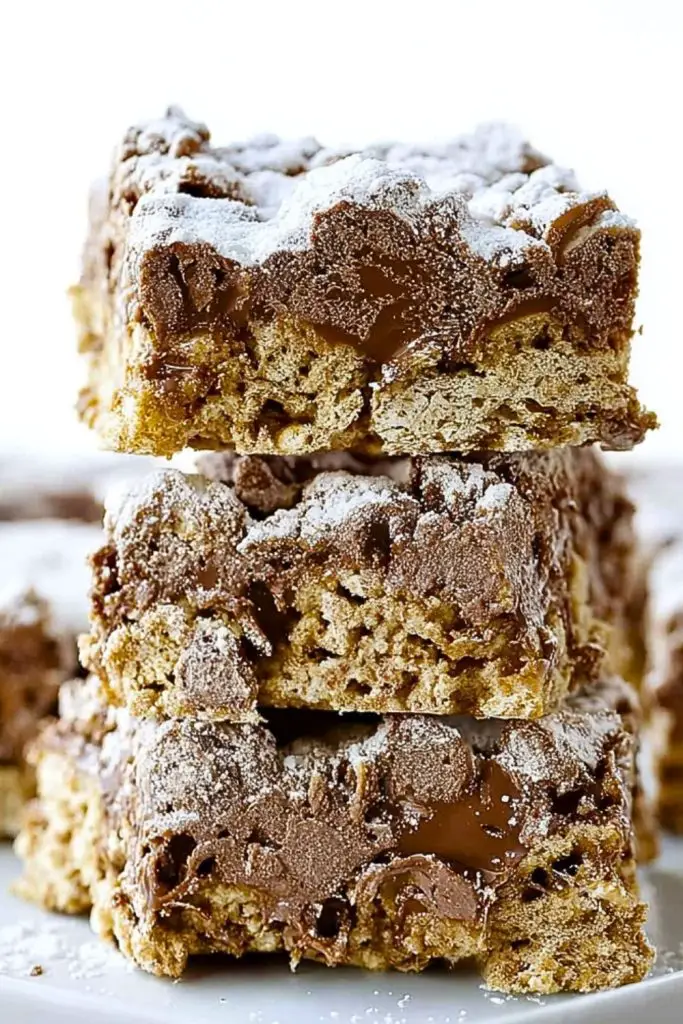
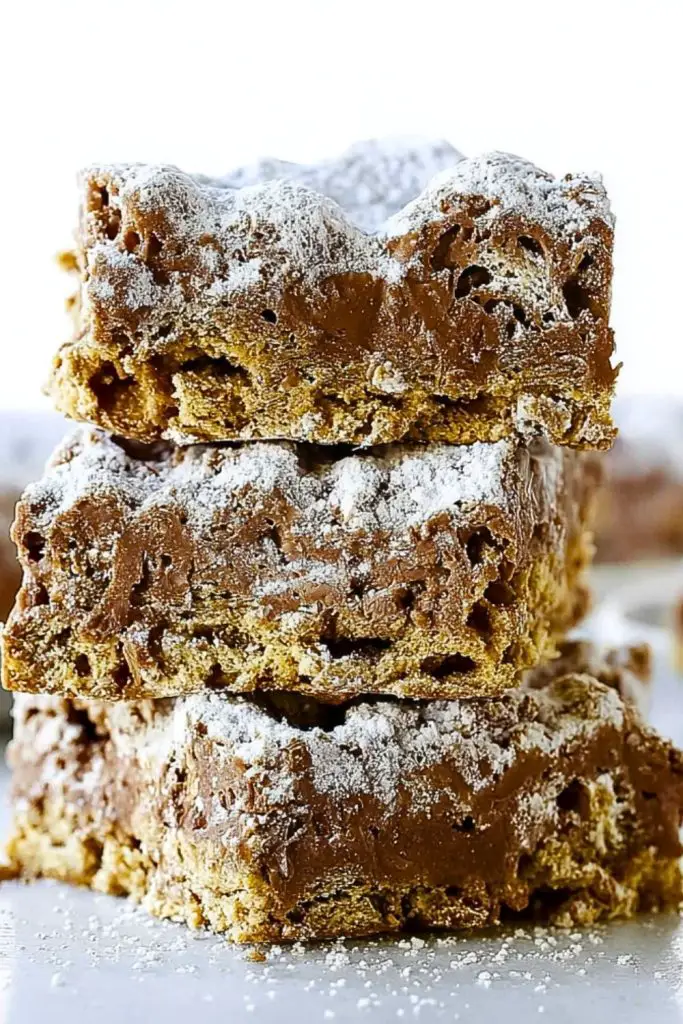
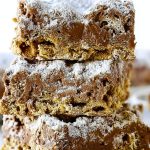
I’ve always had a soft spot for puppy chow — the classic mix of chocolate, peanut butter, and cereal coated in powdered sugar was a staple at every childhood sleepover and holiday gathering. But recently, I decided to give that nostalgic treat a little makeover, turning it into thick, chewy bars that are easy to slice, stack, and snack on. Enter: Puppy Chow Bars. These are everything you love about the original, but in a fuss-free bar form that holds together beautifully and looks like something straight from a bakery display.
WANT TO SAVE THIS RECIPE?
Just enter your email and get it sent to your inbox!
WANT TO SAVE THIS RECIPE?
What I love most about this recipe is how quickly it comes together with ingredients I usually already have in the pantry. It’s no-bake, which is a total lifesaver during busy weeks or hot days when the oven is out of the question. Whether you’re prepping dessert for a party or need a quick sweet fix, these bars hit that perfect balance of crunch, sweetness, and chocolatey goodness.
Why You’ll Love These Puppy Chow Bars
They’re rich, crunchy, and layered with the irresistible combo of chocolate and peanut butter — what’s not to love? These bars are perfect for parties, potlucks, lunchboxes, or just a treat-yourself moment. Unlike the classic loose snack mix, these bars are much less messy and easier to portion.
What Kind of Cereal Should I Use?
You’ll want to stick with rice or corn square cereals like Chex. They have the perfect texture to absorb the chocolate-peanut butter coating without becoming soggy. Avoid flavored or overly sugary versions — the sweetness from the chocolate and powdered sugar is plenty.
Options for Substitutions
If peanut butter isn’t your thing or you need an allergy-friendly option, almond butter or sunflower seed butter will work beautifully. Want to make it dairy-free? Use dairy-free chocolate chips and plant-based butter. You can also add a bit of crunch by mixing in chopped pretzels or roasted peanuts before pressing into the pan.
Ingredients for These Puppy Chow Bars
Rice or Corn Cereal (like Chex): This is the base of the bars and provides the classic crunch and structure. Its airy texture allows it to soak up the chocolate-peanut butter mixture perfectly without going soggy.
Semi-Sweet Chocolate Chips: These add rich chocolate flavor and help bind the bars together. You can also use dark or milk chocolate depending on your preference.
Creamy Peanut Butter: Provides that salty-sweet balance and makes the bars irresistibly smooth and flavorful.
Unsalted Butter: Adds richness and helps melt the chocolate and peanut butter together smoothly.
Vanilla Extract: Just a splash enhances the overall flavor and brings out the sweetness.
Powdered Sugar: Used to coat the top for the signature puppy chow finish. It adds sweetness and that iconic dusty look.
Step 1: Prep Your Pan
Line a 9×9-inch baking dish with parchment paper, leaving some overhang for easy lifting later. Lightly spray it with nonstick spray to make sure the bars release cleanly.
Step 2: Melt the Chocolate Mixture
In a large microwave-safe bowl, combine chocolate chips, peanut butter, and butter. Microwave in 30-second intervals, stirring between each, until smooth and fully melted. Stir in the vanilla extract.
Step 3: Fold in the Cereal
Gently fold the cereal into the chocolate-peanut butter mixture. Use a large spatula and work slowly to avoid crushing the cereal. Make sure each piece is evenly coated.
Step 4: Press Into the Pan
Transfer the coated cereal mixture into the prepared baking dish. Press it down firmly using a spatula or your hands (use parchment on top if it sticks). Pack it in tightly so the bars hold together once cooled.
Step 5: Chill Until Set
Place the dish in the refrigerator and chill for at least 2 hours, or until the bars are firm enough to slice. This step is crucial to get clean cuts and avoid a gooey mess.
Step 6: Add Powdered Sugar
Once the bars are set, dust the top with powdered sugar for that classic puppy chow look. Lift them out using the parchment overhang and slice into squares.
How Long to Prepare the Puppy Chow Bars
Preparation Time: The hands-on prep takes about 15 minutes. Most of this involves melting the chocolate and peanut butter mixture, folding in the cereal, and pressing everything into the pan.
Chill Time: You’ll need to let the bars chill for at least 2 hours in the refrigerator to set completely. You can also leave them overnight if you’re making them ahead of time.
Tips for Perfect Puppy Chow Bars
- Use fresh cereal for the crispiest texture.
- Melt slowly: Don’t rush the melting process. Microwave in short bursts to avoid scorching the chocolate.
- Line your pan well with parchment paper for easier removal.
- Press firmly: The more compact the bars, the better they’ll hold together.
- Dust right before serving if you want that powdered sugar to look fresh and vibrant.
Watch Out for These Mistakes While Cooking
- Overheating the chocolate: It can seize and become grainy. Always stir between intervals.
- Using the wrong cereal: Stick with Chex or something similar. Flakes or puffed cereals don’t hold up well.
- Not chilling long enough: Bars will crumble if you try to cut them too soon.
- Skipping the parchment paper: It makes lifting and slicing much harder without it.
- Adding powdered sugar too early: It can melt into the top if the bars are still warm.
What to Serve With Puppy Chow Bars?
1. A Cold Glass of Milk
The creamy, chilled milk complements the chocolatey crunch beautifully.
2. Fresh Berries
Strawberries or raspberries balance the richness with a burst of tart freshness.
3. Coffee or Espresso
If you’re serving these bars to adults, they pair wonderfully with a strong cup of coffee.
4. Vanilla Ice Cream
A scoop on the side takes these bars to dessert heaven.
5. Salty Snack Mix
Contrast the sweetness with a salty snack like pretzels or mixed nuts.
Storage Instructions
Room Temperature: If your kitchen is cool and dry, store the bars in an airtight container at room temp for up to 3 days.
Refrigerator: To extend their freshness, keep them in the fridge for up to a week. Layer with parchment or wax paper to prevent sticking.
Freezer: These bars freeze well! Wrap individually in plastic wrap and store in a zip-top bag or airtight container for up to 2 months. Thaw at room temperature before serving.
Estimated Nutrition
(Per bar, assuming 16 bars total)
- Calories: ~210
- Total Fat: 11g
- Saturated Fat: 4g
- Cholesterol: 5mg
- Sodium: 90mg
- Carbohydrates: 26g
- Fiber: 1g
- Sugar: 16g
- Protein: 3g
Frequently Asked Questions
How long do these bars last?
They last up to 1 week in the fridge, or 2 months in the freezer.
Can I make them nut-free?
Yes! Substitute peanut butter with sunflower seed butter for a nut-free version.
Can I use crunchy peanut butter?
You can, but it may make mixing harder and the texture will be less smooth.
Do I have to use powdered sugar on top?
Nope, it’s optional! It adds the classic puppy chow touch, but the bars taste great without it.
Can I double the recipe?
Absolutely. Use a 9×13-inch pan and double all ingredients accordingly.
Conclusion
Puppy Chow Bars are a genius twist on the nostalgic treat we all know and love. They’re incredibly easy to make, require no baking, and can be adapted to suit just about any dietary preference. Whether you’re hosting a party or just want a low-effort dessert to stash in the fridge, these bars are bound to be a hit. Their satisfying crunch, rich chocolate-peanut butter flavor, and sweet powdered sugar dusting make them completely irresistible.
Puppy Chow Bars
- Total Time: 2 hours 15 minutes
- Yield: 16 bars
- Diet: Vegetarian
Description
Looking for an easy dessert that’s no-bake, quick to assemble, and bursting with chocolate-peanut butter flavor? These Puppy Chow Bars are the ultimate treat! Crunchy cereal is coated in a smooth, rich chocolate-peanut butter mix, then chilled into thick, chewy bars dusted with powdered sugar. Perfect for quick breakfast bites, easy snacks, lunchbox treats, or a crowd-pleasing addition to your list of dessert and food ideas. Whether you need healthy snack inspiration or sweet breakfast ideas, these bars deliver on flavor and convenience.
Ingredients
2 cups rice or corn cereal (like Chex)
1 cup semi-sweet chocolate chips
1/2 cup creamy peanut butter
2 tablespoons unsalted butter
1 teaspoon vanilla extract
1/2 cup powdered sugar (for topping)
Instructions
1. Line a 9×9-inch baking dish with parchment paper, leaving overhang on the sides. Lightly spray with nonstick spray.
2. In a large microwave-safe bowl, combine the chocolate chips, peanut butter, and butter. Microwave in 30-second bursts, stirring each time, until melted and smooth.
3. Stir in the vanilla extract.
4. Gently fold in the cereal with a spatula, making sure each piece is well coated.
5. Transfer the mixture into the prepared dish. Press it down firmly using a spatula or parchment-covered hands.
6. Chill in the refrigerator for at least 2 hours or until completely set.
7. Dust the top with powdered sugar once fully chilled.
8. Lift from the pan using the parchment paper, slice into bars, and serve.
Notes
Press the mixture firmly into the pan to help the bars hold together better.
Make sure the bars are fully chilled before slicing to avoid crumbling.
Add a fun twist with mix-ins like pretzels, nuts, or mini marshmallows.
- Prep Time: 15 minutes
- Cook Time: 0 minutes
- Category: Dessert
- Method: No-Bake
- Cuisine: American
Nutrition
- Serving Size: 1 bar
- Calories: 210
- Sugar: 16g
- Sodium: 90mg
- Fat: 11g
- Saturated Fat: 4g
- Unsaturated Fat: 6g
- Trans Fat: 0g
- Carbohydrates: 26g
- Fiber: 1g
- Protein: 3g
- Cholesterol: 5mg
Keywords: puppy chow bars, no bake bars, easy dessert, peanut butter chocolate bars, snack bars