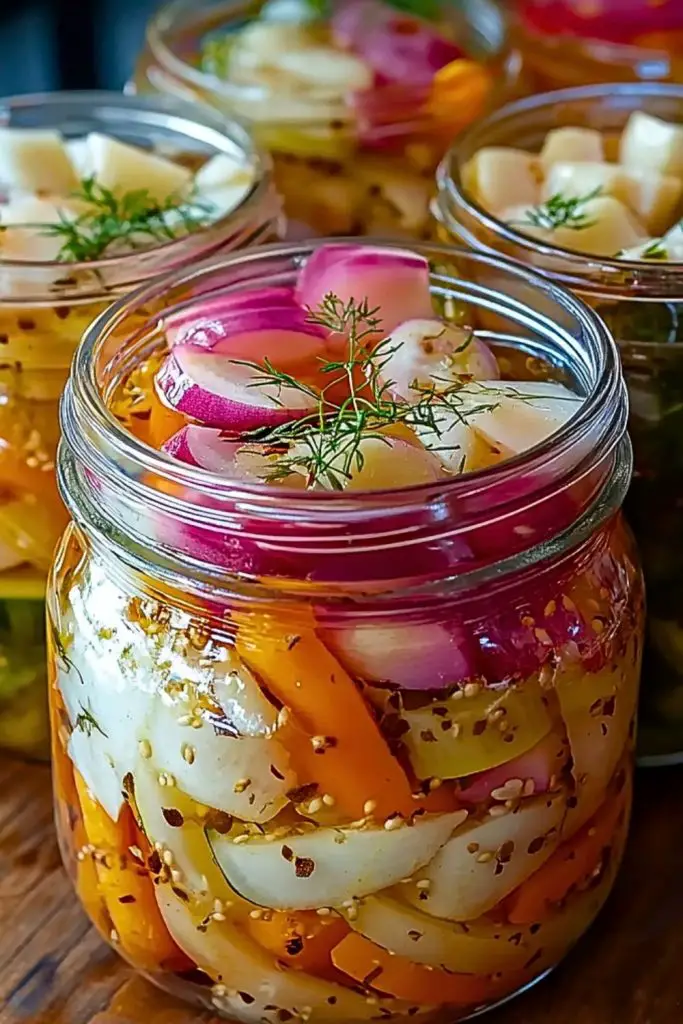
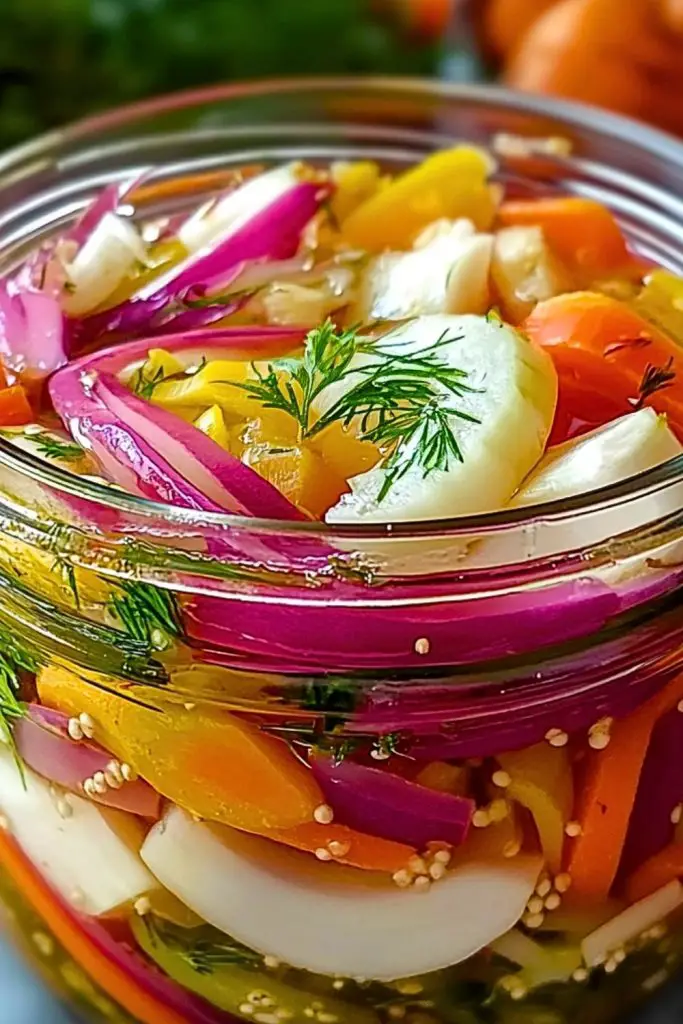
These Easy Refrigerator Pickled Vegetables are the vibrant, tangy crunch your meals have been waiting for. Bursting with color, texture, and bold flavor, these quick pickles are made from a mix of fresh, crisp vegetables like carrots, onions, radishes, and cucumbers soaked in a zesty brine of vinegar, garlic, mustard seeds, and herbs. There’s no need for canning or fancy preservation—just simple ingredients, a few jars, and a fridge.

Perfect as a side dish, a crunchy snack, or a topping for sandwiches and tacos, this recipe is all about convenience without sacrificing flavor. It’s a go-to for anyone looking to add a fresh twist to their meals or preserve seasonal produce in the easiest way possible. With just one batch, your fridge transforms into a treasure chest of punchy pickled perfection.
Why You’ll Love This Easy Refrigerator Pickled Vegetables Recipe
- No canning skills required: If water baths and sterilizers intimidate you, this is your solution. These pickles are as easy as mixing and pouring.
- Ready in just 24 hours: Unlike traditional pickles that take weeks to cure, these develop bold flavor fast.
- Customizable: Mix and match your favorite veggies and spices to suit your taste.
- Healthy & low-calorie: Pickled veggies are naturally low in fat and calories while being high in flavor.
- Beautiful & gift-worthy: Their colorful, layered look makes them a lovely edible gift idea.
- Crisp texture: Quick pickling keeps the vegetables crunchy and satisfying.
Preparation Phase & Tools to Use (Essential Tools and Equipment + Importance of Each Tool)
Before diving into pickling, having the right setup will make your process smoother and more efficient. Here’s what you’ll need:
- Quart-sized mason jars with lids – These are your pickling vessels. Glass is ideal for storing acidic contents like vinegar brine, and the clear sides let you admire your colorful creations.
- Cutting board and sharp knife – Precision matters! A good knife ensures even cuts, which helps the vegetables pickle uniformly.
- Large mixing bowl – Perfect for tossing your sliced veggies with salt or mixing them before jarring.
- Small saucepan – This is where you’ll heat the brine. A pan with a pour spout makes transferring easier and safer.
- Tongs or spoon – To safely pack hot or wet vegetables into jars without making a mess.
- Funnel (optional but helpful) – Makes pouring the hot brine into jars much cleaner and reduces spills.
Each tool helps with speed, safety, and keeping your pickling station neat and efficient.
Preparation Tips
- Prep all veggies in uniform size: This ensures even pickling and keeps textures consistent from jar to jar.
- Use fresh, firm produce: Softer or older vegetables won’t maintain that signature crunch.
- Sterilize your jars: A quick wash in hot, soapy water (or a run through the dishwasher) ensures no contaminants interfere with your pickles.
- Don’t overpack jars: Leave enough room for the brine to flow and cover everything properly.
- Layer by color: If presentation matters, add veggies in a visually appealing way. Think red onions, followed by orange carrots, then green cucumbers.
These small steps make a big difference in flavor, safety, and visual appeal.
Ingredients for This Easy Refrigerator Pickled Vegetables Recipe
Here’s everything you’ll need to make a batch of vibrant, crunchy pickled vegetables that pop with flavor:
For the Vegetables (feel free to mix and match):
- 2 medium carrots, peeled and cut into sticks
- 1 cup cucumber slices or spears
- 1 cup radishes, halved or sliced
- 1 bell pepper (any color), julienned
- 1 small red onion, sliced
- 1 cup cauliflower florets (optional)
- Fresh dill sprigs (for each jar)
For the Brine:
- 1 ½ cups white vinegar (or apple cider vinegar for extra tang)
- 1 ½ cups water
- 2 tablespoons granulated sugar
- 1 tablespoon kosher salt or pickling salt
- 3 garlic cloves, smashed
- 2 teaspoons yellow mustard seeds
- 1 teaspoon whole black peppercorns
- ½ teaspoon crushed red pepper flakes (optional for heat)
- 1 teaspoon coriander seeds (optional, adds citrusy aroma)
This ingredient combo yields a bold, aromatic brine that perfectly complements the fresh crispness of your veggies. Feel free to experiment with additional spices like bay leaves or fennel seeds to suit your flavor vibe.

Step 1: Prepare the Vegetables
Wash and dry all your vegetables thoroughly. Peel, slice, or chop them into uniform pieces—thin sticks, coins, or spears work great depending on the vegetable. Keep the shapes consistent so they pickle evenly. Set aside a few fresh dill sprigs for each jar.
Step 2: Sterilize the Jars
Clean your mason jars and lids with hot, soapy water or run them through the dishwasher. Let them air dry. This step ensures a clean environment for the pickles, extending their freshness and preventing unwanted bacteria.
Step 3: Pack the Jars
Layer your vegetables into the jars tightly but without crushing them. Mix and match the colors for a more vibrant visual appeal. Add a clove of smashed garlic and a sprig of fresh dill to each jar. Leave about ½ inch of space from the top.
Step 4: Make the Brine
In a small saucepan, combine the vinegar, water, sugar, salt, mustard seeds, peppercorns, red pepper flakes, and coriander seeds. Bring to a simmer over medium heat, stirring occasionally until the sugar and salt dissolve completely. This should take about 3–4 minutes.
Step 5: Pour the Brine
Carefully pour the hot brine into each jar over the veggies, using a funnel if needed. Make sure the vegetables are fully submerged. Gently tap the jars on the counter to release any air bubbles, then seal tightly with the lids.
Step 6: Let Them Cool & Refrigerate
Allow the jars to cool to room temperature on the counter. Once cooled, transfer them to the refrigerator. The vegetables will be lightly pickled after about 24 hours, but the flavor deepens beautifully over the next 2–3 days.
Notes
- Customize the spice level: Love a little heat? Add extra red pepper flakes or even a sliced jalapeño to each jar.
- Use different vinegars: White vinegar is classic, but apple cider vinegar or rice vinegar can add interesting flavor twists.
- Add a touch of sweetness: If you like a slightly sweet pickle, increase the sugar by an extra tablespoon or add a few thin slices of apple or pear.
- Best after 48 hours: While these are technically ready after a day, giving them 48 hours in the fridge enhances the flavor and texture.
- Lasts for weeks: These pickled veggies stay fresh in the refrigerator for up to 3–4 weeks—no canning needed!
Watch Out for These Mistakes While Cooking
- Using unclean jars: Skipping sterilization can lead to off flavors or shorter shelf life.
- Overcooking the brine: Boiling too long can make it too strong and reduce the freshness of the flavor.
- Not packing tightly: Loose vegetables shift and float, which can cause uneven pickling.
- Underseasoning the brine: A bland brine means bland veggies—taste the brine before pouring to ensure it’s bold and tangy.
- Forgetting to remove air bubbles: Trapped air can reduce brine coverage and cause soft spots.
- Using table salt: It can make the brine cloudy and affect the texture. Stick to kosher or pickling salt.
- Skipping the cool-down: Placing hot jars directly into the fridge can cause cracking or compromise safety.
- Not fully submerging the vegetables: Anything above the brine line can spoil quickly.
What to Serve With Easy Refrigerator Pickled Vegetables?
These crisp, tangy pickled veggies are wildly versatile and can elevate so many meals with a burst of flavor and crunch. Here’s how to pair them like a pro:
8 Recommendations
1. Charcuterie Boards
Add color and tang to meat and cheese boards. They balance out rich flavors beautifully.
2. Tacos & Burritos
Top your favorite Mexican dishes with these pickles for an extra zing—especially good with carnitas or fish tacos.
3. Grilled Meats
Serve alongside grilled chicken, steak, or pork to brighten and cut through heavier flavors.
4. Sandwiches & Burgers
Add them to any sandwich, especially deli meats or veggie burgers, for crunch and acidity.
5. Rice Bowls & Buddha Bowls
Throw a handful on top of grain-based bowls for contrast and color.
6. Falafel or Shawarma Wraps
Their tang pairs perfectly with Middle Eastern flavors and creamy sauces.
7. Egg Dishes
Serve with scrambled eggs, omelets, or frittatas for a breakfast with a twist.
8. Appetizer Platters
Serve in a small dish as a part of a mezze or antipasto spread.
These pickled veggies bring brightness to just about any savory dish and make a killer snack straight from the jar.
Storage Instructions
These Easy Refrigerator Pickled Vegetables are all about convenience and longevity—without the need for traditional canning. Once you’ve sealed and cooled your jars:
- Refrigerate immediately after they reach room temperature.
- Let them sit for at least 24 hours before opening, but 48–72 hours brings out the best flavor.
- Keep them in the coldest part of your fridge for maximum shelf life.
- Use clean utensils each time you grab from the jar—this helps prevent bacteria from shortening their freshness.
They’ll stay crisp and flavorful for up to 3 to 4 weeks in the refrigerator.
Estimated Nutrition (Per 1/2 cup serving – varies based on veggies used)
- Calories: 25
- Carbohydrates: 5g
- Sugar: 2g
- Fat: 0g
- Protein: 1g
- Fiber: 1g
- Sodium: ~220mg (based on brine strength)
Low in calories, fat-free, and full of flavor, these pickled vegetables are a smart, crunchy choice for snacking or spicing up meals without adding guilt.
Frequently Asked Questions
1. How long do refrigerator pickled vegetables last?
They typically stay fresh for up to 3 to 4 weeks when stored in the refrigerator in airtight jars. Always use clean utensils to avoid contamination.
2. Can I reuse the pickling brine?
Technically yes—for one more batch of vegetables—but the flavor will be milder. Boil it again and taste before using.
3. Do I have to boil the brine?
Yes. Heating helps dissolve the sugar and salt and enhances the infusion of flavors from the spices.
4. Can I use frozen vegetables?
It’s best to use fresh veggies. Frozen ones tend to be too soft and won’t maintain that crunchy texture after pickling.
5. What kind of vinegar should I use?
White vinegar is standard, but apple cider, rice, or white wine vinegar can work too. Just avoid anything with less than 5% acidity.
6. Why are my pickles soft or mushy?
This often happens when using overripe vegetables or not keeping them fully submerged in the brine. Always use firm, fresh produce.
7. Can I add fruit to the jars?
Yes! Thin slices of apples, pears, or even grapes can add a subtle sweetness and pair beautifully with spicy brines.
8. Are these pickles shelf-stable?
No. Since they aren’t canned using a water bath method, they must be stored in the fridge and are not safe for pantry storage.
Conclusion
Easy Refrigerator Pickled Vegetables are the ultimate DIY solution for adding zest, crunch, and color to your meals without the hassle of traditional canning. With just a handful of fresh ingredients and a simple brine, you can transform ordinary vegetables into tangy, flavor-packed bites in under 30 minutes of prep. Whether you’re topping tacos, upgrading sandwiches, or building a killer charcuterie board, these quick pickles deliver every time. Try a batch today—you’ll wonder how your fridge ever lived without them.

Easy Refrigerator Pickled Vegetables Recipe
- Total Time: 30 minutes
- Yield: 4 pint jars
Description
Add a tangy twist to your meals with these Easy Refrigerator Pickled Vegetables—a no-fuss, vibrant mix of crisp produce soaked in a bold, zesty brine. Perfect for those looking for quick breakfast toppings, easy dinner upgrades, or healthy snack ideas, this recipe brings out the best in fresh veggies without the need for canning. Great for anyone craving colorful food ideas and easy recipes that keep flavor high and effort low. With every crunchy bite, you’ll taste the perfect balance of sweet, sour, salty, and spice—ready in just 24 hours!
Ingredients
Vegetables (customize as desired):
- 2 medium carrots, peeled and cut into sticks
- 1 cup cucumber slices or spears
- 1 cup radishes, halved or sliced
- 1 bell pepper, julienned
- 1 small red onion, sliced
- 1 cup cauliflower florets (optional)
- Fresh dill sprigs
Brine:
- 1 ½ cups white vinegar
- 1 ½ cups water
- 2 tablespoons sugar
- 1 tablespoon kosher or pickling salt
- 3 garlic cloves, smashed
- 2 teaspoons mustard seeds
- 1 teaspoon black peppercorns
- ½ teaspoon crushed red pepper flakes (optional)
- 1 teaspoon coriander seeds (optional)
Instructions
- Prep the vegetables: Wash and slice all vegetables into even pieces. Set aside.
- Sterilize jars: Wash mason jars and lids with hot, soapy water or run through a dishwasher.
- Fill the jars: Layer the veggies into the jars, packing tightly but leaving ½ inch at the top. Add garlic and dill.
- Make the brine: In a saucepan, combine vinegar, water, sugar, salt, and spices. Bring to a simmer and stir until dissolved.
- Pour the brine: Carefully pour the hot brine over the veggies, covering them completely. Tap to remove air bubbles.
- Seal & cool: Tightly seal jars, let them cool at room temp.
- Refrigerate: Once cool, store in the fridge. Ready in 24 hours—best after 2–3 days!
- Prep Time: 25 minutes
- Cook Time: 5 minutes (for brine)

