
A slice of No Bake Oreo Pudding Pie is pure comfort in dessert form. With its luscious, creamy filling packed with Oreo cookie crumbs and a buttery chocolate crust, this treat is everything you’d want from an easy yet indulgent dessert. Best of all, it comes together without even turning on the oven, making it perfect for warm days or when you need a quick, crowd-pleasing sweet.
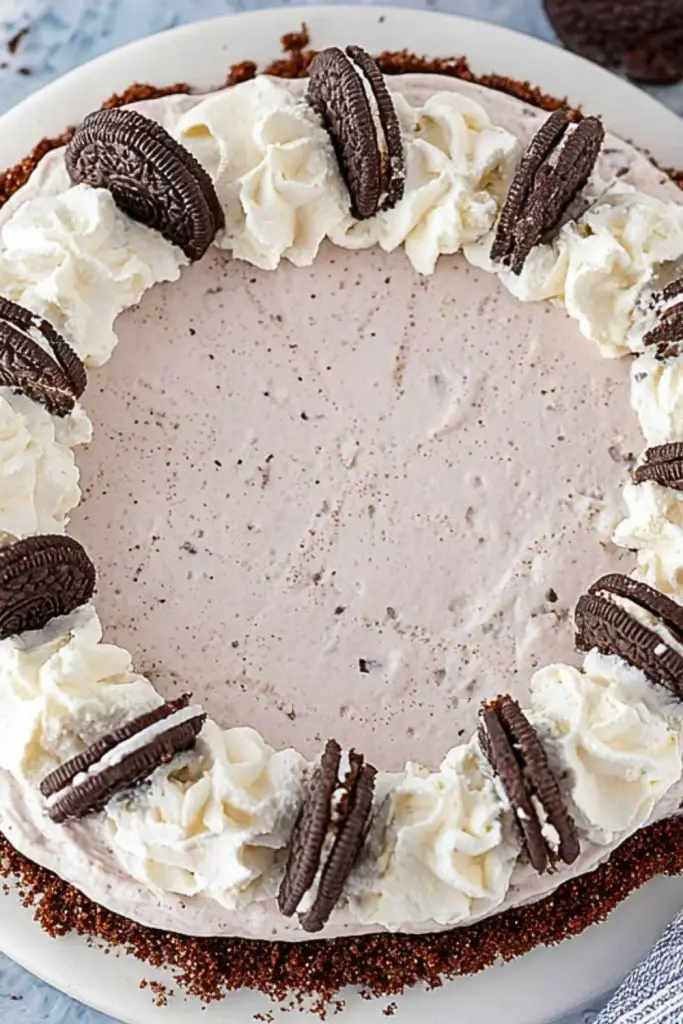
The smooth Oreo pudding filling sits in a chocolatey crust, topped with fluffy whipped cream and finished with mini Oreo cookies for a delightful crunch. It’s a dreamy blend of textures and flavors that’s sure to impress at potlucks, birthday parties, or weeknight dessert cravings. Whether you’re a fan of all things cookies and cream or just need a no-fuss dessert, this pie will win your heart.
Why You’ll Love This No Bake Oreo Pudding Pie
- It’s no bake — no oven required!
- Creamy, rich, and full of Oreo flavor.
- Ready in just 15 minutes (plus chilling time).
- Only a handful of simple ingredients.
- A guaranteed hit with both kids and adults.
Preparation Phase & Tools to Use
To make this pie, you’ll need a few basic tools:
- Mixing bowls: One for the pudding mixture and one for whipped cream — size matters for mess-free mixing.
- Electric hand mixer or stand mixer: Helps you whip the cream and blend the pudding mix quickly and smoothly.
- Rubber spatula: Ideal for folding ingredients together gently without losing airiness.
- 9-inch pie pan: You can use a store-bought chocolate pie crust or make your own.
- Measuring cups/spoons: Precision counts to get the right creamy consistency.
- Refrigerator: For chilling the pie until it’s set and sliceable.
Each of these tools helps streamline the prep and ensures your pie sets beautifully without becoming runny or too firm.
Preparation Tips
Let the whipped topping thaw in the refrigerator, not at room temperature, to maintain its consistency. When folding whipped topping into the pudding mixture, do it gently to keep the filling light and airy. Chill the pie for at least 4 hours, or overnight if possible, to allow it to firm up completely. Garnish just before serving for the freshest presentation. And if you’re crushing Oreos yourself, leave some larger chunks for a more satisfying texture throughout the pie.
Ingredients for this No Bake Oreo Pudding Pie
- 1 (9-inch) prepared chocolate pie crust (store-bought or homemade)
- 1 (3.9 oz) package instant Oreo pudding mix (or chocolate pudding if unavailable)
- 1 1/2 cups cold milk (preferably whole or 2%)
- 8 oz whipped topping (like Cool Whip), thawed
- 10–12 Oreo cookies, crushed (plus extra for garnish)
- Optional: mini Oreo cookies and additional whipped topping for decoration
Step 1: Prepare the Pudding Base
In a large mixing bowl, whisk together the instant Oreo pudding mix and cold milk. Continue to whisk for about 2 minutes until the mixture thickens slightly. If you can’t find Oreo-flavored pudding, use chocolate pudding and stir in finely crushed Oreos for that same cookies-and-cream flavor.
Step 2: Fold in Whipped Topping
Gently fold the thawed whipped topping into the pudding using a rubber spatula. Be careful not to overmix — the goal is a light and fluffy filling. Once the whipped topping is fully incorporated, add in the crushed Oreos and fold again until evenly distributed.
Step 3: Fill the Pie Crust
Spoon the pudding mixture into your prepared chocolate pie crust. Smooth the top using the back of a spoon or an offset spatula for an even finish. Ensure the filling is spread to the edges of the crust so it sets evenly.
Step 4: Chill Until Set
Place the pie in the refrigerator and let it chill for at least 4 hours. For best results, allow it to chill overnight to ensure the pie is fully firm and easy to slice.
Step 5: Decorate and Serve
Before serving, decorate the pie with additional whipped topping piped around the edges. Top each swirl with a mini Oreo cookie, or sprinkle extra crushed cookies for a more rustic look. Slice and serve cold for the ultimate no-bake delight.
Notes
This No Bake Oreo Pudding Pie is incredibly versatile. You can substitute the whipped topping with homemade whipped cream if you prefer a more natural taste. Use double-stuffed Oreos for an extra creamy texture or flavored Oreos for a unique twist. The recipe also works well with a graham cracker crust or even a golden Oreo crust if you want a lighter base. Make sure your pie is fully chilled before slicing — patience is key for the perfect slice.
Watch Out for These Mistakes While Cooking
- Using warm milk: Always use cold milk for the pudding to set properly.
- Overmixing the filling: Be gentle when folding in the whipped topping to maintain the fluffy texture.
- Not chilling long enough: The pie needs at least 4 hours in the fridge to set. Cutting too early may cause the filling to ooze out.
- Using generic pudding brands: Some off-brand puddings may not thicken properly; stick with a reliable brand.
- Crushing Oreos too finely: Leave some chunks for texture or the pie may turn mushy.
Storage Instructions
Store the pie in the refrigerator, covered with plastic wrap or in an airtight container, for up to 4–5 days. Avoid storing at room temperature as the whipped topping and milk-based pudding require refrigeration. If you want to prep it in advance, you can make and freeze the pie (without topping decorations) for up to a month. Thaw in the fridge overnight before serving.
Estimated Nutrition
Per slice (1 of 8 slices):
- Calories: ~320 kcal
- Total Fat: 16g
- Saturated Fat: 7g
- Cholesterol: 10mg
- Sodium: 310mg
- Carbohydrates: 40g
- Sugar: 26g
- Fiber: 1g
- Protein: 3g
Frequently Asked Questions
Can I use homemade whipped cream instead of Cool Whip?
Yes! Use about 2 cups of freshly whipped cream, sweetened with a tablespoon of sugar.
What if I can’t find Oreo pudding mix?
Use chocolate pudding mix and stir in crushed Oreos to mimic the flavor.
Can I make this gluten-free?
Absolutely — just use gluten-free Oreo-style cookies and a gluten-free crust.
Can I freeze the pie?
Yes, freeze without decorations for up to 1 month. Thaw in the fridge before serving.
How far in advance can I make it?
You can make it up to 2 days ahead. Add decorations just before serving.
Can I use a graham cracker crust instead of chocolate?
Definitely — it gives a slightly different flavor but still complements the Oreo filling well.
Why didn’t my pie set properly?
You may not have used cold milk, or the pie wasn’t chilled long enough. Ensure both for best results.
Can I add extra toppings?
Yes! Chocolate shavings, drizzled fudge, or crushed Oreos on top add even more flavor and texture.
Conclusion
This No Bake Oreo Pudding Pie is the ultimate no-fuss dessert that delivers big on flavor and texture. With its creamy filling, crunchy cookie bits, and simple preparation, it’s a reliable go-to for parties, holidays, or whenever you need a sweet fix. Once chilled, it slices beautifully and always gets rave reviews. Make it once, and it’ll quickly become a family favorite.

No Bake Oreo Pudding Pie
- Total Time: 4 hours 15 minutes
- Yield: 8 servings
Description
This No Bake Oreo Pudding Pie is a dream dessert for anyone who loves cookies and cream. With no oven needed, it’s the perfect quick dessert for hot days, lazy weekends, or busy holidays. Made with a creamy Oreo pudding filling, crushed cookies, a chocolate pie crust, and topped with whipped cream and mini Oreos — this easy recipe is guaranteed to be a crowd favorite. Ideal for easy dinner desserts, kid-friendly snacks, or anytime you’re craving something indulgent yet fuss-free, this pie belongs on your list of go-to food ideas for parties or casual weeknights. Keywords: easy recipe, no bake dessert, quick dessert, Oreo pie, cookies and cream, easy dinner ideas.
Ingredients
3.9 oz instant Oreo pudding mix
1 1/2 cups cold milk
8 oz whipped topping, thawed
10 Oreo cookies, crushed
1 (9-inch) prepared chocolate pie crust
Mini Oreo cookies for topping (optional)
Additional whipped topping for garnish (optional)
Instructions
1. In a large bowl, whisk together instant Oreo pudding mix and cold milk for about 2 minutes until slightly thickened.
2. Gently fold in the thawed whipped topping using a rubber spatula.
3. Stir in crushed Oreo cookies until evenly distributed.
4. Spoon the mixture into the prepared chocolate pie crust and smooth the top.
5. Refrigerate for at least 4 hours, preferably overnight.
6. Before serving, decorate with whipped topping and mini Oreos as desired.
7. Slice and enjoy chilled.
Notes
Chill the pie overnight for the best sliceable texture.
Use cold milk to ensure the pudding sets properly.
Crushed Oreos with some larger chunks add better texture than finely ground crumbs.
- Prep Time: 15 minutes
- Cook Time: 0 minutes
- Category: Dessert
- Method: No Bake
- Cuisine: American
Nutrition
- Serving Size: 1 slice
- Calories: 320
- Sugar: 26g
- Sodium: 310mg
- Fat: 16g
- Saturated Fat: 7g
- Unsaturated Fat: 7g
- Trans Fat: 0g
- Carbohydrates: 40g
- Fiber: 1g
- Protein: 3g
- Cholesterol: 10mg
Keywords: easy recipe, Oreo dessert, no bake pie, cookies and cream, pudding pie