

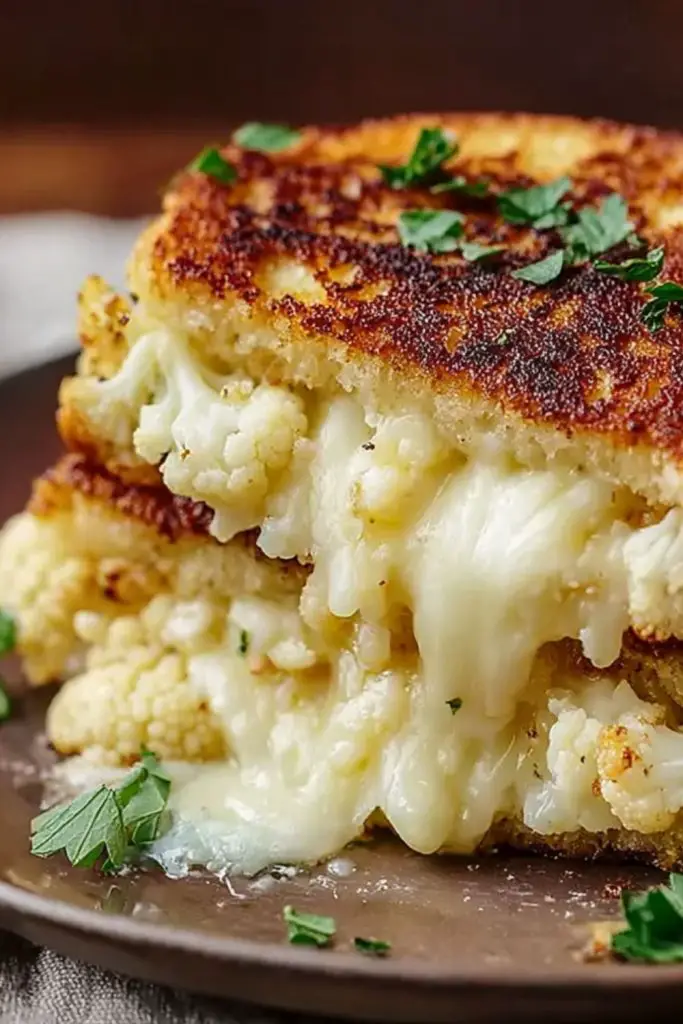
If you’re craving comfort food with a nutritious twist, Cheesy Cauliflower Grilled Cheese is about to become your new obsession. It’s the perfect fusion of crispy, golden brown cauliflower crust and molten, gooey cheese that stretches with every bite. This low-carb alternative to the classic grilled cheese brings the rich flavor of roasted cauliflower together with the indulgence of melted cheese—without the need for bread.
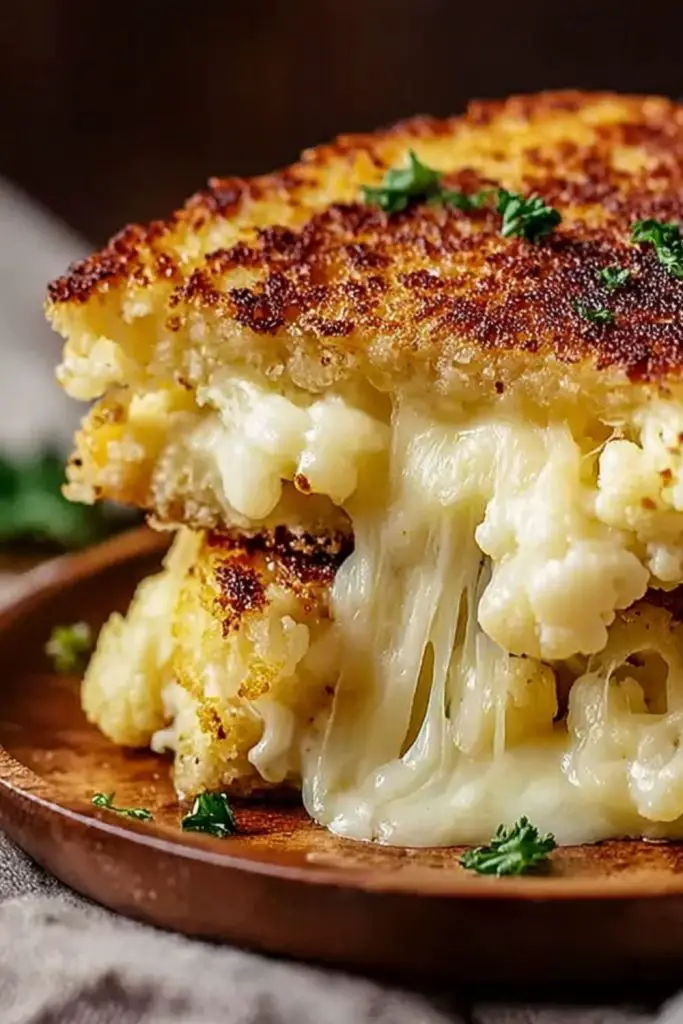
Perfectly crisp on the outside and soft, cheesy, and savory on the inside, this dish is a cozy choice for lunch, dinner, or even a weekend brunch. Whether you’re cutting carbs, gluten, or simply want to sneak more veggies into your meals, this recipe is as satisfying as it is simple.
Why You’ll Love This Cheesy Cauliflower Grilled Cheese
- It’s gluten-free and low-carb but still incredibly comforting.
- The crispy cauliflower “bread” adds a savory depth that regular bread can’t match.
- It’s family-friendly and a great way to introduce more vegetables to picky eaters.
- Super versatile: enjoy it as a meal, snack, or side.
Preparation Phase & Tools to Use
To make this cheesy magic happen, you’ll need a food processor, a cheese grater, parchment paper, a non-stick skillet, and a baking sheet. The food processor is essential for ricing the cauliflower into a fine texture, which helps it form a cohesive crust. The parchment paper prevents sticking while baking the cauliflower rounds. A cheese grater allows you to shred your favorite melty cheese (mozzarella, cheddar, or a combo), and the skillet finishes the sandwich with that satisfying golden crunch. The baking sheet is used for the initial bake to dry and set the cauliflower base.
Preparation Tips
Start by squeezing out every bit of moisture from the riced cauliflower—this is key to getting a crisp crust instead of a soggy mess. Let the baked cauliflower rounds cool slightly before handling, so they hold their shape better when flipped in the skillet. Don’t rush the skillet stage; medium-low heat ensures the cheese melts perfectly without burning the outside. Pre-shredded cheese can save time, but for the best melt and flavor, grate your own. Finally, you can prep the cauliflower crusts ahead of time and refrigerate or freeze them, making assembly a breeze when hunger strikes.
Ingredients for this Cheesy Cauliflower Grilled Cheese
- 1 medium head cauliflower (about 4 cups riced)
- 1 large egg
- 1/2 cup grated Parmesan cheese
- 1/2 teaspoon garlic powder
- 1/2 teaspoon onion powder
- 1/4 teaspoon salt
- 1/4 teaspoon black pepper
- 1 cup shredded mozzarella cheese (for filling)
- 1/2 cup shredded sharp cheddar cheese (for filling)
- 1 tablespoon butter or olive oil (for the skillet)
- Fresh parsley for garnish (optional)
Step 1: Prepare the Cauliflower “Bread”
Start by preheating your oven to 425°F (220°C). Cut the cauliflower into florets and pulse in a food processor until it resembles rice. Transfer to a microwave-safe bowl and microwave for 4-5 minutes until soft. Let it cool, then use a clean kitchen towel or cheesecloth to squeeze out as much moisture as possible. This step is essential for a crispy result.
Step 2: Form and Bake the Crusts
In a large bowl, combine the squeezed cauliflower, egg, Parmesan cheese, garlic powder, onion powder, salt, and pepper. Mix until it forms a dough-like texture. Divide the mixture into four equal portions and form into flat, sandwich-sized rounds on a parchment-lined baking sheet. Bake for 15-18 minutes or until golden and firm.
Step 3: Assemble the Sandwich
Once the cauliflower rounds are baked and slightly cooled, place two of them on a plate. Top each with a mix of shredded mozzarella and cheddar cheese. Cover with the remaining two cauliflower rounds to form sandwiches.
Step 4: Grill to Perfection
Heat butter or olive oil in a non-stick skillet over medium-low heat. Carefully transfer the sandwiches to the skillet. Cook for 3-4 minutes per side, pressing gently with a spatula, until the cheese is melted and the outside is golden brown and crisp. Avoid high heat to prevent burning.
Step 5: Garnish and Serve
Remove the grilled cheese sandwiches from the skillet and let them rest for a minute. Garnish with freshly chopped parsley if desired. Slice in half and serve hot while the cheese is gooey and stretchy.
Notes
This recipe is highly adaptable—feel free to use different cheeses based on your preference or dietary needs. Cauliflower crusts can be made ahead of time and stored in the fridge for up to 3 days or frozen for up to a month. Just ensure they’re reheated in the oven before use to maintain crispness. Also, remember that seasoning the cauliflower crust well is key to a flavor-packed bite.
Watch Out for These Mistakes While Cooking
- Not removing enough moisture from the cauliflower: This is the number one reason your crust may fall apart.
- Using high heat on the skillet: It may burn the crust before the cheese has time to melt.
- Skipping parchment paper: This helps prevent sticking and keeps the crusts intact during baking.
- Undercooking the crust: The rounds should be golden and firm before assembling the sandwich.
- Overloading with cheese: While tempting, too much cheese can cause the sandwich to collapse.
Storage Instructions
Store leftover grilled cheese sandwiches in an airtight container in the fridge for up to 2 days. Reheat in a toaster oven or skillet to restore the crispiness. Avoid microwaving as it can make the crust soggy. If making in advance, it’s better to store the crusts separately and assemble fresh when ready to eat.
Estimated Nutrition
- Calories: ~320 per sandwich
- Protein: 18g
- Fat: 24g
- Saturated Fat: 10g
- Carbohydrates: 9g
- Fiber: 3g
- Sugar: 2g
- Sodium: 480mg
- Cholesterol: 75mg
Frequently Asked Questions
Can I use frozen cauliflower rice?
Yes, but be sure to thaw and squeeze out all the moisture thoroughly.
Can I make this dairy-free?
You can use dairy-free cheeses and nutritional yeast in the crust, but melting quality will vary.
What cheese works best for this recipe?
Mozzarella for stretch and cheddar for flavor are a great combo, but feel free to experiment.
Can I make this ahead of time?
Yes, make and store the cauliflower rounds separately. Assemble and grill fresh for best results.
How do I get the crust to stay crispy?
Squeeze the cauliflower dry and bake until golden before grilling. Avoid excess cheese leaking out.
Is this recipe keto-friendly?
Absolutely. It’s low in carbs and fits well into a keto or low-carb diet.
Can I air fry the sandwich?
Yes! Air fry at 375°F (190°C) for about 5-7 minutes, flipping once halfway through.
What can I serve with it?
A side salad, tomato soup, or roasted veggies all pair beautifully with this grilled cheese.
Conclusion
Cheesy Cauliflower Grilled Cheese is a winning combination of comfort and creativity. Whether you’re following a low-carb lifestyle or just curious to try something new, this veggie-packed version of a grilled cheese sandwich delivers on all fronts: flavor, texture, and satisfaction. Try it once, and it just might replace your traditional favorite.
Cheesy Cauliflower Grilled Cheese
- Total Time: 35 minutes
- Yield: 2 sandwiches
Description
Looking for a healthy twist on a comfort classic? This Cheesy Cauliflower Grilled Cheese is a genius low-carb recipe that swaps out bread for crispy, golden cauliflower crust. Packed with gooey melted cheese and full of savory flavor, it’s a perfect option for those on keto, gluten-free diets, or anyone who loves creative food ideas. This dish is a great go-to for quick lunches, easy dinners, or a satisfying healthy snack. Whether you’re after breakfast ideas or just a cozy easy recipe, this grilled cheese delivers both nourishment and indulgence.
Ingredients
1 medium head cauliflower (about 4 cups riced)
1 large egg
0.5 cup grated Parmesan cheese
0.5 teaspoon garlic powder
0.5 teaspoon onion powder
0.25 teaspoon salt
0.25 teaspoon black pepper
1 cup shredded mozzarella cheese
0.5 cup shredded sharp cheddar cheese
1 tablespoon butter or olive oil
Fresh parsley for garnish (optional)
Instructions
1. Preheat oven to 425°F (220°C). Rice cauliflower in a food processor. Microwave for 4-5 minutes until soft. Cool slightly, then squeeze out all moisture using a clean towel or cheesecloth.
2. In a bowl, mix riced cauliflower, egg, Parmesan, garlic powder, onion powder, salt, and pepper until combined.
3. Divide into four equal rounds on parchment-lined baking sheet. Bake for 15-18 minutes until golden and firm.
4. Once crusts are slightly cooled, top two of them with mozzarella and cheddar cheese. Place the other two crusts on top.
5. Heat butter or oil in a skillet over medium-low. Grill each sandwich 3-4 minutes per side until crispy and cheese is melted.
6. Let rest for 1 minute before slicing. Garnish with fresh parsley if desired and serve hot.
Notes
Make sure to squeeze out every bit of moisture from the cauliflower for the crispiest crust.
Don’t skip baking the cauliflower rounds before grilling—they need that firmness.
Grating your own cheese results in a better melt and flavor.
- Prep Time: 15 minutes
- Cook Time: 20 minutes
- Category: Lunch, Snack
- Method: Baked & Grilled
- Cuisine: American
Nutrition
- Serving Size: 1 sandwich
- Calories: 320
- Sugar: 2g
- Sodium: 480mg
- Fat: 24g
- Saturated Fat: 10g
- Unsaturated Fat: 12g
- Trans Fat: 0g
- Carbohydrates: 9g
- Fiber: 3g
- Protein: 18g
- Cholesterol: 75mg
Keywords: cauliflower grilled cheese, keto lunch, low-carb sandwich, cheesy cauliflower, gluten-free grilled cheese