
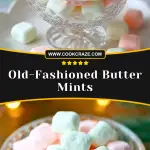
The first time I made these Old-Fashioned Butter Mints, it felt like stepping back into my grandmother’s kitchen. These tiny, pastel-colored pillows melt on your tongue with a cool, buttery sweetness that instantly brings back holiday memories, wedding receptions, and vintage candy dishes. I’ve always loved how something so simple can feel so nostalgic.
What’s wonderful about this recipe is how adaptable and fun it is to make. The dough comes together with just a handful of ingredients, and from there, you can get creative with colors, shapes, and even flavors. Whether you’re making them for a party or simply for yourself, these butter mints feel like a little celebration in every bite.
Why You’ll Love This Old-Fashioned Butter Mints Recipe
These mints are creamy, smooth, and have that perfect melt-in-your-mouth texture. They’re also:
- Incredibly easy to make with no baking required
- Perfect for holidays, weddings, or baby showers
- Customizable in color and flavor
- Freezer-friendly for make-ahead treats
- Made with pantry staples
What Kind of Butter Should I Use for Butter Mints?
Since butter is the star of the show here, I always use high-quality unsalted butter. It gives the mints a richer, creamier flavor without overwhelming the sweetness. Let it come to room temperature before mixing to ensure the dough turns out soft and pliable.
Options for Substitutions
- Flavoring: You can swap peppermint extract for vanilla, almond, or lemon depending on your preference.
- Dairy-Free: Use a vegan butter alternative to make these dairy-free, though the texture might be slightly softer.
- Coloring: Gel food coloring works best, but natural color powders can also be used if you prefer something plant-based.
- Powdered Sugar: If you’re avoiding refined sugar, try a powdered coconut sugar substitute—just know it will change the flavor and color slightly.
Ingredients for Old-Fashioned Butter Mints
- Unsalted Butter: The rich, creamy base that gives these mints their signature texture. Room temperature butter is essential for smooth mixing.
- Powdered Sugar: Finely ground sugar ensures the dough is silky and sweet without any grit.
- Heavy Cream: Adds extra creaminess and makes the dough easy to shape.
- Peppermint Extract: Classic flavoring that gives that cool, refreshing taste—use sparingly for a perfect balance.
- Salt: Just a pinch helps enhance the sweetness and deepen the buttery flavor.
- Food Coloring (optional): Use pastel shades for a traditional look, or get creative with vibrant colors.
Step 1: Cream the Butter
Start by beating the room-temperature unsalted butter in a large mixing bowl until it’s soft, fluffy, and pale in color. This will take about 2-3 minutes with a hand or stand mixer. Properly creamed butter ensures a smooth base for the mints.
Step 2: Add the Extract and Cream
Pour in the peppermint extract and a tablespoon of heavy cream. Beat again until the liquid is fully incorporated and the mixture becomes extra creamy and fragrant.
Step 3: Gradually Add Powdered Sugar
With the mixer on low speed, begin adding the powdered sugar one cup at a time. This prevents a sugar cloud and allows the dough to form gradually. Scrape down the sides as needed. The dough should be soft but not sticky.
Step 4: Knead and Color the Dough
Once the sugar is fully mixed in, turn the dough onto a clean surface dusted with powdered sugar. Knead it gently until smooth. Divide into portions if using different colors. Add a few drops of food coloring to each portion and knead again until evenly tinted.
Step 5: Shape and Cut the Mints
Roll each colored dough piece into long ropes about 1/2 inch thick. Use a sharp knife or bench scraper to cut them into small pillow-like pieces. This is the part where they begin to look like the classic butter mints we all love.
Step 6: Let Them Dry
Lay out the cut mints in a single layer on a parchment-lined baking sheet. Let them sit uncovered at room temperature for 12 to 24 hours, depending on humidity. They should develop a firm outer shell while staying creamy inside.
How Long to Prepare Old-Fashioned Butter Mints
Making these mints is surprisingly quick, but drying takes some time. The hands-on prep is minimal, while the drying process is hands-off but essential.
Active Prep Time: Mixing and shaping the mints takes around 30 minutes. This includes creaming the butter, kneading, adding colors, and cutting into small pieces.
Drying Time: After shaping, the mints need to air-dry for 12 to 24 hours. This allows them to firm up on the outside while remaining soft on the inside. If your home is particularly humid, lean toward the full 24 hours.
Tips for Perfect Butter Mints
- Use room temperature butter—it makes all the difference in texture.
- Add powdered sugar gradually to prevent a dry or crumbly dough.
- Knead thoroughly to avoid streaks in food coloring.
- Don’t skip the drying step! It creates that perfect shell-like exterior.
- Store in a cool, dry place to maintain their texture.
Watch Out for These Mistakes While Cooking
- Using cold butter: It won’t cream properly and will lead to lumps.
- Adding all the sugar at once: Makes it hard to blend and can dry out the dough.
- Skipping kneading: Results in uneven color or texture.
- Not spacing mints when drying: They need airflow to dry evenly.
- Storing before they’re dry: They’ll stick together and lose their shape.
What to Serve With Old-Fashioned Butter Mints?
1. Coffee or Espresso
The smooth creaminess of butter mints pairs beautifully with a strong cup of coffee.
2. Wedding or Baby Shower Desserts
Display alongside cupcakes or petit fours for a vintage-style dessert table.
3. Holiday Cookie Platters
Add a pop of pastel color and cool mint flavor to traditional cookie assortments.
4. After-Dinner Treats
Serve in a small bowl with other bite-sized sweets like truffles or chocolate-covered nuts.
5. Hot Chocolate Bar Garnish
Use them as a garnish or stir-in for a minty twist on classic hot chocolate.
Storage Instructions
Room Temperature: Once dried, butter mints can be stored in an airtight container at room temperature for up to 2 weeks. Keep them in a cool, dry area away from direct sunlight to prevent melting or softening.
Refrigeration: Not necessary unless your environment is very warm or humid. If you do refrigerate, place wax paper between layers to prevent sticking.
Freezing: Butter mints freeze well. Lay them in a single layer on a tray, freeze until solid, then transfer to a freezer-safe bag. They’ll keep for up to 3 months. Thaw at room temperature in a single layer to prevent condensation.
Estimated Nutrition
(Per 4-5 mints serving)
- Calories: ~90
- Fat: 5g
- Saturated Fat: 3g
- Sugar: 10g
- Carbohydrates: 11g
- Protein: 0g
- Sodium: 5mg
- Cholesterol: 10mg
Frequently Asked Questions
What if I don’t have peppermint extract?
You can use vanilla, almond, or lemon extract instead. Just adjust to taste.
Can I make these in advance?
Yes! Make them up to a week ahead or freeze for longer storage.
How do I make them look extra pretty?
Roll them in sanding sugar before drying or use tiny molds for fun shapes.
Why are my butter mints sticky?
They likely didn’t dry long enough. Leave them out longer before storing.
Are butter mints safe for kids?
Absolutely! They’re soft, easy to chew, and not overly sweet—great for little hands.
Conclusion
Old-Fashioned Butter Mints are a charming, easy-to-make treat that bring a touch of nostalgia and elegance to any occasion. With just a few ingredients and a little time, you can create a batch of sweet, melt-in-your-mouth mints perfect for parties, gifting, or just a delightful personal indulgence. Once you try making them at home, you’ll never go back to store-bought again.

Old-Fashioned Butter Mints
- Total Time: 24 hours
- Yield: 100 mints
Description
These Old-Fashioned Butter Mints are the perfect combination of creamy, cool, and sweet. Whether you’re hosting a baby shower, setting up a holiday candy tray, or just want something nostalgic to nibble on, this quick and easy recipe brings back vintage charm with every bite. With a melt-in-your-mouth texture and soft pastel colors, they’re a standout among quick dessert ideas, holiday party snacks, and homemade food gifts. A timeless classic that’s both a treat to eat and fun to make!
Ingredients
2 tablespoons heavy cream
1/2 cup unsalted butter, softened
1/8 teaspoon salt
1/2 teaspoon peppermint extract
4 cups powdered sugar
Food coloring, optional
Instructions
1. Beat the unsalted butter until soft, pale, and fluffy.
2. Add peppermint extract and heavy cream, and beat again until creamy.
3. Gradually add powdered sugar, one cup at a time, mixing until a soft dough forms.
4. Turn the dough onto a surface dusted with powdered sugar and knead until smooth.
5. Divide dough if using colors, add food coloring, and knead until color is uniform.
6. Roll dough into 1/2-inch thick ropes, then cut into small pillow-like pieces.
7. Spread mints in a single layer on parchment-lined trays.
8. Let dry uncovered for 12–24 hours, depending on humidity.
9. Store in airtight containers once fully dried.
10. Enjoy as a snack, party treat, or gift!
Notes
Use gel food coloring for vibrant, non-watery colors that won’t alter dough texture.
For extra elegance, dust with sanding sugar before drying.
If your dough is too sticky, add more powdered sugar 1 tablespoon at a time.
- Prep Time: 30 minutes
- Cook Time: 0 minutes
- Category: Dessert
- Method: No-bake
- Cuisine: American
Nutrition
- Serving Size: 4-5 mints
- Calories: 90
- Sugar: 10g
- Sodium: 5mg
- Fat: 5g
- Saturated Fat: 3g
- Unsaturated Fat: 2g
- Trans Fat: 0g
- Carbohydrates: 11g
- Fiber: 0g
- Protein: 0g
- Cholesterol: 10mg
Keywords: easy dessert, party mints, butter mints, no bake treats, homemade candy, vintage recipe, holiday sweets, quick dessert, baby shower snack