

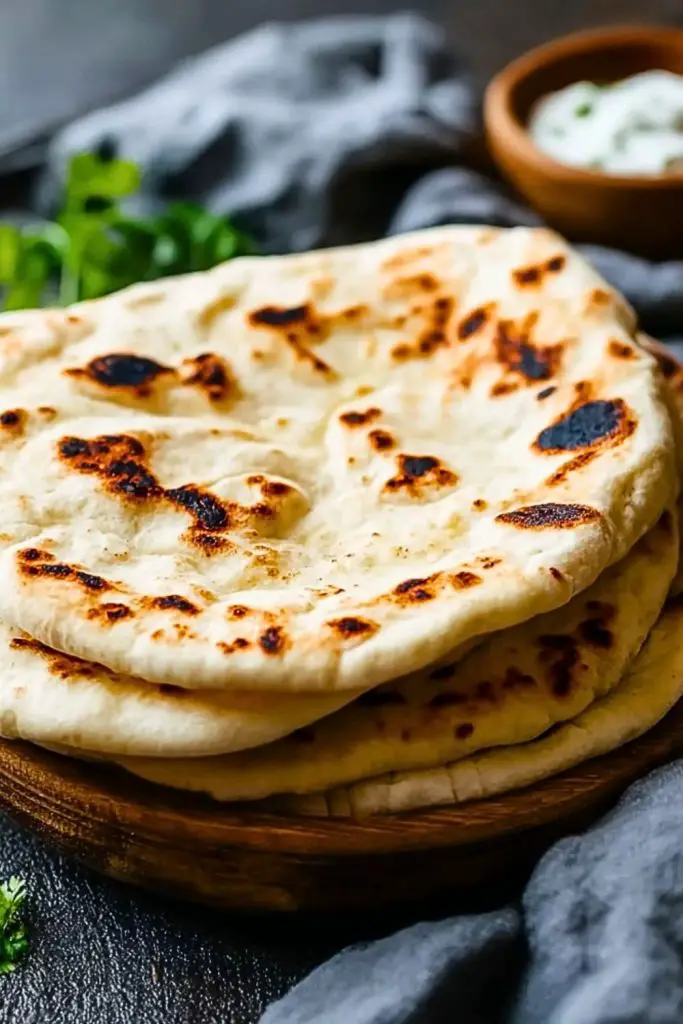
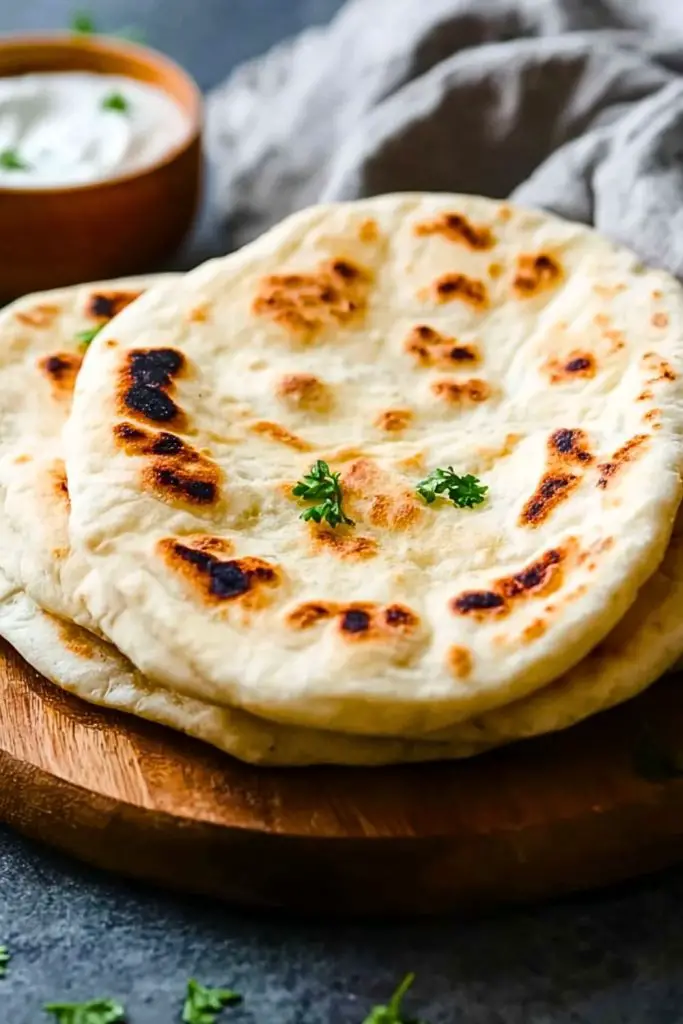
Soft, warm, and slightly chewy, Homemade Pita Bread is a kitchen staple that never goes out of style. Whether you’re scooping up creamy hummus, wrapping up grilled meat, or simply enjoying it fresh off the pan with a brush of olive oil, nothing compares to the taste and texture of pita made from scratch. With its signature pocket that puffs up during cooking, pita bread is a delightful mix of simplicity and versatility that fits perfectly into any meal of the day.
This recipe gives you that authentic Middle Eastern flavor while being incredibly easy to master—even for beginner bakers. Once you see those golden-brown bubbles form on your stovetop or skillet, you’ll be hooked. No need for a tandoor or fancy equipment—just a handful of pantry ingredients, a hot pan, and a little patience are all it takes to make this crowd-pleasing flatbread.
Why You’ll Love This Homemade Pita Bread
- It’s incredibly easy and uses basic pantry staples.
- Cooks in minutes on the stovetop.
- Soft and fluffy with a perfect pocket.
- Freezer-friendly for make-ahead meals.
- Ideal for wraps, dips, sandwiches, or just warm with butter.
Preparation Phase & Tools to Use
To make the perfect pita bread at home, you’ll need a few essential tools:
- Mixing Bowl: For combining and kneading your dough.
- Measuring Cups and Spoons: Accuracy is key for yeast activation and dough consistency.
- Rolling Pin: Helps roll the dough evenly for uniform cooking and puffing.
- Cast Iron Skillet or Heavy-bottomed Pan: Provides even heat for those beautiful golden spots.
- Clean Kitchen Towel: Keeps the dough covered while it rests and proofs, preventing it from drying out.
Each of these tools plays a vital role—from ensuring the dough texture is right to helping achieve that signature puff when the pita hits the heat.
Preparation Tips
Use warm (not hot) water to activate the yeast properly—around 100°F (38°C) is ideal. Allow the dough enough time to rise until doubled in size, which could take up to 1-2 hours depending on room temperature. Roll each ball into a circle that’s not too thin—about ¼ inch works best—to allow the pocket to form during cooking. Heat your pan until it’s hot before adding the dough, and avoid pressing down while cooking so the steam can do its magic. If you’re storing some for later, wrap them in a clean towel while still warm to keep them soft and pliable.
Ingredients for this Homemade Pita Bread
- 2 ¼ teaspoons (1 packet) active dry yeast
- 1 teaspoon granulated sugar
- ¾ cup warm water (about 100°F or 38°C)
- 2 cups all-purpose flour (plus extra for dusting)
- 1 teaspoon salt
- 1 tablespoon olive oil
- Optional: melted butter or olive oil for brushing after cooking
Step 1: Activate the Yeast
In a large mixing bowl, combine the warm water, sugar, and active dry yeast. Stir gently and let it sit for 5 to 10 minutes until the mixture becomes frothy. This step ensures the yeast is alive and ready to help the dough rise.
Step 2: Make the Dough
Add the flour, salt, and olive oil to the yeast mixture. Stir with a wooden spoon or spatula until a shaggy dough forms. Transfer the dough to a floured surface and knead for about 8–10 minutes until it becomes smooth and elastic.
Step 3: Let It Rise
Place the dough in a clean, lightly oiled bowl and cover it with a damp kitchen towel or plastic wrap. Let it rise in a warm, draft-free area for 1 to 1.5 hours, or until it has doubled in size. Rising time may vary based on room temperature.
Step 4: Divide and Shape
Once the dough has risen, punch it down gently to release excess air. Transfer it to a floured surface and divide it into 6–8 equal pieces. Roll each piece into a smooth ball. Then, using a rolling pin, flatten each ball into a 6-inch round, about ¼ inch thick.
Step 5: Preheat Your Skillet
Heat a cast iron skillet or heavy-bottomed non-stick pan over medium-high heat. Let it get very hot—this is crucial for the pita to puff and form the iconic pocket.
Step 6: Cook the Pita
Place one pita round in the hot skillet. Cook for 30 seconds to 1 minute until bubbles start to form. Flip and cook the other side for another minute. Flip again, and the pita should puff up like a balloon. Cook until both sides are golden with light char marks. Repeat with remaining rounds.
Step 7: Keep Warm and Serve
As you finish each pita, transfer it to a plate and cover with a clean towel to keep warm and soft. Serve fresh, or allow to cool before storing. Enjoy with your favorite dips, wraps, or spreads!
Notes
Homemade pita bread is best enjoyed fresh, but it also stores surprisingly well. Using high-quality olive oil and fresh yeast will significantly improve the flavor and texture. If you don’t see a puff while cooking, don’t worry—it’ll still taste great, even without the pocket. Consider doubling the batch to freeze extras for quick meals later on. And if you want whole wheat pita, you can substitute up to half the all-purpose flour with whole wheat flour.
Watch Out for These Mistakes While Cooking
- Water too hot or too cold: This can kill or under-activate your yeast. Stick to around 100°F.
- Skipping the rest period: Dough that hasn’t properly risen won’t puff well and will be dense.
- Pan not hot enough: The pocket forms from steam. If your pan isn’t hot, it won’t puff.
- Rolling too thin or too thick: Too thin, and it’ll be crispy like a cracker; too thick, and it won’t puff.
- Flipping too early: Let it sit just long enough before flipping so that the heat builds up inside.
Storage Instructions
Once completely cooled, store pita bread in an airtight container or resealable bag at room temperature for up to 3 days. To keep longer, freeze the pitas with parchment paper between them and store in a freezer bag for up to 2 months. Reheat on a skillet or in a warm oven wrapped in foil. Avoid microwaving directly as it can make the bread rubbery.
Estimated Nutrition
- Calories: ~165 kcal per pita
- Carbohydrates: 28g
- Protein: 4g
- Fat: 3g
- Saturated Fat: 0.5g
- Fiber: 1g
- Sugar: 0.5g
- Sodium: 230mg
Frequently Asked Questions
Can I use instant yeast instead of active dry yeast?
Yes, you can use instant yeast. Just skip the proofing step and mix it directly with the dry ingredients.
Why didn’t my pita puff up?
It could be due to insufficient pan heat, dough not rested enough, or the round wasn’t rolled evenly.
Can I bake pita bread instead of cooking it on the stove?
Yes! Preheat your oven with a baking stone or steel to 475°F (245°C) and bake each pita for about 3 minutes.
How can I make this gluten-free?
Use a gluten-free flour blend designed for yeasted bread, but results may vary.
What can I serve with pita bread?
Hummus, tzatziki, falafel, grilled meats, roasted veggies, or even peanut butter and banana.
Can I freeze pita dough instead of baked pita?
Yes, shape them into balls after the first rise and freeze. Thaw overnight and roll before cooking.
How do I reheat pita without drying it out?
Wrap in foil and warm in a 300°F oven, or lightly dampen and microwave for a few seconds.
Is pita bread considered healthy?
Yes, especially if made with whole wheat. It’s low in fat and can be a good source of carbs and fiber.
Conclusion
Making homemade pita bread is a rewarding process that brings a taste of the Mediterranean right to your kitchen. With its soft texture, light chew, and incredible versatility, this flatbread is a must-have in your recipe rotation. Whether you use it for wraps, scooping up dips, or a base for quick pizzas, once you try it fresh and warm, you’ll never go back to store-bought again. Happy cooking!

Homemade Pita Bread
- Total Time: 1 hour 45 minutes
- Yield: 6–8 pitas
- Diet: Vegetarian
Description
Craving warm, pillowy flatbread straight from your kitchen? This Homemade Pita Bread recipe delivers soft, chewy pockets perfect for stuffing, dipping, or tearing and enjoying with your favorite dishes. Whether you’re looking for a quick breakfast idea, a simple side for dinner, or just an easy recipe to add to your weekly meal plan, this pita bread hits the mark. Made with pantry staples and cooked on the stovetop, it’s a foolproof way to bring bakery-style bread to your table without the need for an oven. If you’re into healthy snacks or Mediterranean-inspired food ideas, this one’s for you!
Ingredients
2 ¼ teaspoons active dry yeast
1 teaspoon granulated sugar
¾ cup warm water (about 100°F or 38°C)
2 cups all-purpose flour
1 teaspoon salt
1 tablespoon olive oil
Optional: melted butter or olive oil for brushing after cooking
Instructions
1. In a large bowl, mix warm water, sugar, and yeast. Let it sit for 5–10 minutes until frothy.
2. Add flour, salt, and olive oil. Stir to form a dough, then knead for 8–10 minutes until smooth.
3. Place dough in an oiled bowl, cover, and let it rise for 1–1.5 hours or until doubled.
4. Punch down the dough and divide into 6–8 equal balls.
5. Roll each ball into a 6-inch circle, about ¼ inch thick.
6. Heat a cast iron skillet over medium-high heat until hot.
7. Cook each pita for 30 seconds on one side, flip, cook another minute, flip again to puff.
8. Transfer cooked pitas to a plate and cover with a towel to keep warm and soft.
Notes
Use warm—not hot—water to activate yeast properly.
Let dough rise fully for optimal puffing.
Don’t skip the hot pan; it’s the key to creating the pita pocket.
- Prep Time: 15 minutes
- Cook Time: 15 minutes
- Category: Bread
- Method: Stovetop
- Cuisine: Mediterranean
Nutrition
- Serving Size: 1 pita
- Calories: 165
- Sugar: 0.5g
- Sodium: 230mg
- Fat: 3g
- Saturated Fat: 0.5g
- Unsaturated Fat: 2g
- Trans Fat: 0g
- Carbohydrates: 28g
- Fiber: 1g
- Protein: 4g
- Cholesterol: 0mg
Keywords: homemade pita bread, easy recipe, flatbread, healthy snack, quick breakfast, dinner ideas