

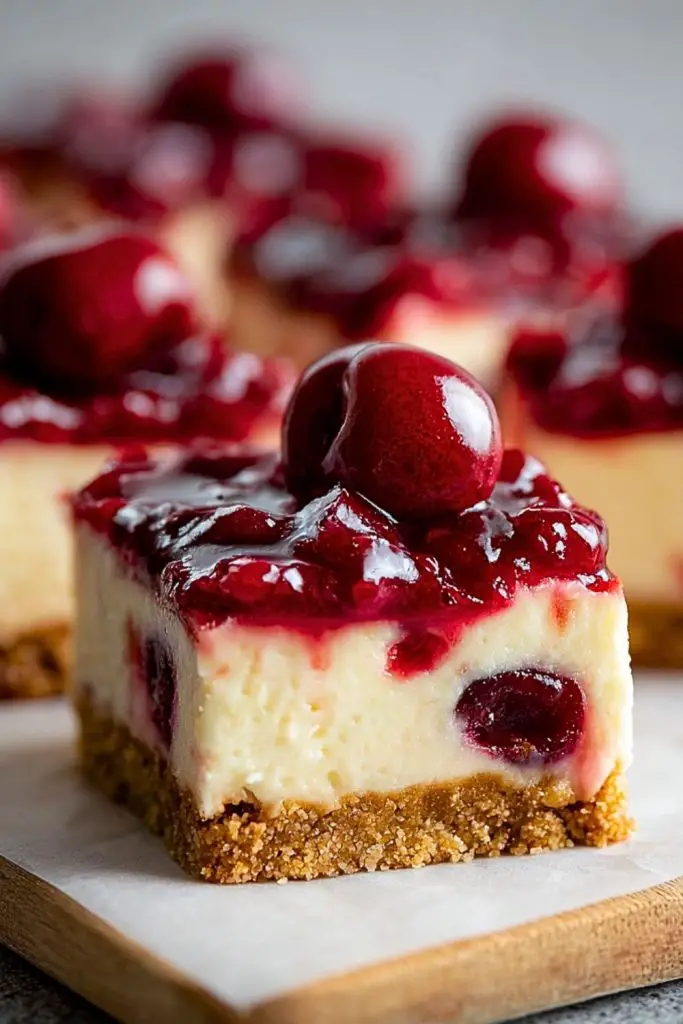
With a buttery graham cracker crust, a velvety cream cheese center, and a glossy, ruby-red cherry topping, Cherry Cheesecake Bars are the kind of treat that steal the spotlight at any gathering. Each bite is the perfect balance of tangy, creamy, and sweet, finished with just the right amount of crunch. These bars deliver everything you love about traditional cheesecake, but in a more casual, easy-to-serve format.
WANT TO SAVE THIS RECIPE?
Just enter your email and get it sent to your inbox!
Whether you’re planning a picnic, holiday dessert table, or just want something indulgent for your weekend sweet tooth, Cherry Cheesecake Bars hit all the right notes. No need for a springform pan or water bath—this recipe simplifies the classic cheesecake process without compromising on richness or flavor. They’re visually striking, practically foolproof, and dangerously addictive.
Why You’ll Love This Cherry Cheesecake Bars Recipe
- Easy yet elegant: No fancy equipment or complex steps needed—just layers of deliciousness.
- Make-ahead friendly: These bars taste even better after chilling overnight.
- Portable perfection: Great for potlucks, bake sales, and lunchbox surprises.
- Rich and refreshing: The tart cherry topping balances the creamy filling beautifully.
- Adaptable: Use canned or homemade cherry pie filling—or even swap the fruit entirely!
Preparation Phase & Tools to Use (Essential Tools and Equipment + Importance)
To create perfect Cherry Cheesecake Bars, having the right tools on hand makes a big difference in both ease and outcome:
- 9×13-inch Baking Pan: This pan size ensures the bars have the right thickness—sturdy enough to slice, yet soft and creamy inside.
- Parchment Paper: Lining your pan helps lift out the bars cleanly and makes cleanup effortless.
- Mixing Bowls: At least two medium to large bowls are needed—one for the crust and one for the filling.
- Electric Mixer or Stand Mixer: For that ultra-smooth, lump-free cheesecake texture, a mixer is your best friend.
- Rubber Spatula: Perfect for scraping every bit of batter and evenly spreading layers.
- Measuring Cups and Spoons: Precision is crucial for cheesecake, especially with the crust and filling ratios.
- Offset Spatula (optional): Helps spread the filling evenly for a smooth surface.
- Cooling Rack: Allows the cheesecake to cool evenly before chilling.
Preparation Tips
- Room Temperature Cream Cheese: Let it soften beforehand to avoid lumps in your filling. Cold cream cheese can ruin the silky texture.
- Don’t Overmix: Once the eggs are added, mix until just combined. Overbeating can incorporate too much air, leading to cracks.
- Chill Thoroughly: The bars need at least 4 hours to set, but overnight chilling gives the best texture and flavor.
- Use a Warm Knife for Clean Cuts: Run your knife under warm water and wipe clean between cuts for those perfect bakery-style slices.
- Pack the Crust Firmly: Use the bottom of a measuring cup or glass to press the crust evenly so it stays compact and doesn’t crumble.
- Cool Gradually: Let the bars cool in the pan at room temperature before refrigerating to prevent condensation or sogginess.
Ingredients for This Cherry Cheesecake Bars Recipe
For the Crust:
- 2 cups graham cracker crumbs (about 14 full crackers)
- 1/2 cup unsalted butter, melted
- 1/4 cup granulated sugar
- Pinch of salt
For the Cheesecake Layer:
- 24 oz (3 blocks) cream cheese, softened to room temperature
- 3/4 cup granulated sugar
- 1/4 cup sour cream
- 1 teaspoon pure vanilla extract
- 3 large eggs, room temperature
For the Cherry Topping:
- 1 (21 oz) can cherry pie filling
or - 2 cups homemade cherry compote (if making from scratch)
Optional Garnish:
- Fresh cherries
- White chocolate shavings
- Whipped cream
Step 1: Prepare the Pan and Preheat Oven
Line a 9×13-inch baking pan with parchment paper, leaving some overhang on the sides for easy lifting. Preheat your oven to 325°F (163°C).
Step 2: Make the Graham Cracker Crust
In a medium bowl, mix graham cracker crumbs, melted butter, sugar, and a pinch of salt until the texture resembles wet sand. Press the mixture firmly into the bottom of the pan using a flat-bottomed glass or measuring cup. Bake for 10 minutes, then let it cool slightly while you make the filling.
Step 3: Prepare the Cheesecake Filling
Using a hand or stand mixer, beat the softened cream cheese on medium speed until smooth (about 2–3 minutes). Add in sugar and beat until well combined. Mix in sour cream and vanilla extract. Finally, add the eggs one at a time, mixing on low just until combined—do not overmix.
Step 4: Assemble and Bake
Pour the cheesecake batter over the slightly cooled crust. Smooth out the top with a spatula. Bake for 35–40 minutes or until the center is set but still slightly jiggly. The edges should be lightly golden.
Step 5: Cool and Chill
Let the bars cool at room temperature for at least 1 hour. Then transfer the pan to the fridge and chill for at least 4 hours or overnight for best results.
Step 6: Add Cherry Topping and Slice
Once fully chilled, spread the cherry pie filling evenly over the top. Carefully lift the bars out of the pan using the parchment overhang. Slice into squares using a sharp knife, wiping it clean between each cut.
Notes
- Chill Time Matters: Don’t skip the chilling process—it’s what transforms the filling from soft to sliceable.
- Crust Customization: You can swap graham crackers for crushed digestive biscuits or even vanilla wafers.
- Fruit Flexibility: While cherry is a classic, these bars also work well with blueberry, raspberry, or strawberry toppings.
Watch Out for These Mistakes While Cooking
- Using Cold Cream Cheese: It won’t blend smoothly, leading to a lumpy filling.
- Overbaking: The cheesecake layer should still jiggle slightly in the center when done—overbaking can dry it out and cause cracks.
- Skipping the Liner: Not using parchment paper makes it difficult to remove the bars cleanly from the pan.
- Cutting Too Soon: Let the bars chill fully; warm or partially chilled cheesecake doesn’t slice well and can fall apart.
- Overmixing After Eggs Are Added: This can create air bubbles, leading to cracks or a puffy top.
- Using Low-Fat Ingredients: Stick with full-fat cream cheese and sour cream for the best texture and taste.
- Uneven Crust Layer: Pressing the crust too thin in areas can make it fragile and crumbly.
- Topping While Warm: Always let the bars cool completely before adding the cherry topping to avoid a runny mess.
What to Serve With Cherry Cheesecake Bars?
Here Are 8 Recommendations:
- Fresh Mint Tea or Iced Green Tea
A light and refreshing drink to balance the rich, creamy texture of the bars. - Espresso or Strong Black Coffee
The bitterness of coffee contrasts beautifully with the sweetness of cherry and cream cheese. - Vanilla Bean Ice Cream
A cool scoop on the side adds an extra layer of indulgence—especially for summer servings. - Lemon Sorbet
Its citrusy zing cleanses the palate and adds a tart edge that complements the cherry flavor. - Fresh Berries
A small bowl of raspberries, blueberries, or strawberries provides a naturally sweet, juicy contrast. - Prosecco or Sparkling Rosé
If you’re serving the bars at a brunch or gathering, these light, bubbly wines make a festive pairing. - Dark Chocolate Shavings or Sauce
Drizzle a little dark chocolate sauce over the top or add a few curls—chocolate and cherry are always a hit. - Whipped Cream with a Hint of Almond Extract
Just a dollop gives a creamy boost and the almond subtly enhances the cherry flavor.
Storage Instructions
- Refrigeration: Store Cherry Cheesecake Bars in an airtight container in the refrigerator for up to 5 days. The flavors continue to develop, making them even more delicious after the first day.
- Freezing: These bars freeze beautifully. Place them in a single layer on a baking sheet to freeze solid, then transfer to a freezer-safe container with parchment between layers. Freeze for up to 2 months. Thaw overnight in the fridge before serving.
- Avoid Room Temp Storage: Because of the dairy content, they should not be left out for more than 2 hours.
Estimated Nutrition (Per Bar – based on 16 bars)
- Calories: 310
- Total Fat: 20g
- Saturated Fat: 12g
- Cholesterol: 90mg
- Sodium: 180mg
- Carbohydrates: 27g
- Sugar: 18g
- Dietary Fiber: 0.5g
- Protein: 4g
Note: Nutritional values may vary slightly depending on brands and portion sizes used.
Frequently Asked Questions
1. Can I use low-fat cream cheese instead of full-fat?
You can, but it’s not recommended. Low-fat versions often result in a thinner, less creamy texture and can cause the bars to be watery or less stable when sliced.
2. Do I have to bake the crust first?
Yes, baking the crust for a few minutes helps it set and stay firm under the cheesecake layer. Skipping this step may lead to a soggy base.
3. Can I make these bars ahead of time?
Absolutely! In fact, they taste even better the next day. You can make them up to 2 days in advance and store them in the fridge.
4. How do I avoid cracks in the cheesecake layer?
Don’t overmix the batter once the eggs are added, and be careful not to overbake. Letting the bars cool slowly at room temperature also helps prevent cracks.
5. What’s the best way to cut these bars cleanly?
Use a sharp knife dipped in warm water and wiped clean between each cut. This helps maintain sharp edges and prevents filling from smudging.
6. Can I substitute the cherry topping with another fruit?
Yes, blueberries, strawberries, raspberries, or even lemon curd make delicious alternatives. Just keep the amount similar.
7. Are Cherry Cheesecake Bars gluten-free?
Not by default. However, you can make them gluten-free by using certified gluten-free graham crackers for the crust.
8. Can I double this recipe for a crowd?
Definitely! Use a larger sheet pan or make two 9×13 pans. You may need to slightly adjust the baking time but follow the same instructions.
Conclusion
Cherry Cheesecake Bars are everything you love about classic cheesecake—rich, tangy, and sweet—wrapped into an easy-to-make, easy-to-serve square. From their crunchy graham base to their creamy middle and fruity topping, they’re a crowd-pleaser with little fuss and big payoff. Whether you’re entertaining, celebrating, or simply treating yourself, these bars are the perfect way to indulge in a timeless dessert.
Cherry Cheesecake Bars
- Total Time: 5 hours
- Yield: 16 bars
Description
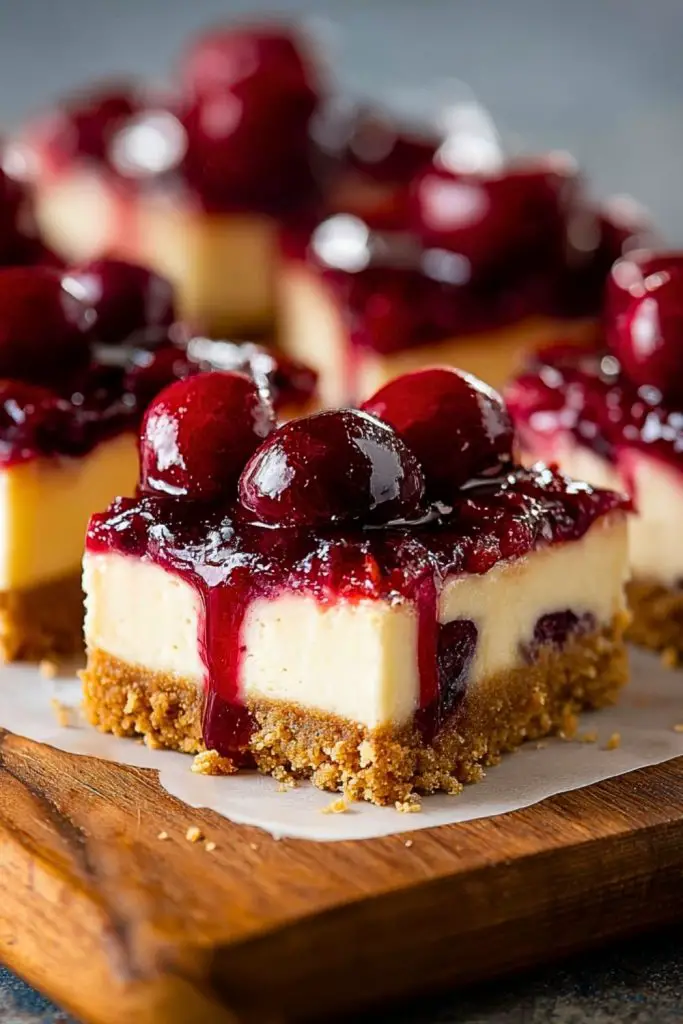
Rich, creamy, and topped with a glossy layer of cherries, these Cherry Cheesecake Bars are the ultimate dessert bar for any occasion. With a buttery graham cracker crust and a velvety cream cheese filling, they offer all the indulgence of traditional cheesecake in a handheld, party-friendly form. Whether you’re looking for easy dessert ideas, a quick make-ahead treat, or something that dazzles at potlucks, these bars hit the sweet spot. They’re a simple recipe that’s big on flavor, with minimal fuss—perfect for dinner ideas, holiday desserts, or a weekend baking project.
Ingredients
2 cups graham cracker crumbs
0.5 cup unsalted butter, melted
0.25 cup granulated sugar
1 pinch salt
24 oz cream cheese, softened
0.75 cup granulated sugar
0.25 cup sour cream
1 teaspoon vanilla extract
3 large eggs
21 oz cherry pie filling or 2 cups homemade cherry compote
Instructions
1. Preheat the oven to 325°F (163°C) and line a 9×13-inch baking pan with parchment paper, leaving overhang on the sides.
2. Combine graham cracker crumbs, melted butter, 1/4 cup sugar, and a pinch of salt in a bowl. Mix until evenly combined.
3. Press the mixture into the bottom of the prepared pan. Bake for 10 minutes, then set aside to cool slightly.
4. In a large mixing bowl, beat softened cream cheese until smooth (about 2–3 minutes). Add 3/4 cup sugar and beat until combined.
5. Mix in sour cream and vanilla. Add eggs one at a time, mixing on low speed just until incorporated. Do not overmix.
6. Pour cheesecake filling over the baked crust and smooth the top with a spatula.
7. Bake for 35–40 minutes, until the center is mostly set but still slightly jiggly.
8. Remove from oven and cool at room temperature for 1 hour.
9. Refrigerate for at least 4 hours or overnight until completely chilled and firm.
10. Once set, spread cherry topping evenly over the cheesecake layer.
11. Lift out of the pan using the parchment overhang and cut into squares using a warm, clean knife.
Notes
Let bars chill fully before slicing to ensure clean, firm cuts.
Use full-fat cream cheese and sour cream for the creamiest texture.
Substitute cherry topping with your favorite fruit compote or pie filling.
- Prep Time: 20 minutes
- Cook Time: 40 minutes
- Category: Dessert
- Method: Baking
- Cuisine: American
Nutrition
- Serving Size: 1 bar
- Calories: 310
- Sugar: 18g
- Sodium: 180mg
- Fat: 20g
- Saturated Fat: 12g
- Unsaturated Fat: 6g
- Trans Fat: 0g
- Carbohydrates: 27g
- Fiber: 0.5g
- Protein: 4g
- Cholesterol: 90mg
Keywords: cherry cheesecake bars, dessert bars, easy cheesecake recipe, holiday dessert, quick cheesecake