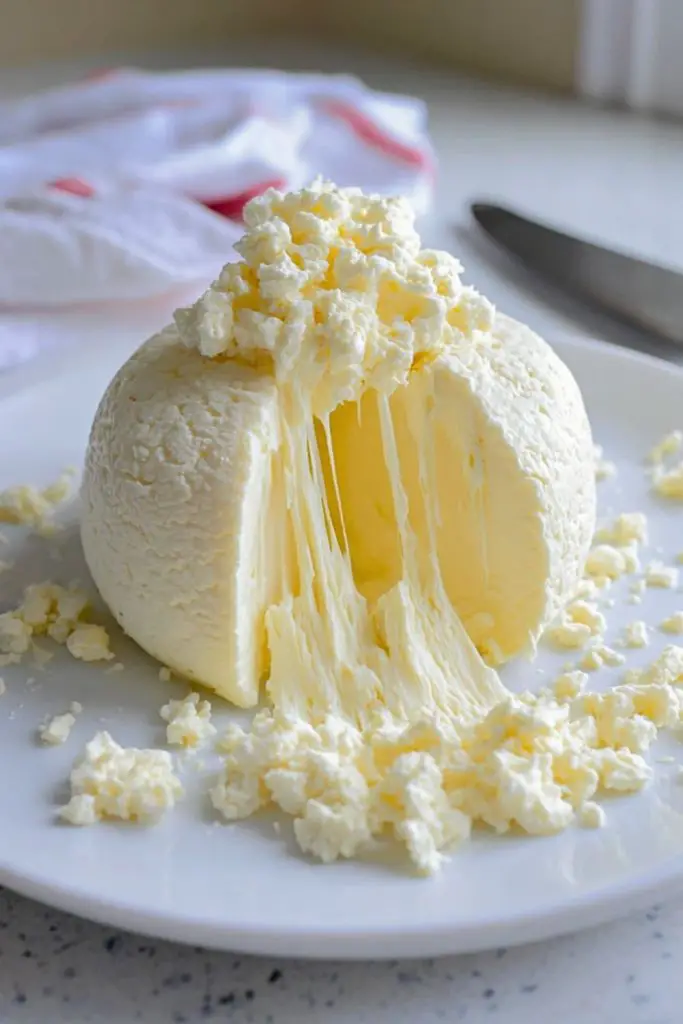
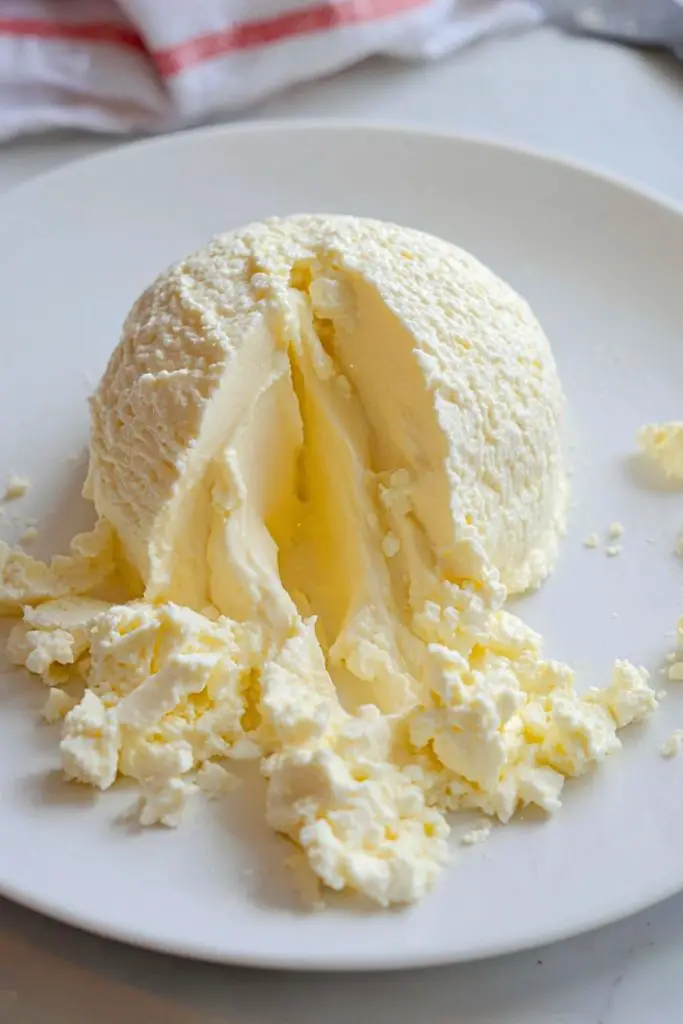
There’s something incredibly comforting about making your own cheese at home. When I first tried my hand at Homemade Farmer’s Cheese, I was hooked from the first curdle. Watching milk transform into soft, tender crumbles of creamy cheese with just a few ingredients felt like a quiet kitchen miracle. I love how it brings me closer to traditional cooking techniques that have been passed down for generations. It’s humble, it’s honest, and best of all—it’s utterly delicious.

This cheese is versatile and comes together with little effort. Whether you want to spread it over toast, crumble it into a salad, or let it melt softly into hot pasta, Farmer’s Cheese is ready to adapt. Its mild, slightly tangy flavor and tender texture work beautifully in both savory and sweet dishes. Plus, I always feel a little proud when I serve something I made entirely from scratch.
Why You’ll Love This Farmer’s Cheese
Homemade Farmer’s Cheese isn’t just tasty—it’s incredibly rewarding. You only need a few basic ingredients (you probably already have them on hand), and the process is simple enough for beginners. You control what goes into it, meaning no preservatives or unnecessary additives. It’s fresher than anything store-bought, and honestly, once you taste it, you might never go back.
What Kind of Milk Should I Use for Farmer’s Cheese?
The kind of milk you choose makes all the difference in the final flavor and texture of your Farmer’s Cheese. I always go for whole milk because it gives a richer, creamier cheese. Make sure it’s not ultra-pasteurized—those high temps break down the proteins too much, making it hard for the curds to form properly. If you can get fresh, local milk, even better. Raw milk works beautifully too, but just be aware of your local guidelines when using it.
Options for Substitutions
If you’re short on whole milk, don’t worry—2% milk can be used in a pinch, though your cheese might be slightly drier. For a richer version, you can blend whole milk with a splash of cream. Vinegar and lemon juice are both great for curdling the milk—lemon gives a subtle citrusy brightness, while vinegar is more neutral. If you’re lactose intolerant, you can even use lactose-free milk as long as it’s not ultra-pasteurized. The flexibility of this recipe is one of its best features.
Ingredients for This Farmer’s Cheese
Whole Milk
This is the heart of the cheese. Whole milk gives the richest flavor and creamiest texture. The higher the fat content, the better your cheese will taste and hold together.
White Vinegar or Fresh Lemon Juice
Either one will acidify the milk, causing it to curdle and form those delicate cheese curds. Lemon juice adds a hint of brightness, while vinegar gives a more neutral flavor.
Salt
Just a pinch enhances the flavor of the curds. You can adjust to your preference, but I find even a small amount makes a big difference.
Water (optional, for rinsing)
If you want a milder flavor, a quick rinse of the curds can tone down the acidity. I use this step when I’m planning to serve the cheese in sweet dishes or desserts.

Step 1: Heat the Milk
Pour the whole milk into a large, heavy-bottomed pot and set it over medium heat. Stir occasionally to prevent scorching. Warm it slowly until it reaches about 185°F (85°C)—just below boiling. Small bubbles should form around the edges, and you’ll see steam rising.
Step 2: Add the Acid
Once the milk is hot, remove the pot from the heat. Slowly pour in the vinegar or lemon juice while gently stirring. You’ll see the milk curdle almost instantly—white curds will separate from the clear, yellowish whey.
Step 3: Let It Sit
Cover the pot with a clean kitchen towel and let it sit undisturbed for about 10 to 15 minutes. This gives the curds time to fully develop and firm up.
Step 4: Strain the Curds
Line a colander with cheesecloth and set it over a large bowl or sink. Gently pour the mixture into the colander to drain the whey. Let it sit for about 10–20 minutes, depending on how moist or dry you want your cheese.
Step 5: Salt and Shape
Once drained to your liking, sprinkle in the salt and mix gently. You can press it into a round shape or crumble it loosely, depending on how you want to use it. Let it cool, then refrigerate.
How Long to Cook the Farmer’s Cheese
The actual “cooking” time is quite short—heating the milk to the right temperature takes about 10 to 15 minutes. Once the acid is added and curds begin to form, you’ll only need another 10 to 15 minutes of resting. The full process, from warming the milk to draining the curds, typically takes around 40 minutes. It’s quick enough for a weekday project and simple enough to become a weekend ritual.
Tips for Perfect Farmer’s Cheese
- Don’t Rush the Heating: Gentle, even heating helps the milk proteins set up properly. Avoid boiling or scorching.
- Use a Thermometer: Hitting that sweet spot around 185°F makes all the difference in curd formation.
- Acid Matters: If the curds don’t form well, try adding a bit more lemon juice or vinegar.
- Let It Sit: That 10–15 minute rest after curdling really helps the curds firm up.
- Drain to Taste: For a creamier cheese, drain for less time. For a crumbly texture, give it a full 20 minutes or more.
- Add Flavor Later: Want herbs or spices? Mix them in after the cheese is drained and salted for best results.
Watch Out for These Mistakes While Cooking
- Using Ultra-Pasteurized Milk: This milk won’t curdle properly due to altered proteins—always check the label.
- Overheating the Milk: Boiling can lead to rubbery curds and scorched flavor. Stay just below a full boil.
- Not Enough Acid: If the curds aren’t forming, it could be a sign you need a little more vinegar or lemon juice.
- Skipping the Rest Time: That 10–15 minute pause allows the curds to fully set—don’t skip it.
- Draining Too Much or Too Little: Pay attention to how you’ll use the cheese—less draining for spreads, more for crumbles.
What to Serve With Farmer’s Cheese?
On Fresh Toast with Honey
A slice of warm bread topped with creamy cheese and a drizzle of honey is hard to beat.
Mixed Into Pasta
Stir it into hot pasta with olive oil, garlic, and fresh herbs for a rustic, satisfying meal.
In Salads
Crumble it over greens or roasted vegetables—its soft texture adds lovely contrast.
As a Blintz or Crepe Filling
Sweetened with a little sugar and vanilla, it makes a perfect creamy filling.
Paired with Fresh Fruit
Peaches, berries, or grapes all go beautifully with the gentle tang of Farmer’s Cheese.
In a Sandwich or Wrap
Layer it into wraps with roasted veggies or smoked salmon for a fresh, creamy bite.
Baked into Savory Tarts
Its mild flavor makes it ideal for pairing with spinach, leeks, or caramelized onions.
On a Cheese Board
Serve it alongside olives, nuts, and a drizzle of olive oil for a rustic, homemade touch.
Storage Instructions
Farmer’s Cheese should be stored in an airtight container in the refrigerator. It keeps well for about 5 to 7 days. If it starts to develop a sour smell or any discoloration, it’s time to let it go. For longer storage, you can freeze it, but be aware that freezing may change the texture slightly—best for cooked dishes after thawing. When frozen, use it within 2 months for best quality. Always label your container with the date so you know how fresh it is.
Estimated Nutrition
A 1/4-cup (about 60g) serving of homemade Farmer’s Cheese contains approximately:
- Calories: 100
- Protein: 6g
- Fat: 7g
- Carbohydrates: 2g
- Sugar: 1g
- Calcium: 15% of the Daily Value
- Sodium: Depends on the salt you add, usually around 100mg
These values can vary depending on the milk used and how much whey is drained out.
Frequently Asked Questions
How do I know if the curds have formed properly?
They’ll look like soft, white clumps separating from clear, yellowish whey. If the liquid is still cloudy, you might need more acid or a bit more time.
Can I use apple cider vinegar instead of white vinegar?
Yes, you can. It will add a slight apple note to the cheese, which some people really enjoy. Just be aware of the flavor difference.
Why is my cheese rubbery?
It likely means the milk was overheated or boiled. Keeping the temperature just under boiling prevents this.
Can I flavor the cheese with herbs or spices?
Absolutely. Add chopped fresh herbs, cracked pepper, or even garlic after draining for personalized flavor.
What should I do with the leftover whey?
Don’t throw it out! You can use it in smoothies, bread dough, soups, or even feed it to your plants—it’s full of nutrients.
Can I use goat’s milk or sheep’s milk instead of cow’s milk?
Yes, just make sure it’s not ultra-pasteurized. Each type gives a unique flavor and texture to the cheese.
Is this cheese good for sweet recipes?
Definitely. It’s often used in Eastern European desserts, and works beautifully when sweetened slightly and used as a filling or topping.
How much cheese will I get from 1 gallon of milk?
Typically, one gallon yields about 1 to 1.5 pounds of Farmer’s Cheese, depending on the fat content and how much whey you drain.
Conclusion
Making Farmer’s Cheese at home is a small act of kitchen alchemy that always feels rewarding. It’s simple, satisfying, and opens the door to a whole range of dishes—from breakfast spreads to elegant appetizers. Whether you’re new to cheesemaking or just want a reliable, flexible recipe, this one delivers every time. Plus, once you taste it fresh, you’ll wonder why you ever settled for store-bought.

Farmer’s Cheese
- Total Time: 40 minutes
- Yield: About 1 to 1.5 pounds of cheese
Description
Homemade Farmer’s Cheese is a fresh, creamy cheese made from milk and a simple acid like vinegar or lemon juice. It has a tender, slightly tangy flavor and is incredibly versatile. Whether spread on toast, crumbled over salads, or folded into pasta, this cheese adds a homemade touch to any meal.
Ingredients
- 1 gallon whole milk (not ultra-pasteurized)
- 1/4 cup white vinegar or fresh lemon juice
- 1/2 to 1 teaspoon salt, to taste
- Water (optional, for rinsing)
Instructions
- In a large, heavy-bottomed pot, heat the milk over medium heat until it reaches 185°F (85°C), just below boiling.
- Remove from heat and slowly stir in the vinegar or lemon juice. Watch for curds to form.
- Cover the pot and let it sit undisturbed for 10-15 minutes.
- Line a colander with cheesecloth and place it over a large bowl or in the sink. Pour the curdled milk into the colander to drain the whey.
- Let the curds drain for 10-20 minutes, depending on your desired consistency.
- Sprinkle salt over the curds and mix gently.
- Shape into a ball or keep loose and refrigerate in an airtight container.
- Prep Time: 10 minutes
- Cook Time: 30 minutes

