

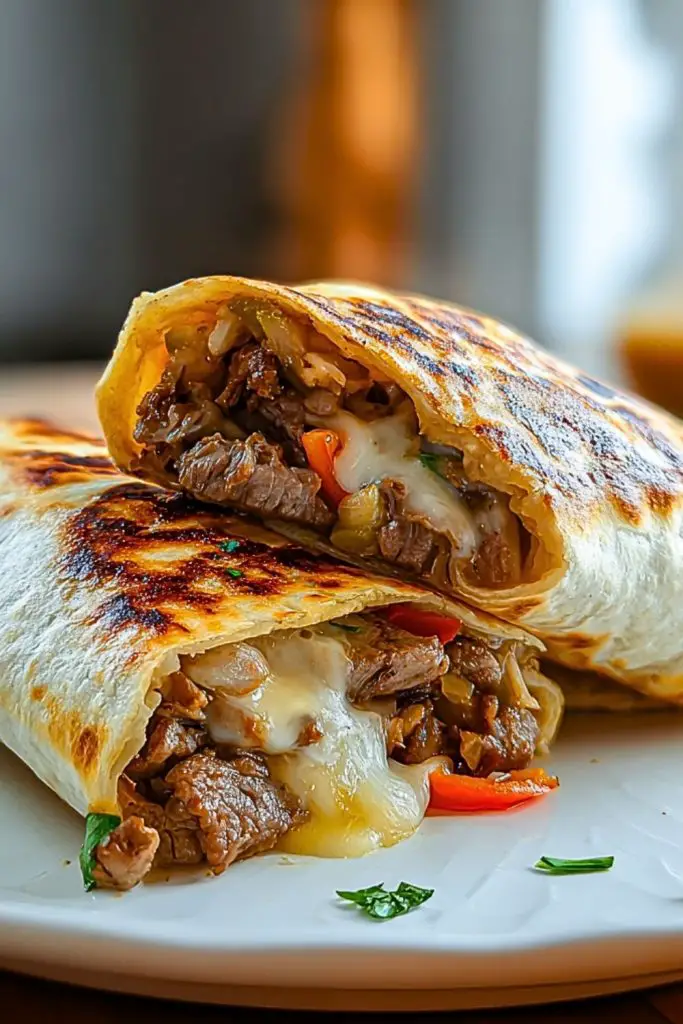
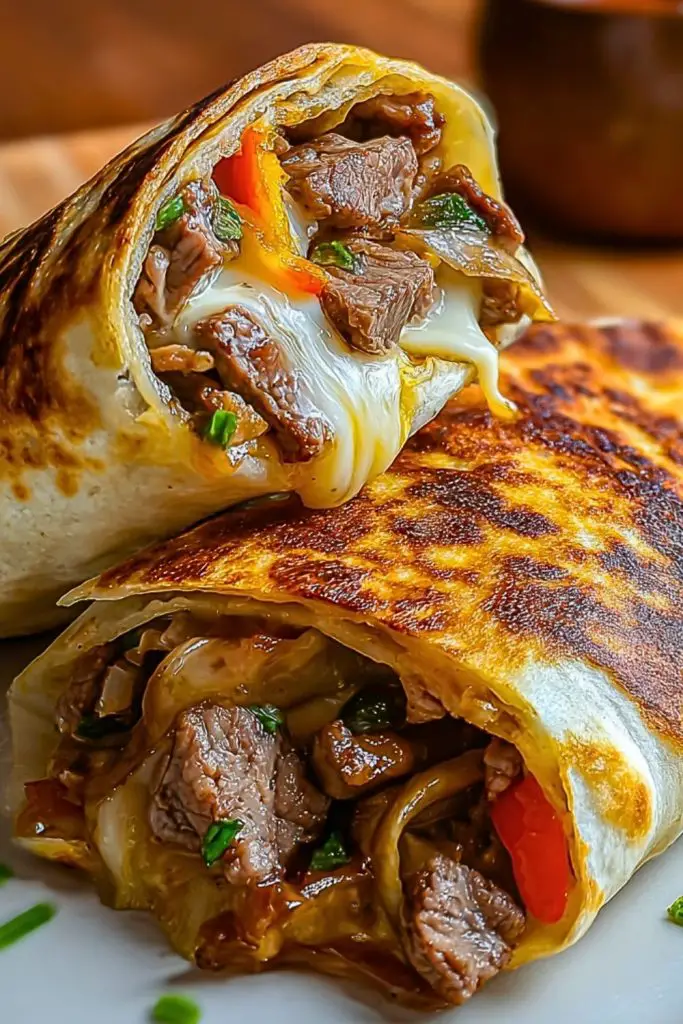
Few things hit the comfort food sweet spot like the perfect blend of tender beef, melted cheese, and sautéed peppers wrapped in a golden, crispy tortilla. These Crispy Philly Cheesesteak Grilled Wraps take everything you love about a classic cheesesteak and give it a crunchy, handheld upgrade. With every bite, you’ll get that savory beef flavor, the creamy pull of melted cheese, and the smoky char that only a hot skillet can deliver.
Whether you’re serving lunch to a hungry crowd or looking to elevate your weeknight dinner game, these wraps are a quick, crowd-pleasing solution. They’re packed with flavor, require minimal prep, and are endlessly customizable. You can whip them up in under 30 minutes—and they’ll disappear in even less time.
Why You’ll Love This Crispy Philly Cheesesteak Grilled Wraps
- Quick & Easy: A full meal in one wrap, ready in minutes.
- Texture Heaven: Juicy beef inside, crispy tortilla outside.
- Customizable: Swap out meats, cheeses, or add sauces.
- Family-Friendly: Loved by kids and adults alike.
- Perfect for Leftovers: A great way to repurpose steak or roast beef.
Preparation Phase & Tools to Use (Essential Tools and Equipment, and the Importance of Each Tool)
Before diving into these delicious Crispy Philly Cheesesteak Grilled Wraps, make sure your kitchen is ready with the right tools. Having the proper equipment will make your cooking smoother and more efficient.
- Cast Iron or Non-Stick Skillet: Essential for getting that signature golden-brown crust on the wraps. A cast iron pan retains heat well and helps you get that crispy finish.
- Sharp Chef’s Knife: Needed for thinly slicing beef and chopping peppers and onions with precision.
- Cutting Board: Keeps your prep area clean and helps with safe slicing.
- Tongs or Spatula: For flipping the wraps without tearing them or spilling the filling.
- Mixing Bowl: Useful for tossing your sliced beef with seasoning before it hits the pan.
- Foil or Plate with Lid: Keeps the wraps warm and lets the cheese continue to melt slightly while you finish cooking the rest.
These tools ensure an even cook, reduce mess, and help preserve the integrity of each wrap during assembly and grilling.
Preparation Tips
- Thin is Key: Slice your beef as thinly as possible for fast, even cooking. Freezing it for 15 minutes before slicing makes this easier.
- Use Medium Heat: Too hot, and your tortilla will burn before the cheese melts. Medium heat lets everything cook through perfectly.
- Drain Excess Juices: After cooking the beef and veggies, drain any excess liquid before filling your wraps. This prevents sogginess.
- Shred Cheese Fresh: Freshly shredded cheese melts better and provides that luscious, stretchy bite.
- Don’t Overfill: Resist the urge to stuff too much inside—less is more when it comes to wrap integrity.
- Seal and Press: Fold the sides in tightly, press the seam side down first on the skillet to lock everything in place.
With just a bit of thoughtful prep, you’ll be well on your way to a restaurant-worthy wrap in your own kitchen.
Ingredients for This Crispy Philly Cheesesteak Grilled Wraps
To make these wraps flavorful and satisfying, each ingredient plays a role in building layers of texture and taste. Here’s everything you’ll need:
- 1 lb ribeye steak or sirloin, thinly sliced (can substitute with shaved beef or roast beef)
- 1 tablespoon olive oil
- 1 small yellow onion, thinly sliced
- 1 small red bell pepper, thinly sliced
- 1 small yellow bell pepper, thinly sliced
- 1 teaspoon Worcestershire sauce
- Salt and freshly ground black pepper, to taste
- 1 teaspoon garlic powder (optional for added depth)
- 1 ½ cups shredded provolone or mozzarella cheese (or a mix of both)
- 4 large flour tortillas (burrito-size, pliable and fresh)
- Butter or cooking spray, for grilling the wraps
Optional add-ins for customization:
- Jalapeños for heat
- Mushrooms, sliced and sautéed
- Cream cheese spread for an extra creamy bite
- Hot sauce or aioli for dipping or drizzling
This combination delivers the classic cheesesteak flavor with a modern, crispy twist, making each bite irresistible.
Step 1: Cook the Beef
Heat 1 tablespoon of olive oil in a large skillet over medium-high heat. Add the thinly sliced beef, season with salt, pepper, and garlic powder (if using). Cook for 2–3 minutes, stirring frequently, until just browned. Add Worcestershire sauce for depth. Remove from the skillet and set aside.
Step 2: Sauté the Veggies
In the same skillet, add a touch more oil if needed. Toss in the sliced onions and bell peppers. Sauté over medium heat until soft and slightly caramelized—about 5–7 minutes. Stir occasionally to prevent burning.
Step 3: Combine the Filling
Return the cooked beef to the skillet with the vegetables. Toss everything together and cook for another minute so the flavors blend. Remove from heat and let it cool slightly before assembling the wraps.
Step 4: Assemble the Wraps
Lay out the flour tortillas. Spoon an even layer of the beef and pepper mixture onto the center of each one. Sprinkle generously with shredded cheese. Fold in the sides, then roll tightly into a wrap.
Step 5: Grill to Perfection
Preheat a clean skillet over medium heat. Lightly butter the outside of each wrap or spray with cooking spray. Place seam-side down in the pan and grill until golden brown and crispy—about 2–3 minutes per side. Flip carefully with tongs or a spatula.
Step 6: Serve and Enjoy
Slice diagonally and serve hot with your favorite dipping sauce—ranch, garlic aioli, or even a spicy chipotle mayo work great.
Notes
- Make-Ahead Tip: You can prep the beef and veggies a day in advance and store them in an airtight container. This cuts down your cook time significantly.
- Cheese Choices: Provolone is classic, but mozzarella adds a nice stretch. For a bolder flavor, try white cheddar or pepper jack.
- Tortilla Tips: Warm tortillas slightly before wrapping to make them more pliable and less likely to tear.
- Vegetarian Option: Swap the beef for portobello mushrooms or a plant-based meat alternative. The seasoning and grilling method remain the same.
Watch Out for These Mistakes While Cooking
- Overstuffing the Wraps: Adding too much filling can lead to messy wraps that are hard to seal and cook unevenly.
- Using Cold Tortillas: Cold tortillas crack and tear when rolled. A quick 10-second microwave warm-up makes a huge difference.
- Cooking on High Heat: This might char the outside before the cheese melts inside. Stick to medium heat for an even, golden finish.
- Skipping the Drain Step: Not draining the cooked beef and veggies can lead to soggy wraps. A quick rest on a paper towel does the trick.
- Rushing the Grill Time: Don’t flip too soon. Let each side get golden and crispy before turning for the best texture.
- Forgetting to Seal the Ends: Fold in the sides of the tortilla to lock in filling and avoid leakage during cooking.
Avoiding these common mistakes ensures your wraps come out perfectly crispy, melty, and packed with flavor every time.
What to Serve With Crispy Philly Cheesesteak Grilled Wraps?
These wraps are hearty on their own, but pairing them with the right sides can elevate your meal to something truly special.
8 Recommendations
- Seasoned Waffle Fries
A crunchy, seasoned fry is the perfect match for the cheesesteak flavors and adds a fun, diner-style twist. - Creamy Coleslaw
The cool, tangy crunch of coleslaw balances the rich, cheesy interior of the wraps beautifully. - Roasted Garlic Parmesan Broccoli
Adds a healthy, flavorful veggie component that roasts up quickly in the oven. - Pickle Spears
Classic cheesesteak sidekick. The briny snap of a dill pickle cuts through the richness of the wrap. - Spicy Aioli or Chipotle Mayo
Perfect for dipping or drizzling, this brings a little heat and creaminess. - Loaded Potato Skins
Another indulgent side that works great for game days or parties. - Grilled Corn on the Cob
Especially in summer, buttery grilled corn is an ideal fresh and sweet counterpart. - Tomato Cucumber Salad
Light and refreshing, this simple salad adds balance and bright acidity to your plate.
With any of these sides, your Crispy Philly Cheesesteak Grilled Wraps meal goes from satisfying to sensational.
Storage Instructions
- Refrigeration: Store leftover wraps in an airtight container or wrap individually in foil. They’ll keep in the fridge for up to 3 days.
- Reheating: For best results, reheat in a skillet over medium heat to restore crispiness. Alternatively, use an air fryer for 5–6 minutes at 375°F. Avoid microwaving if possible—it softens the tortilla.
- Freezing: You can freeze the assembled (but ungrilled) wraps. Wrap tightly in foil and store in a freezer bag for up to 2 months. Thaw overnight in the fridge before grilling.
Estimated Nutrition (Per Wrap)
- Calories: ~490 kcal
- Protein: 29g
- Carbohydrates: 32g
- Fat: 28g
- Fiber: 2g
- Sugar: 3g
- Cholesterol: 75mg
- Sodium: 670mg
Note: Nutrition values may vary based on specific ingredients and brands used.
Frequently Asked Questions
1. Can I use a different type of meat besides ribeye or sirloin?
Yes! Shaved beef, roast beef slices, or even ground beef can work. Just ensure it’s seasoned well and cooked quickly.
2. What’s the best cheese for a Philly cheesesteak wrap?
Provolone is the classic choice, but mozzarella adds a good melt. For extra flavor, try cheddar, pepper jack, or even a cheese sauce.
3. Can I make these wraps vegetarian?
Absolutely. Replace the meat with sautéed mushrooms, onions, and peppers, or use plant-based meat alternatives.
4. Do I have to grill the wraps, or can I bake them?
Grilling gives the crispiest finish, but baking at 400°F for 10–12 minutes (flip halfway) works too—especially for larger batches.
5. How do I keep the wraps from falling apart?
Don’t overfill, warm the tortillas before rolling, and always grill seam-side down first to seal them.
6. Can I prepare the filling ahead of time?
Yes! Cook the meat and veggies, then store in the fridge. Assemble and grill wraps when ready to serve.
7. What dipping sauces go well with these wraps?
Try ranch, garlic aioli, spicy mayo, BBQ sauce, or even nacho cheese sauce.
8. How do I get the tortilla extra crispy?
Brush lightly with melted butter or spray with oil before grilling, and use medium heat to avoid burning while allowing time to crisp up.
Conclusion
Crispy Philly Cheesesteak Grilled Wraps are the perfect fusion of comfort and convenience—packing all the flavors of a classic cheesesteak into a handheld, golden-brown tortilla. They’re quick to make, fun to customize, and satisfy just about every craving. Whether it’s for lunch, dinner, or a crowd-pleasing game day snack, these wraps are a go-to solution for flavor-packed, crispy perfection. Keep this recipe in your regular rotation—you’ll be glad you did.

Crispy Philly Cheesesteak Grilled Wraps
- Total Time: 25 minutes
- Yield: 4 wraps
Description
Crispy Philly Cheesesteak Grilled Wraps combine savory thin-sliced beef, melted cheese, and sautéed peppers and onions wrapped tightly in a flour tortilla and grilled until golden and crispy. Perfectly balanced between gooey and crunchy, they’re an easy, satisfying meal for any day of the week.
Ingredients
- 1 lb ribeye steak or sirloin, thinly sliced
- 1 tbsp olive oil
- 1 small yellow onion, thinly sliced
- 1 small red bell pepper, thinly sliced
- 1 small yellow bell pepper, thinly sliced
- 1 tsp Worcestershire sauce
- Salt and black pepper, to taste
- 1 tsp garlic powder (optional)
- 1 1/2 cups shredded provolone or mozzarella cheese
- 4 large flour tortillas
- Butter or cooking spray for grilling
Instructions
- Heat olive oil in a skillet over medium-high heat. Add sliced beef, season with salt, pepper, and garlic powder. Cook for 2–3 minutes. Stir in Worcestershire sauce. Set aside.
- In the same skillet, sauté onions and bell peppers until soft and caramelized, about 5–7 minutes.
- Return beef to the skillet, mix with the veggies, and cook for 1 more minute.
- Lay tortillas flat and divide the beef and veggie mixture evenly. Top with shredded cheese.
- Fold in the sides and roll into tight wraps.
- Heat a skillet over medium heat. Lightly butter or spray the wraps and grill seam-side down for 2–3 minutes per side until golden and crisp.
- Slice diagonally and serve hot with your favorite dipping sauce.
- Prep Time: 10 minutes
- Cook Time: 15 minutes