

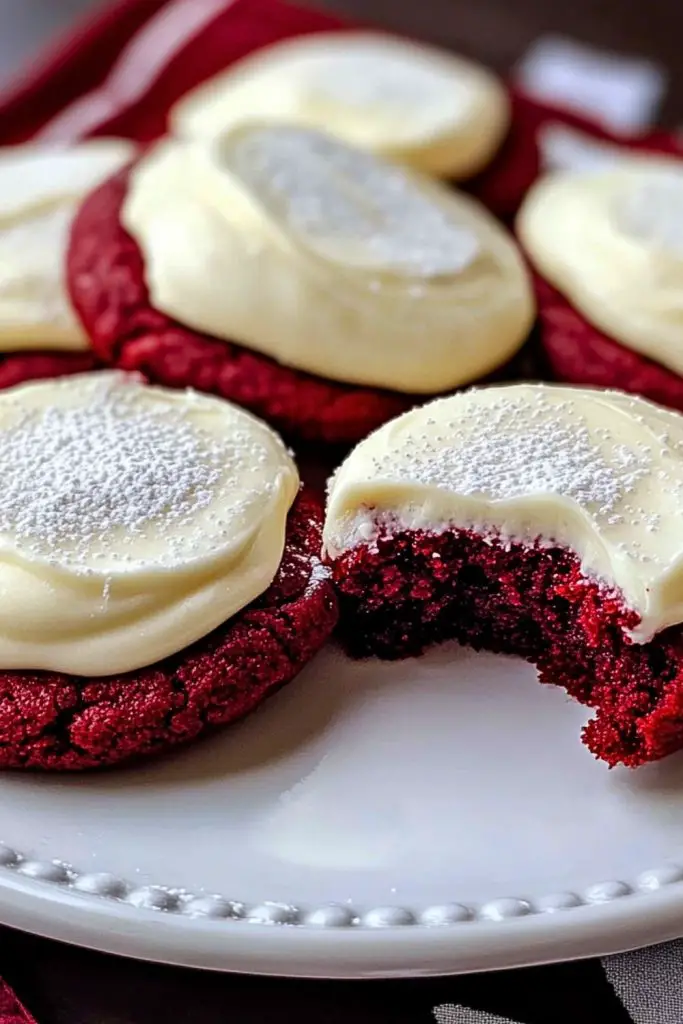
Red velvet cookies are a rich and festive twist on a classic treat, delivering the luxurious flavor of cocoa with the perfect balance of sweet and tangy. Each cookie boasts a soft, chewy texture and a vibrant crimson hue that’s irresistibly eye-catching. What takes them to the next level is the crown of velvety cream cheese frosting—smooth, thick, and decadently luscious, adding just the right amount of creamy contrast.
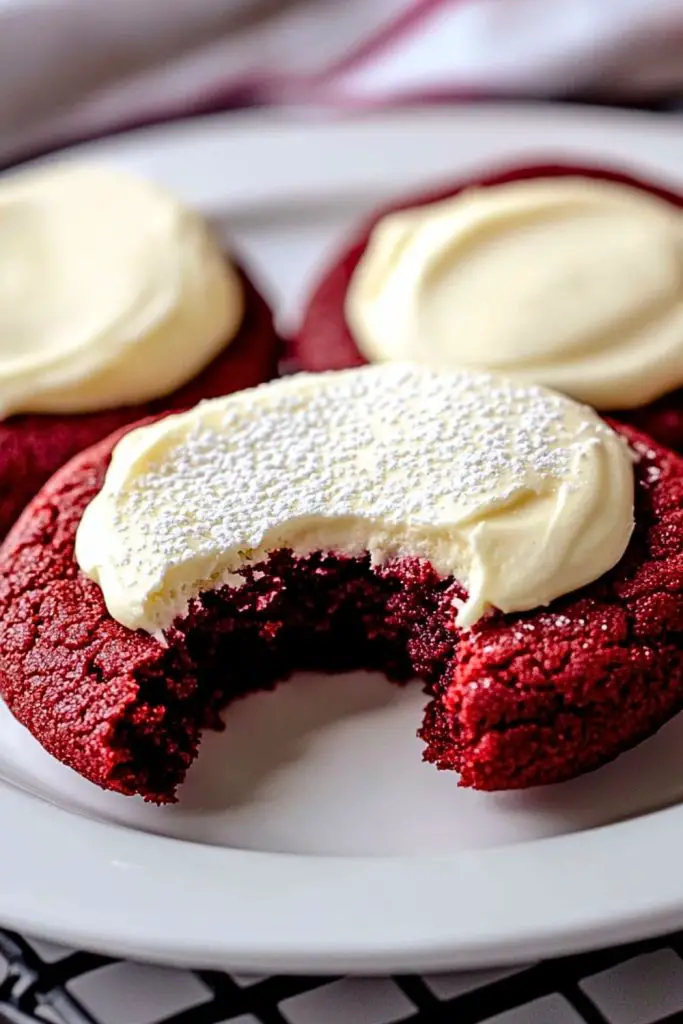
Whether you’re baking for the holidays, Valentine’s Day, or simply satisfying your sweet tooth, these cookies are guaranteed to impress. The combination of chocolate undertones, slight acidity, and melt-in-your-mouth texture makes them an instant favorite for dessert tables and cookie exchanges alike.
Why You’ll Love This Red Velvet Cookies with Cream Cheese Frosting Recipe
- Rich and chewy: These cookies offer the perfect soft-baked texture—dense, chewy centers with crisp edges.
- Flavorful frosting: The cream cheese frosting brings a silky tang that complements the cookie’s cocoa notes.
- Picture-perfect: Their bold red color and swirls of white frosting make them ideal for gifting or special occasions.
- Easy to make: Simple steps and common ingredients ensure great results, even for beginner bakers.
- Versatile: You can make them smaller for parties or larger for bakery-style indulgence.
Preparation Phase & Tools to Use (Essential Tools and Equipment, and Why They Matter)
Before diving into mixing and baking, setting up your workspace with the right tools ensures smooth and efficient preparation. Here’s what you’ll need and why each tool is important for this recipe:
- Mixing Bowls (Medium & Large): You’ll need separate bowls for dry ingredients and wet ingredients. A large bowl is ideal for creaming butter and sugar, while a medium bowl works well for sifting the flour, cocoa, and leavening agents.
- Electric Hand Mixer or Stand Mixer: Creaming butter and sugar until fluffy is critical for texture. A stand mixer is best for hands-free mixing, but a hand mixer will do the job efficiently too.
- Rubber Spatula: For scraping down the bowl and gently folding ingredients without overmixing, ensuring the dough stays tender.
- Measuring Cups & Spoons: Accuracy is crucial for baking. Use dry measuring cups for flour and sugar, and liquid measuring cups for buttermilk or vanilla extract.
- Baking Sheets: Heavy-duty baking sheets with a rim are ideal. They heat evenly and reduce the risk of burnt bottoms.
- Parchment Paper or Silicone Baking Mats: Prevents sticking and helps cookies bake evenly with golden bottoms.
- Cooling Rack: Allows air to circulate around cookies, stopping residual heat from overbaking them.
- Icing Spreader or Offset Spatula: For smooth, bakery-style frosting application once the cookies have cooled.
Preparation Tips
- Room Temperature Ingredients: Soften butter and bring eggs to room temperature before starting. This helps them blend smoothly and create a uniform dough.
- Do Not Overmix: When incorporating dry ingredients into the wet mixture, mix just until combined. Overmixing can lead to dense, tough cookies.
- Chill the Dough (optional but recommended): If time allows, chill the dough for 30 minutes. This helps the cookies hold their shape better and enhances flavor.
- Use Gel Food Coloring: For that classic deep red hue without thinning the dough, opt for gel rather than liquid food coloring.
- Frost Only When Cooled: Never frost warm cookies. Let them cool completely to avoid melting the cream cheese frosting.
Ingredients for this Red Velvet Cookies with Cream Cheese Frosting Recipe
To achieve the signature flavor, color, and texture of these luscious red velvet cookies, each ingredient plays a specific role. Here’s everything you’ll need for both the cookie dough and the cream cheese frosting:
For the Red Velvet Cookies:
- 1/2 cup (1 stick) unsalted butter, softened
Provides richness and a tender crumb. - 3/4 cup granulated sugar
Sweetens the dough and aids in creating a chewy texture. - 1/4 cup packed brown sugar
Adds moisture and a hint of caramel-like depth. - 1 large egg
Binds the ingredients and contributes to structure. - 1 teaspoon vanilla extract
Enhances overall flavor with warm, aromatic notes. - 1 tablespoon red gel food coloring
Gives the cookies their iconic red hue without watering down the dough. - 1 1/2 cups all-purpose flour
The foundation of the cookie’s structure. - 2 tablespoons unsweetened cocoa powder
Adds the subtle chocolate essence signature to red velvet. - 1/2 teaspoon baking soda
Leavening agent that ensures the cookies rise properly. - 1/4 teaspoon salt
Balances sweetness and enhances flavor. - 1/2 teaspoon white vinegar
Reacts with the baking soda for classic red velvet lift and tang.
For the Cream Cheese Frosting:
- 4 oz cream cheese, softened
Smooth, tangy base of the frosting. - 1/4 cup unsalted butter, softened
Adds richness and helps create a fluffy texture. - 1 1/2 cups powdered sugar
Sweetens the frosting and helps it set with a smooth finish. - 1/2 teaspoon vanilla extract
Adds warmth and depth to the frosting’s flavor.
Optional:
- Powdered sugar for dusting
A decorative touch to make the cookies even more tempting.
Step 1: Cream the Butter and Sugars
In a large mixing bowl, beat the softened butter, granulated sugar, and brown sugar together using a hand or stand mixer on medium speed. Mix for 2–3 minutes until the mixture is fluffy and pale in color. This step is key to incorporating air for soft, chewy cookies.
Step 2: Add Wet Ingredients
Add the egg and vanilla extract to the creamed mixture. Beat until well combined. Then mix in the red gel food coloring and vinegar. Scrape down the sides of the bowl with a spatula to ensure everything is evenly blended.
Step 3: Combine Dry Ingredients
In a separate medium bowl, whisk together the flour, cocoa powder, baking soda, and salt. This ensures even distribution of leavening and chocolate flavor throughout the dough.
Step 4: Mix Dry and Wet Ingredients
Gradually add the dry ingredients to the wet mixture, mixing on low speed. Mix just until combined—do not overmix. The dough will be thick and slightly tacky.
Step 5: Chill the Dough (Optional)
For cookies that spread less and bake more evenly, cover the dough and refrigerate for 30 minutes. This also intensifies the flavor.
Step 6: Preheat and Prepare Baking Sheets
Preheat your oven to 350°F (175°C). Line your baking sheets with parchment paper or silicone baking mats.
Step 7: Portion and Bake
Scoop tablespoon-sized balls of dough onto the prepared baking sheets, spacing them about 2 inches apart. Bake for 9–11 minutes, or until the edges are set and the centers look slightly underbaked. They’ll firm up as they cool.
Step 8: Cool Completely
Transfer the cookies to a wire rack and let them cool fully. This is important before frosting—warm cookies will melt the frosting.
Step 9: Make the Cream Cheese Frosting
In a medium bowl, beat the cream cheese and butter together until smooth. Add in powdered sugar and vanilla extract. Beat on medium-high until light, fluffy, and spreadable.
Step 10: Frost and Finish
Once cookies are completely cool, use an offset spatula or spoon to generously frost the tops. Optionally, dust lightly with powdered sugar for an elegant finish.
Notes
- Room Temperature Ingredients Are Key: Make sure your butter, cream cheese, and egg are all at room temperature. This allows them to blend more easily and helps the dough come together smoothly.
- Chilling Optional, But Helpful: While you can bake the dough right away, chilling it for 30 minutes leads to thicker cookies with less spreading and deeper flavor.
- Adjust the Red Coloring to Your Preference: Depending on the intensity you want, you can increase or decrease the amount of gel food coloring. Start with 1 tablespoon and adjust gradually.
- Double the Batch: These cookies are a hit at parties and gatherings, and they disappear fast. Consider doubling the recipe if you’re baking for a crowd.
Watch Out for These Mistakes While Cooking
- Overmixing the Dough: Once you add the dry ingredients to the wet mixture, mix only until incorporated. Overmixing develops the gluten, which can result in tough cookies.
- Using Liquid Food Coloring: Avoid water-based liquid food dyes—they can thin out your dough and affect baking. Gel food coloring provides vibrant color without compromising texture.
- Frosting Warm Cookies: This is one of the biggest mistakes. Warm cookies will cause your beautiful cream cheese frosting to melt into a mess. Let them cool completely on a rack.
- Using Melted Butter: For the dough, softened butter is ideal. Melted butter will make the dough too runny and affect how the cookies spread.
- Skipping the Vinegar: Though it may seem odd, vinegar reacts with baking soda to give red velvet its classic texture and subtle tang. Don’t leave it out!
What to Serve With Red Velvet Cookies with Cream Cheese Frosting?
These cookies shine on their own, but pairing them with the right beverages and treats can elevate your dessert game even further. Whether you’re hosting a party or enjoying a cozy night in, these serving ideas will make your red velvet cookie experience even sweeter.
8 Perfect Pairings:
- Hot Coffee or Espresso
The robust flavor of coffee complements the cocoa notes in red velvet beautifully, balancing the sweetness of the frosting. - Chilled Milk
A cold glass of milk is a timeless match—simple, refreshing, and kid-approved. - Red Wine (like Merlot or Cabernet Sauvignon)
For a more adult twist, red wine pairs wonderfully with chocolate-based desserts and adds elegance to your presentation. - Vanilla Ice Cream
Sandwich a scoop between two cookies for an indulgent ice cream sandwich or serve on the side for a hot/cold contrast. - Strawberries or Fresh Berries
Fresh fruit adds brightness and natural sweetness, making the dessert feel a little lighter. - Hot Chocolate with Whipped Cream
A comforting winter pairing, especially for holiday gatherings. - Sparkling Water with a Lemon Twist
A zesty palate cleanser that refreshes between bites. - Mini Cheesecake Bites or Bars
Keep the cream cheese theme going with small cheesecake portions that complement the cookie frosting flavor.
Storage Instructions
Proper storage ensures that your Red Velvet Cookies with Cream Cheese Frosting stay fresh, moist, and delicious long after baking.
Room Temperature
- Unfrosted cookies can be stored in an airtight container at room temperature for up to 5 days.
- Frosted cookies should not be left out for long periods due to the dairy in the frosting.
Refrigeration
- Frosted cookies should be stored in a single layer in an airtight container and kept in the refrigerator. They will stay fresh for up to 7 days.
- Let them sit at room temperature for about 10–15 minutes before serving to soften the frosting.
Freezing
- To freeze the dough: Scoop dough balls onto a tray, freeze until solid, then transfer to a zip-top freezer bag. Bake from frozen by adding 1–2 extra minutes to the bake time.
- To freeze baked cookies: Store unfrosted cookies in layers separated by parchment paper in a freezer-safe container for up to 3 months. Thaw overnight in the fridge and frost before serving.
- Do not freeze cream cheese frosting on the cookies—it can become grainy. Instead, freeze it separately in an airtight container and whip it again before using.
Estimated Nutrition
Per one frosted cookie (based on standard portion size)
- Calories: 210 kcal
- Total Fat: 11g
- Saturated Fat: 7g
- Cholesterol: 40mg
- Sodium: 125mg
- Carbohydrates: 27g
- Sugar: 18g
- Protein: 2g
Note: These values are approximate and can vary based on specific brands and measurements used.
Frequently Asked Questions
What makes red velvet cookies different from chocolate cookies?
Red velvet cookies use less cocoa than traditional chocolate cookies and include ingredients like vinegar and buttermilk (or their equivalents) to create a unique tang. The addition of red coloring also gives them their iconic hue and slightly different flavor profile.
Can I make these cookies without food coloring?
Yes, the cookies will still taste great without the red coloring. They’ll resemble a light chocolate cookie, but the vibrant red appearance will be absent.
Can I use cream cheese spread instead of block cream cheese?
It’s best to use full-fat block-style cream cheese for the frosting, as it yields a thicker, more stable texture. Cream cheese spread may make the frosting too runny.
How do I get perfectly round cookies?
After baking, while the cookies are still warm and soft, use a round cookie cutter or the edge of a glass to gently swirl around the edges. This trick helps reshape slightly misshapen cookies.
Can I make the dough in advance?
Absolutely! You can make the dough up to 48 hours in advance. Store it in the fridge, tightly wrapped. Let it sit at room temperature for 10–15 minutes before scooping and baking.
What should I do if my frosting is too runny?
Chill the frosting in the fridge for 15–20 minutes, or add a little more powdered sugar to thicken it. Always ensure your butter and cream cheese are not overly soft when mixing.
Can I double or halve the recipe?
Yes. This recipe scales easily. Just be sure to adjust mixing and baking times slightly, and use accurate measurements for the best results.
Are these cookies suitable for gifting?
Definitely! Just let the frosting set completely, then layer the cookies between parchment in a sturdy gift box. Store in a cool place until ready to give.
Conclusion
Red Velvet Cookies with Cream Cheese Frosting are the perfect blend of style and substance—a treat that looks impressive and tastes even better. With their plush texture, rich cocoa flavor, and creamy topping, these cookies are a celebration in every bite. Whether you’re baking them for loved ones or just to spoil yourself, they promise to bring joy and a touch of luxury to any moment.
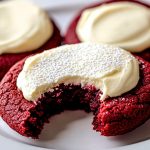
Red Velvet Cookies with Cream Cheese Frosting
- Total Time: 1 hour
- Yield: About 18 cookies
Description
These cookies are soft, chewy, and rich with cocoa flavor—finished with a smooth, tangy cream cheese frosting. Their stunning red color makes them festive and irresistible, perfect for holidays, parties, or everyday indulgence.
Ingredients
For the Cookies:
- 1/2 cup (1 stick) unsalted butter, softened
- 3/4 cup granulated sugar
- 1/4 cup packed brown sugar
- 1 large egg
- 1 teaspoon vanilla extract
- 1 tablespoon red gel food coloring
- 1 1/2 cups all-purpose flour
- 2 tablespoons unsweetened cocoa powder
- 1/2 teaspoon baking soda
- 1/4 teaspoon salt
- 1/2 teaspoon white vinegar
For the Frosting:
- 4 oz cream cheese, softened
- 1/4 cup unsalted butter, softened
- 1 1/2 cups powdered sugar
- 1/2 teaspoon vanilla extract
Optional: powdered sugar for dusting
Instructions
- In a large bowl, cream together butter, granulated sugar, and brown sugar until light and fluffy.
- Add egg, vanilla, food coloring, and vinegar. Mix well.
- In a separate bowl, whisk flour, cocoa powder, baking soda, and salt.
- Gradually add dry ingredients to wet mixture; mix until just combined.
- (Optional) Chill dough for 30 minutes.
- Preheat oven to 350°F (175°C). Line baking sheets with parchment.
- Scoop tablespoon-sized dough balls onto sheets. Space 2 inches apart.
- Bake 9–11 minutes. Let cool on baking sheets, then transfer to a wire rack.
- For frosting, beat cream cheese and butter until smooth. Add powdered sugar and vanilla. Beat until fluffy.
- Frost cooled cookies. Dust with powdered sugar if desired.
- Prep Time: 20 minutes
- Chill Time: 30 minutes
- Cook Time: 10 minutes