
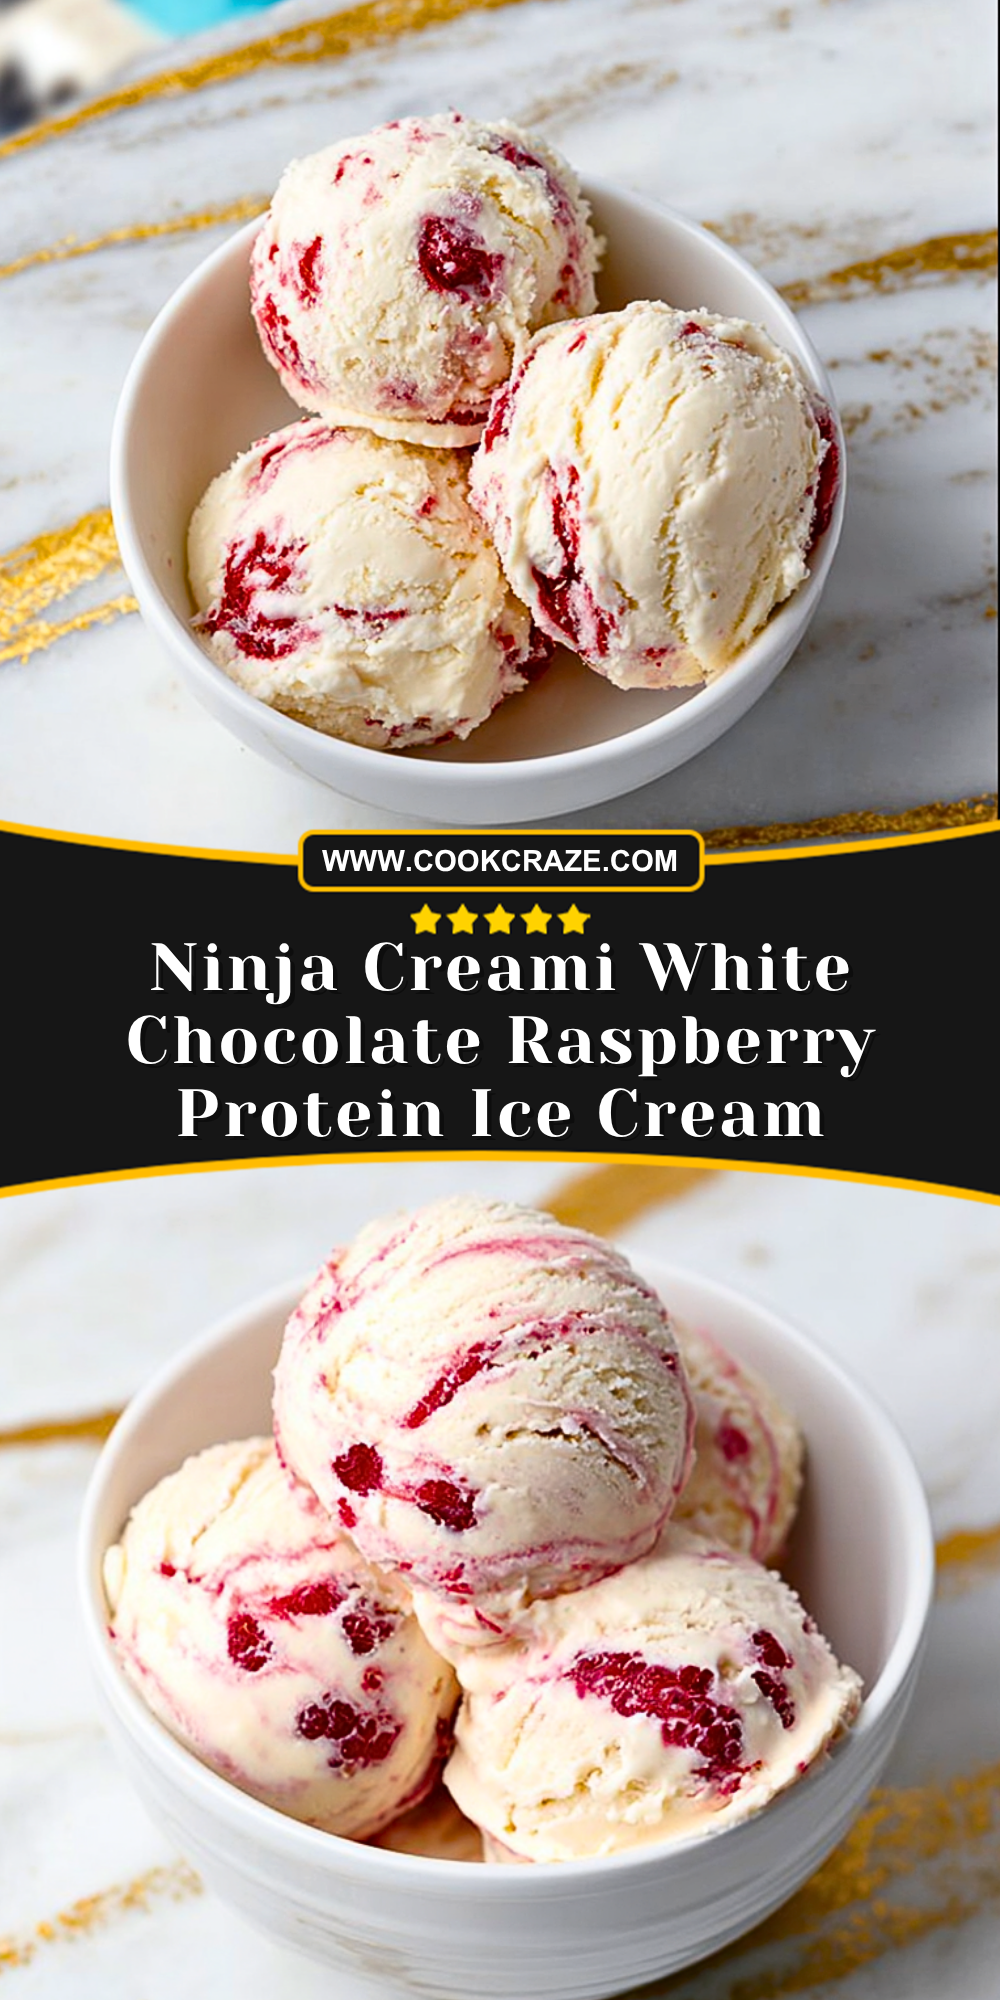
I still remember the first time I experimented with my Ninja Creami to create a protein-packed dessert that didn’t taste like a compromise. This white chocolate raspberry protein ice cream quickly became one of those recipes I keep coming back to. It has that creamy, indulgent texture you’d expect from a traditional ice cream, but with a lighter, more nourishing twist that fits easily into a balanced lifestyle.
WANT TO SAVE THIS RECIPE?
Just enter your email and get it sent to your inbox!
WANT TO SAVE THIS RECIPE?
What I love most is how the sweet, smooth white chocolate flavor blends beautifully with the slightly tart raspberry swirls. Every spoonful feels like a treat, yet it’s something I can enjoy without hesitation. Whether I’m craving a late-night dessert or a refreshing post-workout snack, this recipe always delivers.
Why You’ll Love This Ninja Creami White Chocolate Raspberry Protein Ice Cream
This recipe brings together indulgence and nutrition in a way that feels effortless. The Ninja Creami transforms simple ingredients into a rich, velvety texture that rivals any store-bought ice cream.
It’s also incredibly customizable. You can adjust sweetness, protein levels, and even the intensity of the raspberry swirl depending on your mood or dietary goals. Plus, it’s a fantastic way to satisfy a sweet craving while still staying on track.
What Makes the Ninja Creami Perfect for Protein Ice Cream?
The Ninja Creami isn’t just another kitchen gadget—it’s designed specifically to turn frozen bases into smooth, scoopable desserts. Unlike traditional churning methods, it processes the mixture after freezing, which helps maintain a creamy consistency even with lower-fat, high-protein ingredients.
That means you can enjoy a dessert that feels luxurious without relying on heavy cream or excessive sugar. It’s a game-changer for anyone looking to make healthier frozen treats at home.
Options for Substitutions
One of the best things about this recipe is how flexible it is. If you don’t have white chocolate protein powder, vanilla protein powder works just as well and still pairs nicely with the raspberry flavor.
For the milk base, you can use almond milk, oat milk, or regular dairy milk depending on your preference. Each option slightly changes the texture and richness, so feel free to experiment.
If raspberries aren’t available, strawberries or mixed berries can be used for a similar fruity swirl. And for those watching sugar intake, a sugar-free sweetener can easily replace traditional sugar without sacrificing taste.
Ingredients for this Ninja Creami White Chocolate Raspberry Protein Ice Cream
Milk of choice
This forms the base of the ice cream and determines the overall creaminess. Dairy milk gives a richer texture, while almond or oat milk keeps it lighter and lower in calories.
White chocolate protein powder
This is the key ingredient that adds both flavor and protein. It gives the ice cream that subtle sweetness and creamy white chocolate taste without needing excessive sugar.
Greek yogurt
Adds thickness and a creamy consistency while boosting protein content. It also gives a slight tang that balances the sweetness beautifully.
Sweetener (sugar, honey, or sugar-free alternative)
Enhances the flavor and allows you to control how indulgent or light you want the dessert to be.
Vanilla extract
Brings depth to the flavor and complements both the white chocolate and raspberry notes.
Fresh or frozen raspberries
These create the vibrant swirl and add a natural tartness that cuts through the creaminess.
White chocolate chips (optional)
Provide small bursts of sweetness and texture for a more indulgent experience.
Pinch of salt
Balances the sweetness and enhances all the flavors in the ice cream.
Step 1: Prepare the Base Mixture
In a mixing bowl, combine your milk of choice, white chocolate protein powder, Greek yogurt, sweetener, vanilla extract, and a pinch of salt. Whisk thoroughly until the mixture is completely smooth and free of lumps.
Take a moment here to taste the mixture before freezing. Adjust sweetness if needed, as flavors tend to dull slightly once frozen.
Step 2: Freeze the Base
Pour the mixture into your Ninja Creami pint container. Make sure the surface is level to ensure even processing later.
Place the container in the freezer on a flat surface and freeze for at least 8–12 hours, or until completely solid. This step is crucial for achieving the right texture.
Step 3: Process in the Ninja Creami
Remove the frozen pint from the freezer and place it into the Ninja Creami machine. Select the “Lite Ice Cream” or “Ice Cream” setting depending on your preference.
After the first spin, check the texture. It may look crumbly at first—that’s completely normal.
Step 4: Re-spin for Creaminess
If the texture appears dry or powdery, use the “Re-spin” function once or twice until it becomes smooth and creamy. You can also add a small splash of milk before re-spinning for an even silkier result.
Step 5: Prepare the Raspberry Swirl
In a small bowl, mash the raspberries with a fork until they break down into a chunky sauce. You can add a touch of sweetener if the berries are too tart.
This step creates that signature swirl that makes every bite more interesting.
Step 6: Add Mix-Ins and Swirl
Use a spoon to create a small well in the center of the processed ice cream. Add the mashed raspberries and optional white chocolate chips.
Run the “Mix-In” function on the Ninja Creami to distribute the ingredients evenly while keeping visible swirls.
Step 7: Final Texture Check
After mixing, check the consistency. If you prefer a softer texture, serve immediately. For a firmer scoop, place the pint back in the freezer for 30–60 minutes.
Step 8: Serve and Enjoy
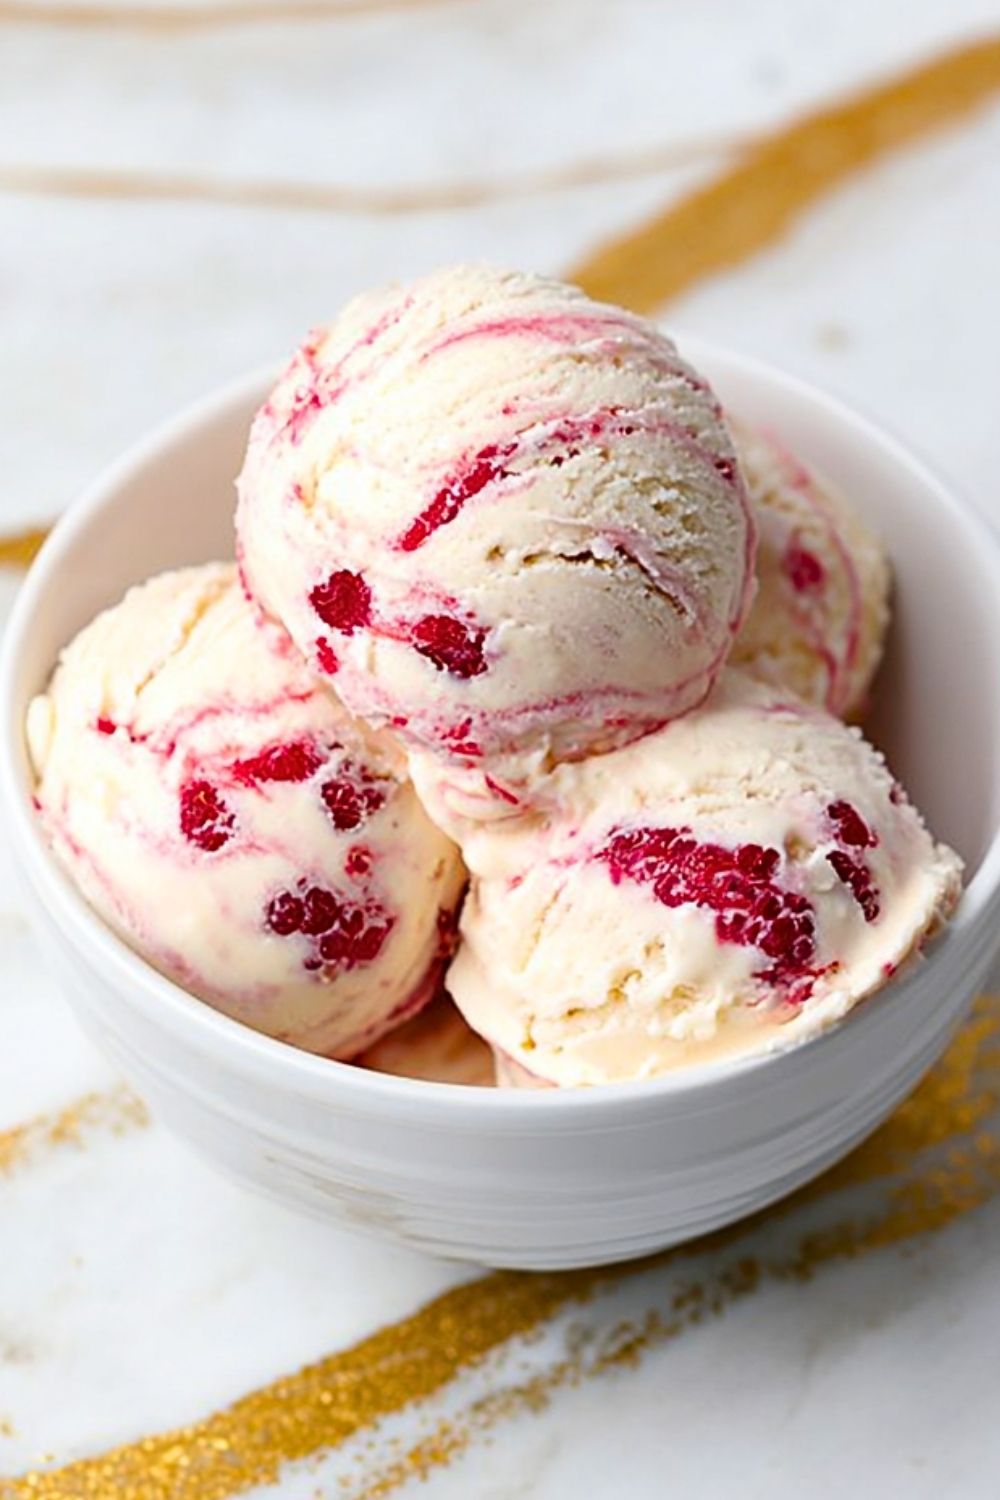
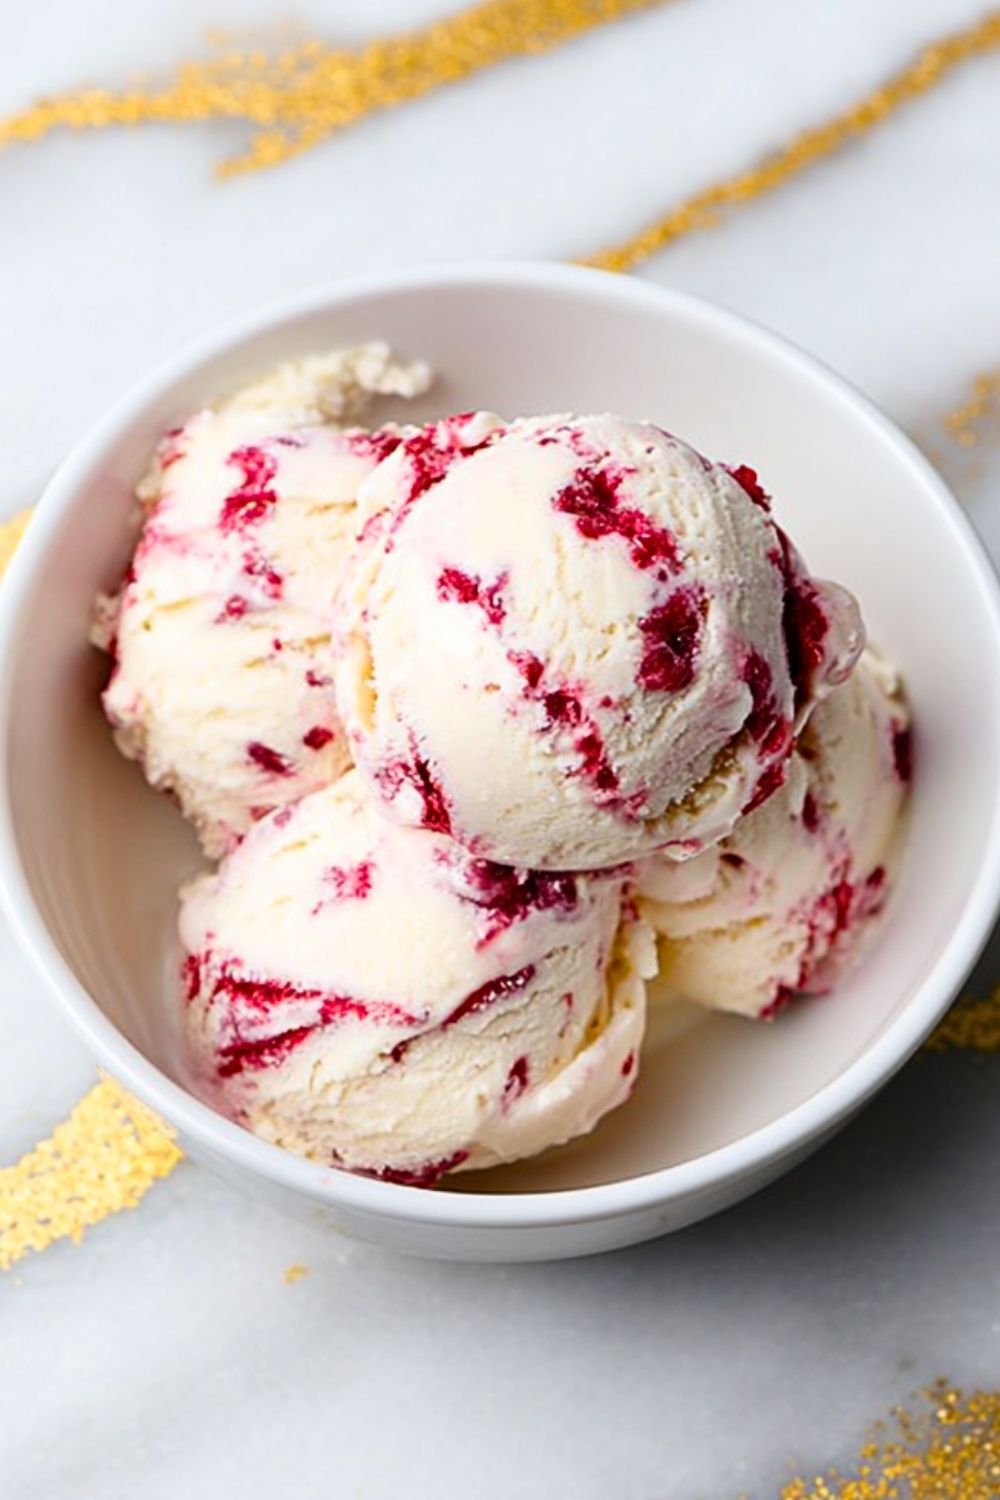
Scoop the ice cream into a bowl and enjoy right away. The combination of creamy white chocolate and tangy raspberry will be at its best fresh out of the machine.
Ninja Creami White Chocolate Raspberry Protein Ice Cream
How Long to Prepare the Ninja Creami White Chocolate Raspberry Protein Ice Cream
Preparing this recipe is surprisingly simple, but it does require a bit of patience due to the freezing stage. The active preparation time—mixing the ingredients and getting everything ready—usually takes about 10 to 15 minutes. This makes it an easy option even on a busy day when you want something homemade without spending hours in the kitchen.
The longest part of the process is the freezing time, which typically ranges from 8 to 12 hours. This step is essential because the Ninja Creami relies on a fully frozen base to create that smooth, creamy texture. Once frozen, the spinning and re-spinning process only takes a few minutes, making it quick to enjoy when you’re ready.
Tips for Perfect Ninja Creami White Chocolate Raspberry Protein Ice Cream
For the best texture, always ensure your base is completely frozen solid before placing it in the Ninja Creami. Even slight softness can affect the final consistency.
Using full-fat or slightly creamier milk alternatives will result in a richer texture, while lower-fat options may require an extra re-spin to achieve smoothness.
Don’t skip tasting the mixture before freezing. Adjusting sweetness at this stage ensures the final product meets your preferences.
If you want a stronger raspberry flavor, reserve a small portion to swirl in after the mix-in cycle for a more pronounced taste.
Watch Out for These Mistakes While Cooking
One common mistake is under-freezing the base. If the mixture isn’t fully solid, the Ninja Creami won’t process it correctly, leading to a slushy or uneven texture.
Adding too much liquid during the re-spin stage can make the ice cream overly soft. Start with a small splash and increase gradually if needed.
Overloading with mix-ins can disrupt the creamy consistency. It’s best to keep additions balanced so the texture remains smooth.
Skipping the re-spin step is another frequent issue. The first spin often looks crumbly, but the re-spin is what transforms it into a creamy dessert.
What to Serve With Ninja Creami White Chocolate Raspberry Protein Ice Cream?
Fresh Berry Medley
A mix of strawberries, blueberries, and raspberries enhances the fruity notes and adds a refreshing contrast.
Granola Crunch
Sprinkling granola on top adds texture and a subtle nutty flavor that pairs well with the creamy base.
Dark Chocolate Drizzle
A light drizzle of melted dark chocolate creates a beautiful contrast with the white chocolate flavor.
Coconut Flakes
Toasted coconut flakes add a tropical twist and a bit of crunch.
Protein Pancakes
Serving this ice cream alongside warm protein pancakes turns it into a satisfying breakfast-inspired treat.
Storage Instructions
If you have leftovers, simply smooth the surface of the ice cream in the pint container and store it in the freezer with the lid tightly sealed. This helps prevent ice crystals from forming.
When ready to enjoy again, allow the pint to sit at room temperature for about 5 to 10 minutes before reprocessing in the Ninja Creami using the “Re-spin” function. This restores the creamy texture.
For best quality, consume within one week, as homemade ice cream without preservatives tends to lose its optimal texture over time.
Estimated Nutrition
This recipe is designed to be a lighter, protein-rich alternative to traditional ice cream. While exact values vary depending on the ingredients used, a typical serving offers a good balance of protein, moderate carbohydrates, and lower fat compared to classic versions.
It’s an excellent option for those looking to enjoy a dessert that aligns with fitness or health goals without sacrificing flavor.
Frequently Asked Questions
Can I make this without a Ninja Creami?
Yes, but the texture will be different. You can blend the frozen mixture in a high-speed blender, though it may not achieve the same creamy consistency.
What if my ice cream turns out crumbly?
This is normal after the first spin. Simply use the re-spin function, and it should become smooth and creamy.
Can I use frozen raspberries directly?
Yes, but it’s best to thaw and mash them slightly to create a better swirl texture.
How can I increase the protein content?
You can add more protein powder or use higher-protein yogurt, but be careful not to overdo it as it may affect texture.
Is this recipe suitable for a low-sugar diet?
Absolutely. Using sugar-free sweeteners and unsweetened ingredients makes it easy to keep the sugar content low.
Conclusion
This Ninja Creami White Chocolate Raspberry Protein Ice Cream proves that healthy desserts don’t have to be boring. With its creamy texture, balanced sweetness, and vibrant raspberry swirl, it’s a recipe that feels indulgent while still being mindful.
Once you try it, you’ll likely find yourself experimenting with new flavors and variations. It’s a simple yet satisfying way to enjoy homemade ice cream that fits seamlessly into your routine.
Ninja Creami White Chocolate Raspberry Protein Ice Cream
- Total Time: 8 hours 10 minutes
- Yield: 2 servings
Description
This Ninja Creami White Chocolate Raspberry Protein Ice Cream is the perfect balance of indulgence and nutrition. It’s a creamy, smooth frozen dessert with sweet white chocolate flavor and vibrant raspberry swirls, making it ideal as a healthy snack, easy dessert, or even a post-workout treat. Whether you’re looking for quick breakfast ideas, healthy food ideas, or an easy recipe to satisfy your sweet tooth, this protein ice cream delivers rich flavor with a lighter twist.
Ingredients
1 cup milk of choice
1 scoop white chocolate protein powder
1/2 cup Greek yogurt
2 to 3 tablespoons sweetener of choice
1 teaspoon vanilla extract
1/2 cup raspberries
2 tablespoons white chocolate chips (optional)
1 pinch salt
Instructions
1. In a bowl, whisk together milk, protein powder, Greek yogurt, sweetener, vanilla extract, and salt until smooth.
2. Taste the mixture and adjust sweetness if needed.
3. Pour into a Ninja Creami pint container and freeze for 8–12 hours until solid.
4. Place frozen pint into Ninja Creami and run the “Lite Ice Cream” or “Ice Cream” cycle.
5. If crumbly, add a small splash of milk and use the “Re-spin” function until creamy.
6. Mash raspberries into a chunky sauce.
7. Create a well in the ice cream, add raspberries and white chocolate chips.
8. Use the “Mix-In” function to swirl everything together.
9. Serve immediately or freeze for 30–60 minutes for a firmer texture.
Notes
Use full-fat milk or creamier alternatives for a richer texture.
Always fully freeze the base before processing for best results.
Add mix-ins gradually to avoid affecting the creamy consistency.
- Prep Time: 10 minutes
- Cook Time: 0 minutes
- Category: Dessert
- Method: Ninja Creami
- Cuisine: American
Nutrition
- Serving Size: 1 serving
- Calories: 220
- Sugar: 8g
- Sodium: 120mg
- Fat: 6g
- Saturated Fat: 3g
- Unsaturated Fat: 2g
- Trans Fat: 0g
- Carbohydrates: 18g
- Fiber: 2g
- Protein: 20g
- Cholesterol: 15mg
Keywords: ninja creami, protein ice cream, healthy dessert, easy recipe, low sugar dessert, high protein snack