
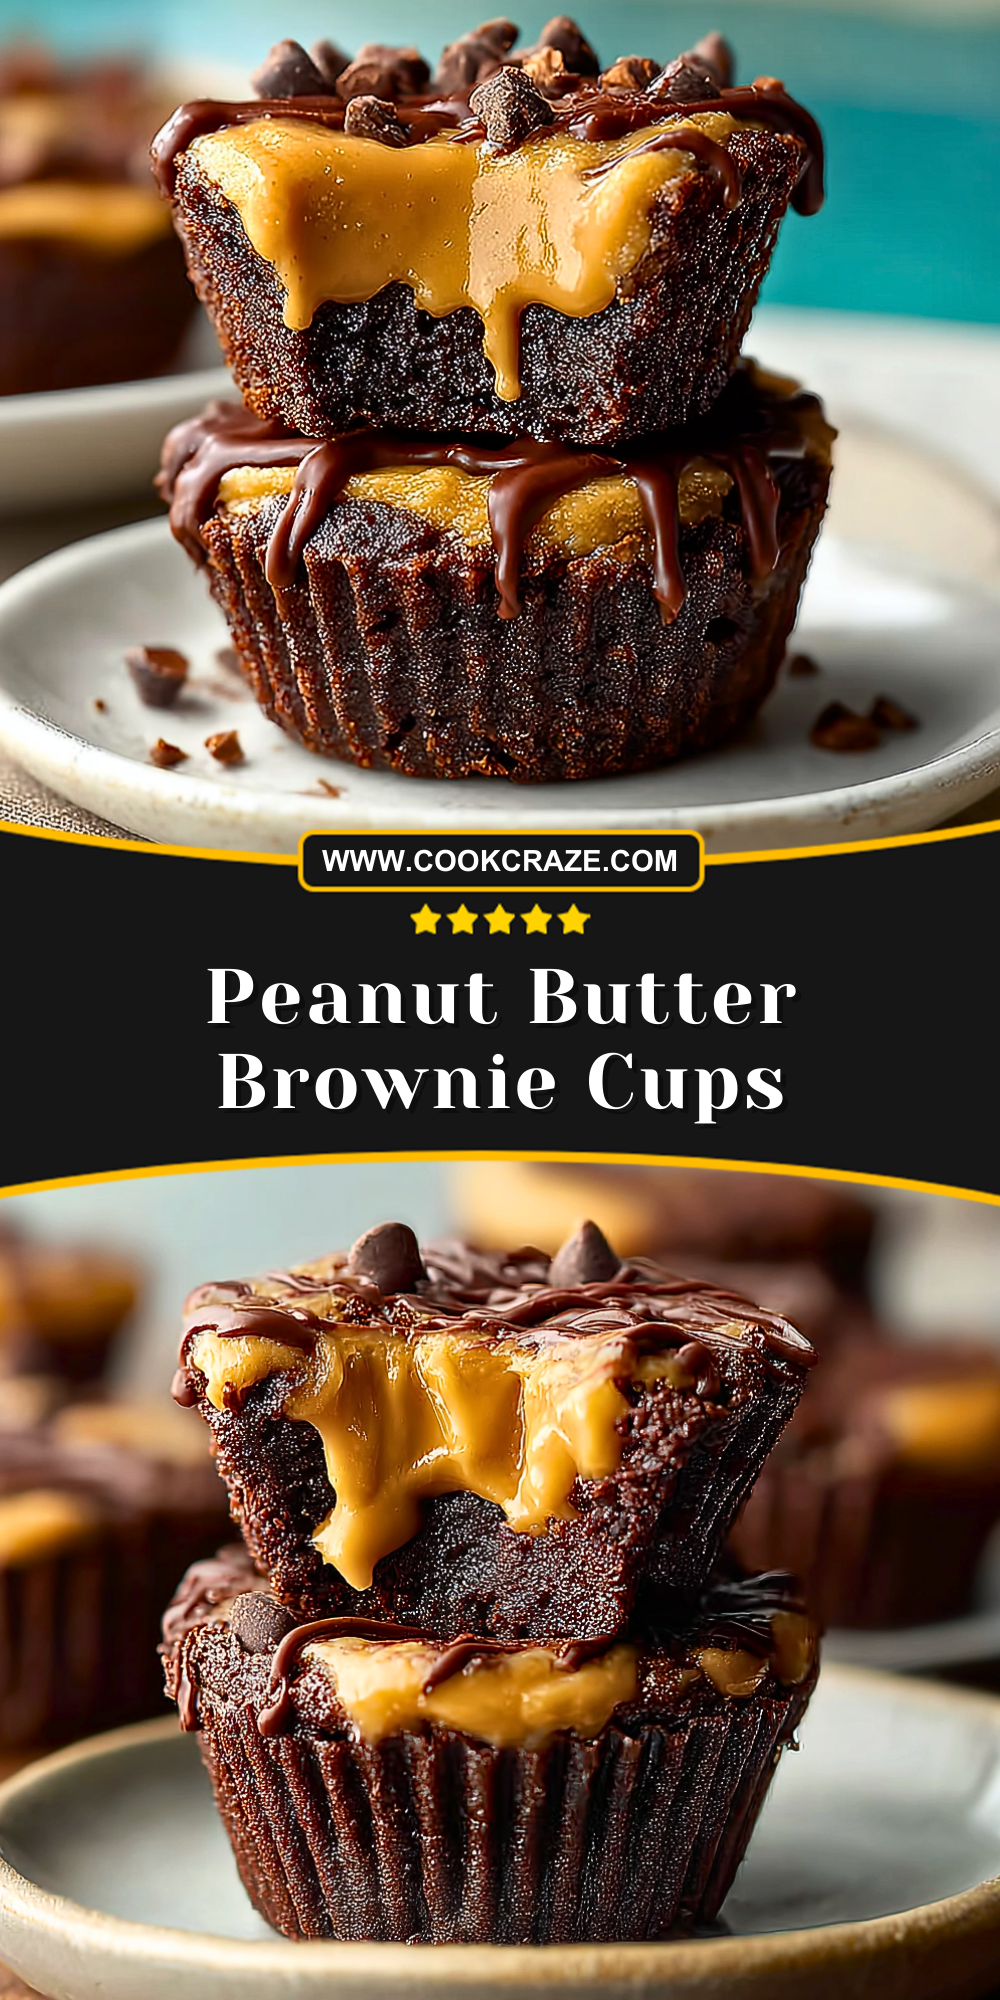
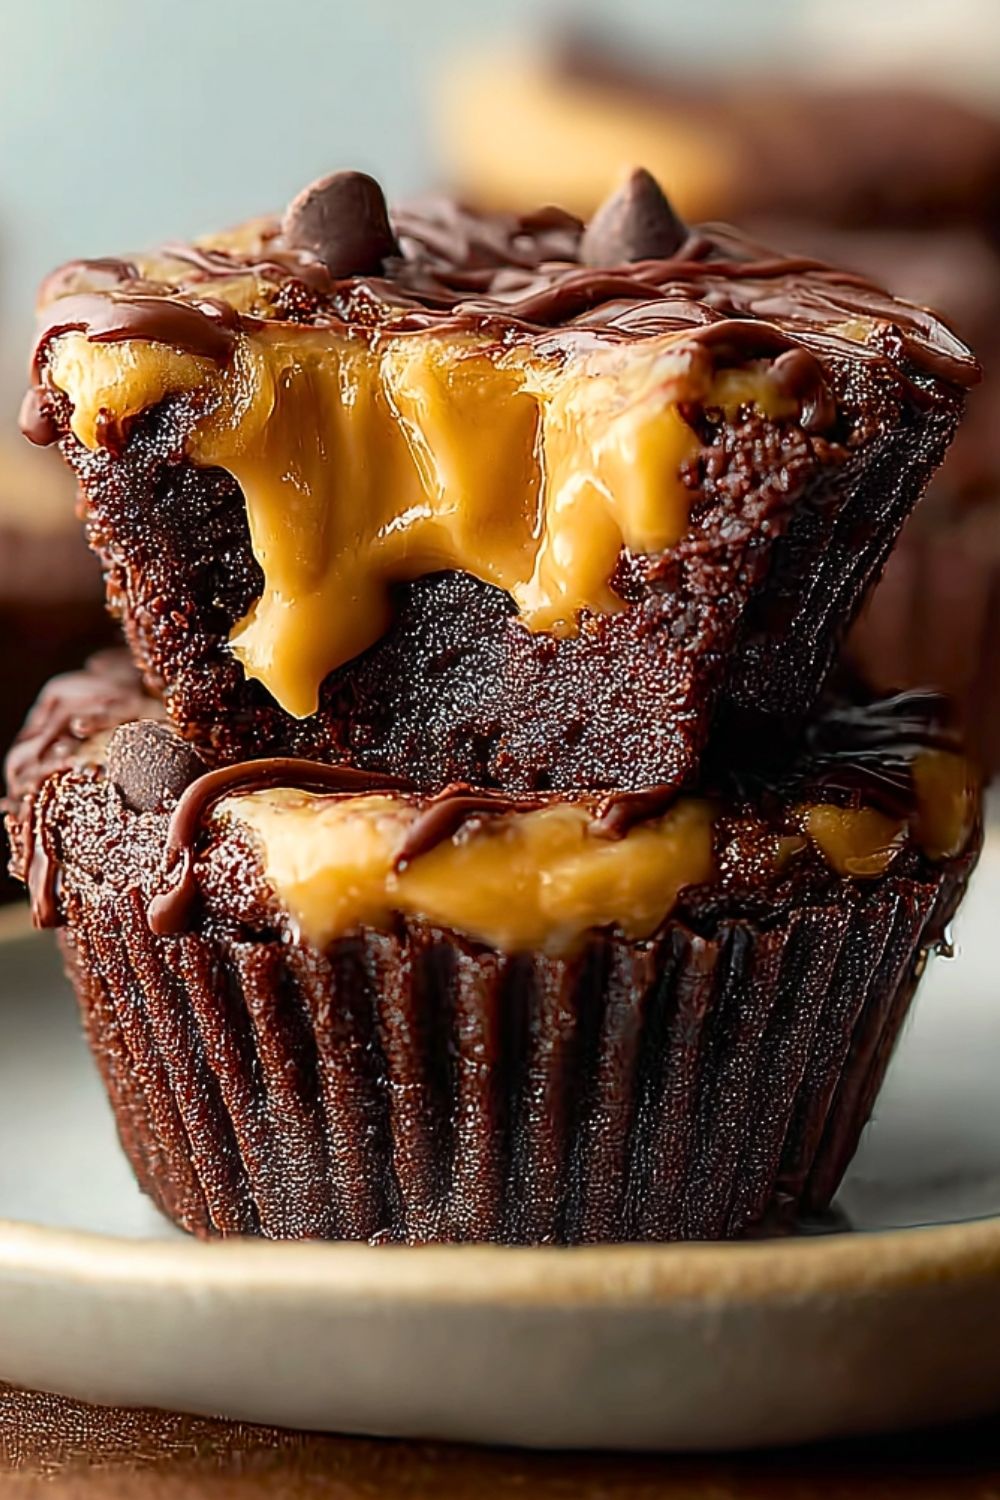
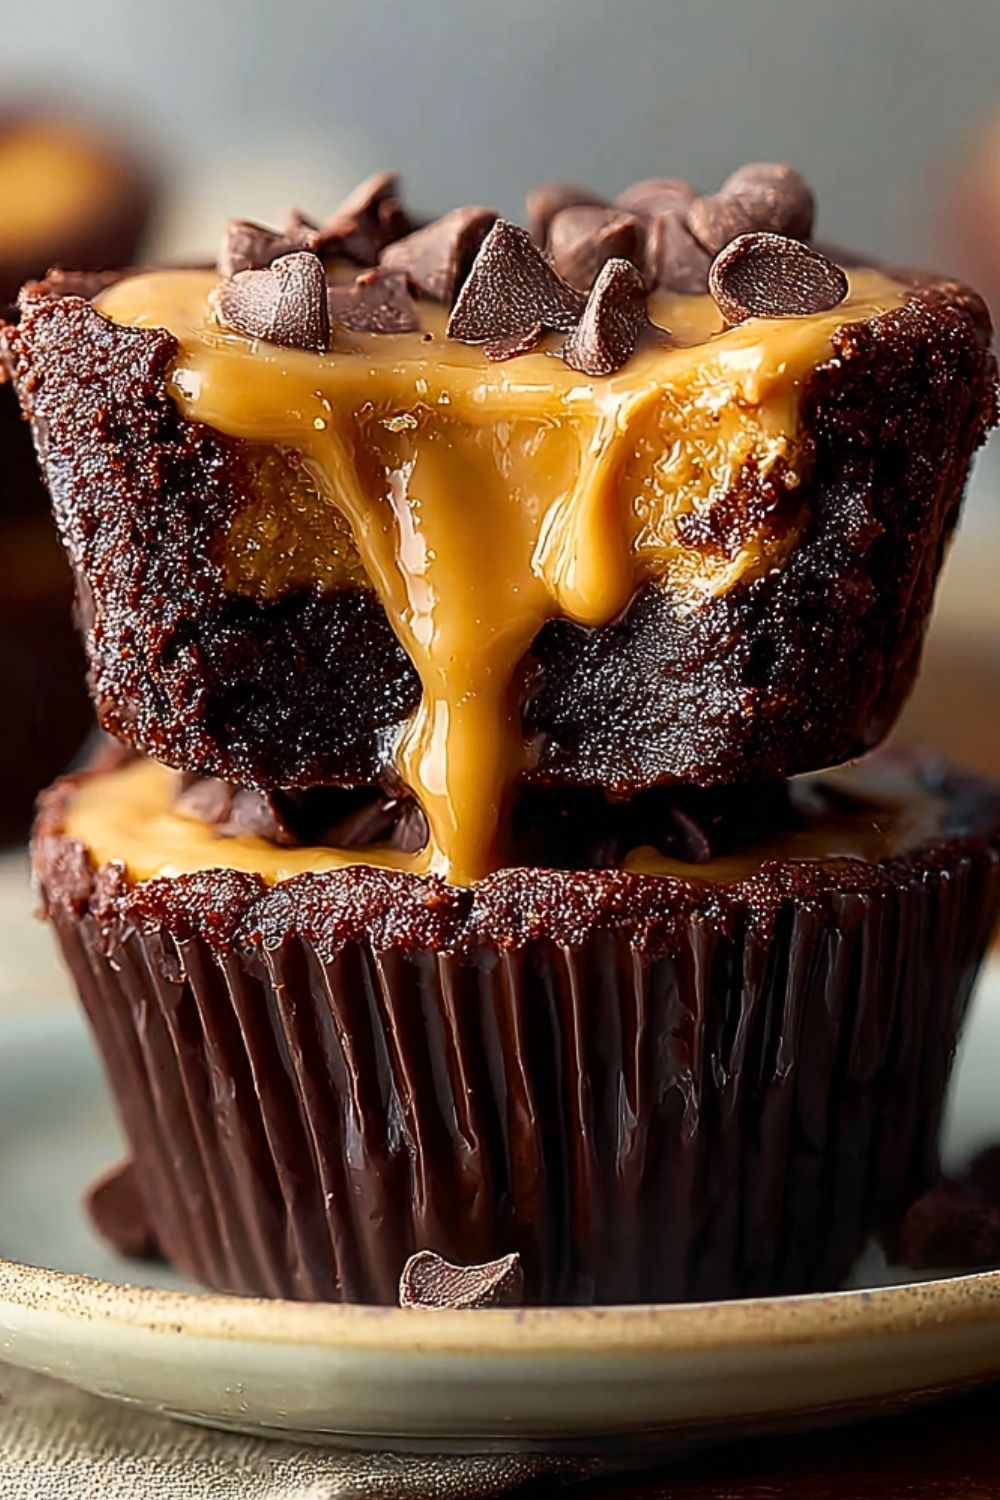
When I’m craving the ultimate indulgence, these Peanut Butter Brownie Cups always hit the sweet spot. They combine the rich, fudgy texture of a brownie with the creamy, salty-sweet magic of peanut butter—all packed into a single, irresistible bite. Whether I’m hosting friends or simply treating myself, these decadent treats never fail to impress.
I love how easily these come together, yet they look and taste like something straight out of a gourmet bakery. The contrast between the dense chocolate base and the luscious peanut butter center is pure bliss. Plus, they’re perfectly portioned, which makes them ideal for parties, gifting, or late-night cravings when I want just a little something sweet without overdoing it.
Why You’ll Love These Peanut Butter Brownie Cups
These brownie cups aren’t your average dessert. Each bite delivers a mouthful of chocolatey richness balanced with smooth, nutty peanut butter. They bake up beautifully in muffin tins, creating individual portions with just the right ratio of brownie to filling. Plus, they freeze well, making them a great make-ahead treat. If you’re a fan of classic flavor combos, these are about to become your new favorite.
What Kind of Chocolate Should I Use?
The type of chocolate can truly define your brownie cups. I prefer using a mix of melted semi-sweet chocolate and cocoa powder for that deep, bold chocolate flavor. Chocolate chips are great too—they add bursts of texture throughout and also look amazing melted on top. You can experiment with dark chocolate or even milk chocolate if you prefer a sweeter result.
Options for Substitutions
Need to adjust for dietary preferences or pantry limitations? No problem:
- Nut butter alternatives: Almond butter or cashew butter work beautifully in place of peanut butter.
- Flour alternatives: Swap all-purpose flour for a 1:1 gluten-free flour blend if needed.
- Egg substitute: Use flax eggs or a commercial egg replacer for a vegan version.
- Dairy-free: Use plant-based butter and dairy-free chocolate chips to make these suitable for lactose-intolerant friends.
Ingredients for These Peanut Butter Brownie Cups
- Unsalted Butter: Melted butter adds moisture and richness to the brownie base, giving it that classic fudgy texture.
- Granulated Sugar: Sweetens the brownies and helps create a crackly top when baked.
- Brown Sugar: Adds depth and a slight caramel flavor, enhancing the overall richness.
- Eggs: Essential for structure and binding the ingredients together.
- Vanilla Extract: A flavor enhancer that deepens both the chocolate and peanut butter notes.
- All-Purpose Flour: Provides structure and balance to the fudgy consistency of the brownie.
- Unsweetened Cocoa Powder: Delivers a bold chocolate flavor that forms the base of the brownie batter.
- Salt: Balances the sweetness and sharpens the flavors.
- Semi-Sweet Chocolate Chips: Melted into the batter for a deep chocolate taste, and some reserved for topping.
- Peanut Butter: Creamy peanut butter creates the luscious filling in the center of each brownie cup.
- Powdered Sugar: Lightens and sweetens the peanut butter filling.
- Milk or Cream: Used to soften the peanut butter filling, making it silky and spreadable.
Step 1: Preheat and Prep
Start by preheating your oven to 350°F (175°C). Line a 12-cup muffin tin with paper liners or lightly grease each cavity with nonstick spray. This keeps the brownie cups from sticking and makes for easy cleanup.
Step 2: Melt the Butter and Chocolate
In a microwave-safe bowl, melt the butter and about half of the semi-sweet chocolate chips together in 30-second intervals, stirring in between until smooth. Let it cool slightly so it doesn’t scramble the eggs in the next step.
Step 3: Mix the Wet Ingredients
In a large mixing bowl, whisk together the granulated sugar, brown sugar, and eggs until light and fluffy. Stir in the vanilla extract and the slightly cooled chocolate mixture.
Step 4: Add the Dry Ingredients
Sift in the cocoa powder, flour, and salt. Gently fold until just combined. Be careful not to overmix—this helps keep the brownies tender and fudgy.
Step 5: Fill the Muffin Tin
Spoon about 1 heaping tablespoon of brownie batter into each muffin cup. Smooth it out slightly with the back of a spoon. This forms the base of your brownie cup.
Step 6: Add the Peanut Butter Layer
In a separate bowl, mix together the peanut butter, powdered sugar, and milk or cream until smooth and creamy. Roll small spoonfuls into balls or dollop about a teaspoon onto the center of each brownie base. Gently press down.
Step 7: Top with More Brownie Batter
Cover each peanut butter center with another spoonful of brownie batter. Smooth the tops and sprinkle a few chocolate chips over each one.
Step 8: Bake to Perfection
Bake for 16–20 minutes, or until the edges look set and a toothpick inserted near the edge comes out with a few moist crumbs. Avoid overbaking—they’ll continue to set as they cool.
Step 9: Cool and Serve
Let the brownie cups cool in the pan for 10 minutes before transferring to a wire rack. Serve warm for a gooey center or let them cool completely for a firmer bite.
How Long to Prepare the Peanut Butter Brownie Cups
Prep Time: Most of the time goes into simple mixing and assembling. You’ll need about 20 minutes to prepare the ingredients and get everything into the muffin tins. Melting the butter and chocolate, whipping up the peanut butter center, and layering the cups are all straightforward steps that move quickly.
Baking Time: These brownie cups bake in about 16–20 minutes. Let them cool in the pan for at least 10 minutes before transferring to a wire rack. You can serve them warm for gooey centers or fully cooled for a firmer bite. Total time from start to finish is roughly 35–40 minutes.
Tips for Perfect Peanut Butter Brownie Cups
- Don’t overmix the batter. Stir just until combined to avoid a tough texture.
- Use room temperature eggs. They blend better and give a smoother batter.
- Slightly warm the peanut butter filling. It spreads easier and creates a cleaner layer.
- Chill before removing liners. If your brownie cups feel too soft, a quick chill firms them up nicely.
- Top with extra chips before baking. This gives them that tempting, melty chocolate finish.
Watch Out for These Mistakes While Cooking
- Skipping the cooling step. The brownie cups can fall apart if removed from the tin too early.
- Using natural peanut butter. It’s too runny and doesn’t firm up well—stick with creamy, shelf-stable versions.
- Overbaking. If they bake too long, they lose their fudgy center. Check early and pull them out with moist crumbs on a tester.
- Not measuring flour properly. Too much flour = cakey brownies. Spoon and level instead of scooping.
- Forgetting to grease or line the tin. Essential for easy release.
What to Serve With Peanut Butter Brownie Cups?
1. A Scoop of Vanilla Ice Cream
Cold, creamy ice cream is the perfect contrast to warm, gooey brownie cups.
2. Fresh Strawberries
Their tartness balances the richness of the dessert and adds a pop of color.
3. Whipped Cream
Light and fluffy, it adds an airy sweetness that complements the dense brownies.
4. A Glass of Cold Milk
Simple and classic—it washes down every bite and enhances the chocolate.
5. Espresso or Coffee
The bitterness of coffee pairs beautifully with chocolate and peanut butter.
Storage Instructions
Room Temperature: Store in an airtight container for up to 3 days. Make sure they’ve cooled completely before storing to avoid condensation.
Refrigerator: Keep them chilled for up to a week. The texture becomes a little firmer, which some people love!
Freezer: These freeze beautifully. Wrap each cup individually and store in a zip-top bag for up to 2 months. Thaw at room temperature or warm in the microwave for a freshly baked feel.
Estimated Nutrition (Per Brownie Cup)
- Calories: 290
- Total Fat: 18g
- Saturated Fat: 8g
- Cholesterol: 35mg
- Sodium: 120mg
- Total Carbohydrates: 30g
- Dietary Fiber: 2g
- Sugars: 20g
- Protein: 5g
Frequently Asked Questions
What kind of peanut butter works best?
Creamy, shelf-stable peanut butter is ideal. Natural peanut butter tends to separate and makes the filling oily.
Can I use a boxed brownie mix?
Yes! Use your favorite boxed mix as the base and follow the same layering instructions. Just adjust baking time if needed.
How do I know when they’re done baking?
Insert a toothpick near the edge. If it comes out with moist crumbs (not raw batter), they’re done.
Can I make them gluten-free?
Absolutely—just swap in a 1:1 gluten-free flour blend. No other changes needed.
Are these safe for nut allergies?
Only if you use a peanut-free butter alternative like sunflower seed butter. Be cautious of cross-contamination.
Conclusion
Peanut Butter Brownie Cups are the kind of dessert that feels both comforting and indulgent. They’re easy enough to whip up on a weeknight but fancy enough to serve to guests. Every bite offers a rich brownie base with a creamy peanut butter heart—and that combo never gets old. Whether you’re baking for a crowd or just satisfying a chocolate craving, these little treats deliver big-time flavor and satisfaction.
Peanut Butter Brownie Cups
- Total Time: 40 minutes
- Yield: 12 brownie cups
Description
If you’re looking for a decadent, crowd-pleasing dessert that combines two beloved flavors, these Peanut Butter Brownie Cups are exactly what you need. With a rich, fudgy chocolate base and a creamy, sweet-salty peanut butter center, these treats deliver bakery-quality results with minimal effort. Perfect for parties, quick desserts, or even as a freezer-friendly snack, this easy recipe fits right into your list of go-to food ideas. Whether you’re hunting for a quick breakfast option, easy dinner dessert, or just healthy snack inspiration with a bit of indulgence, these brownie cups belong in your rotation of fun, easy recipes.
Ingredients
8 tablespoons unsalted butter
1/2 cup granulated sugar
1/4 cup brown sugar
2 large eggs
1 teaspoon vanilla extract
1/2 cup all-purpose flour
1/3 cup unsweetened cocoa powder
1/4 teaspoon salt
1/2 cup semi-sweet chocolate chips (melted into batter)
1/4 cup semi-sweet chocolate chips (for topping)
1/2 cup creamy peanut butter
1/4 cup powdered sugar
1 tablespoon milk or cream
Instructions
1. Preheat oven to 350°F (175°C) and line a muffin tin with paper liners or grease each cavity.
2. Melt the butter and 1/2 cup of chocolate chips in the microwave, stirring until smooth. Let it cool slightly.
3. In a large bowl, whisk together granulated sugar, brown sugar, and eggs until light and fluffy.
4. Stir in vanilla extract and the melted chocolate mixture until fully combined.
5. Sift in cocoa powder, flour, and salt. Gently fold together without overmixing.
6. Spoon 1 heaping tablespoon of brownie batter into each muffin cup and smooth the tops.
7. In a small bowl, mix peanut butter, powdered sugar, and milk until smooth and creamy.
8. Drop about 1 teaspoon of peanut butter mixture into the center of each cup and lightly press it down.
9. Cover with remaining brownie batter and top with a few chocolate chips.
10. Bake for 16–20 minutes or until edges are set and a toothpick comes out with moist crumbs.
11. Cool in the pan for 10 minutes, then transfer to a wire rack to cool completely or serve warm.
Notes
Let brownie cups cool before removing from liners to avoid breakage.
Use shelf-stable creamy peanut butter for best consistency.
Freeze individually for a quick grab-and-go chocolate snack.
- Prep Time: 20 minutes
- Cook Time: 20 minutes
- Category: Dessert
- Method: Baking
- Cuisine: American
Nutrition
- Serving Size: 1 brownie cup
- Calories: 290
- Sugar: 20g
- Sodium: 120mg
- Fat: 18g
- Saturated Fat: 8g
- Unsaturated Fat: 7g
- Trans Fat: 0g
- Carbohydrates: 30g
- Fiber: 2g
- Protein: 5g
- Cholesterol: 35mg
Keywords: easy dessert, peanut butter brownies, quick chocolate treat, fun baking idea, homemade brownie cups